⚡ Quiet power that protects your space—because your health deserves the best.
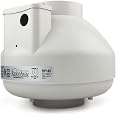
The RadonAway RP145 Radon Fan features a 4.5-inch inlet/outlet diameter, combining ultra-quiet, energy-efficient operation with a water-hardened motorized impeller and sealed seams to prevent radon leakage. Rated for both commercial and residential use, it meets all electrical code requirements and includes a thermally protected motor for enhanced safety and durability.


M**N
The last one lasted 10 years so ...
... I replaced it with the same one ... technically, the old one was still working but was making some noise ... likely the bearings.
A**.
[READ] Time-Saving Information Below
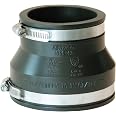
If you are replacing an old radon fan or have a newer home, with a passive random system already (e.g., a pipe leading from the sub-slab of concrete through the attic and to the roof), along with a pre-installed electrical outlet in the attic, then this is a fairly simple project to do yourself.The RadonAway 145c is the most commonly used fan. It has moderate suction, and it is ideal for gravel and concrete slab basements. Below is a variety of information pertaining to installing the RadonAway 145c and more:Get a radon detector that measures a weekly average because radon can vary greatly throughout the day and week. I have the AirThings radon detector from Amazon. I had a second one and the readings were the same, so at least the reliability is good.Get a RadonAway manometer to test the suction of your radon fan. This will ensure the fan is working well and there are no leaks in the system. For installation, search “Installing And Understanding Radon Mitigation System Manometer” by Heathy Air Solutions on YouTube. However, ensure you drill the hole in the pipe about two inches lower than the top of the manometer. Also, when you get the manometer, it might not be even on both sides or set to 0. Don’t worry because it adjusts by sliding up and down. As for it not being even on each side, that is also normal. It will even out once you take the tube stoppers off the top of either side.As for installing the fan, here are the steps I used:1. Get all the supplies: radon fan, 2 pipe-to-fan connectors/couplings (the 145c model has a 4” connection size and my radon system pipe was 3”, so I got 2 Fernco 3”-to-4” couplings), electrical cord (HomeAire (AKA RadonAway) Power Cord Kit - 6 foot on Amazon will get the job done) [yes, it does not come with a power cord for some reason], PVC hand saw or fine-tooth sawzall, razor for reaming the inside of the pipe after cutting (optional), file for filing the edges of the PVC after cutting (optional), and flat-head screw driver or socket wrench for tightening the coupling.2. If applicable, and the pipe goes to the attic, install in the attic, not the basement.3. For installing the power cord, your fan might have two or three wires for the electrical. According to an Amazon answer by RadonAway, either way is fine, and it just depends on which manufacturing facility produced it. However, the power cord has three wires. If your fan only has two, then just cap the third one on the power cord, the green/ground wire.4. Test the fan by plugging it in prior to going up in your attic. Shake it to ensure nothing is loose or trapped inside the fan.5. Affix the coupling to the fan on both ends prior to heading into the attic.6. Take all your supplies to the attic.7. Cut the pipe. I cut out a 11.25” chunk of pipe because the total length of the fan and the couplings was 14.25”. Then, I subtracted 1.5” for each end of the coupling.8. [OPTIONAL] File the outer rim of the pipe on both sides.9. [OPTIONAL] Using a razor or reaming tool, ream the inner rim of the piper on both sides.10. Plug the fan in, then check your manometer to ensure it has proper suction. The max should be about 1.75, and mine come out to 1.25.As for the sound, it has a fairly mild humming, even through the ceiling, but you will get used to it in no time. I sleep with a sound machine, and at worst, it just adds to that noise.I hope this helps and saves you some time!
S**Y
Quiet and easy install
Very Quiet fan and easy install
Y**W
RP145C can replace RP145
Save money and replace this fan yourself!I called the manufacturer to confirm prior to purchasing this unit. The RP145C is a direct replacement for the RP145. The ‘C’ is apparently for contractor grade. The manufacturer has an agreement for resell with radon mitigation companies to only sell them the RP145.One thing to note is the RP145c wiring is ‘2 wire’ versus a ‘3 wire’ for the RP145. Just put a wire nut on the green wire when installing this unit. The wiring detail is covered in the included installation instructions.Easy peasy.
M**O
Quiet, efficient, and gets it done.
This unit is very quiet. We installed it outdoors but even for a possible indoors installation (in a basement or attic) would probably produce very tolerable noise levels. Most importantly, it works!! Our radon levels went from >5 pCi/L long term averages to ~0.2 pCi/L immediately. We used a dry sump pit to draw air from the foundation. Build quality looks sturdy. Had to buy rubber couplers separately, but overall very happy with the purchase so far.
R**C
dropped radon level significantly
I have a digital radon detector in my basement to keep track of radon levels and I am amazed at how much the numbers can vary throughout the year. I finished building my house last February and had installed a loop of 3" corrugated and perforated drain pipe around the inside perimeter of my basement before the basement slab was poured in case I needed a mitigation system. I had no idea what level of radon my basement would have, but I know that in Montana we have a pretty high incidence of elevated radon levels. Anyway, once the house was framed I ran 4" schedule 40 PVC up through the garage and out the roof. I had the PVC from the drain pipe under the concrete slab stubbed into the basement and I had the vent pipe out the roof stubbed into the unfinished basement ceiling. I got the radon detector before I connected the two together and found that the radon levels were running between 9 and 12 pC/L depending on how much I had the basement windows open. The recommended max level of radon in the US is 4 pC/L, so I was a fair bit above that. I connected the vent out the roof to the drain pipe under the slab and the numbers dropped to around 2 pC/L right away. The number stayed pretty low through the summer with this passive mitigation system, but I worked on landscaping the yard and installed a sprinkler system. By fall when the weather started cooling down and I had sod installed and the sprinkler system turned on the radon numbers started going back up. They got all the way up to 17 pC/L so I ordered this radon fan. I guess once the soil gets wet around the house and then freezes in the winter the soil doesn't breathe well and the radon levels go up. That would make sense, anyway. Well, as soon as I got the fan installed in the garage attic the numbers dropped to below 1. Right now I am running between 0.6 and 0.9 pC/L. Needless to say, this fan made a huge difference. The performance is going to vary based on how porous the soil/gravel is under the foundation. I installed a pressure meter on mine and I am running at about 0.6 inches of water column vacuum in the pipe. Looking at the conversion table of the fan owner's manual it would seem that means the fan is pulling somewhere in the 125 to 130 cfm range. I would definitely recommend this radon mitigation fan.
Trustpilot
3 days ago
1 day ago