


💡 Elevate Your Raspberry Pi Experience!
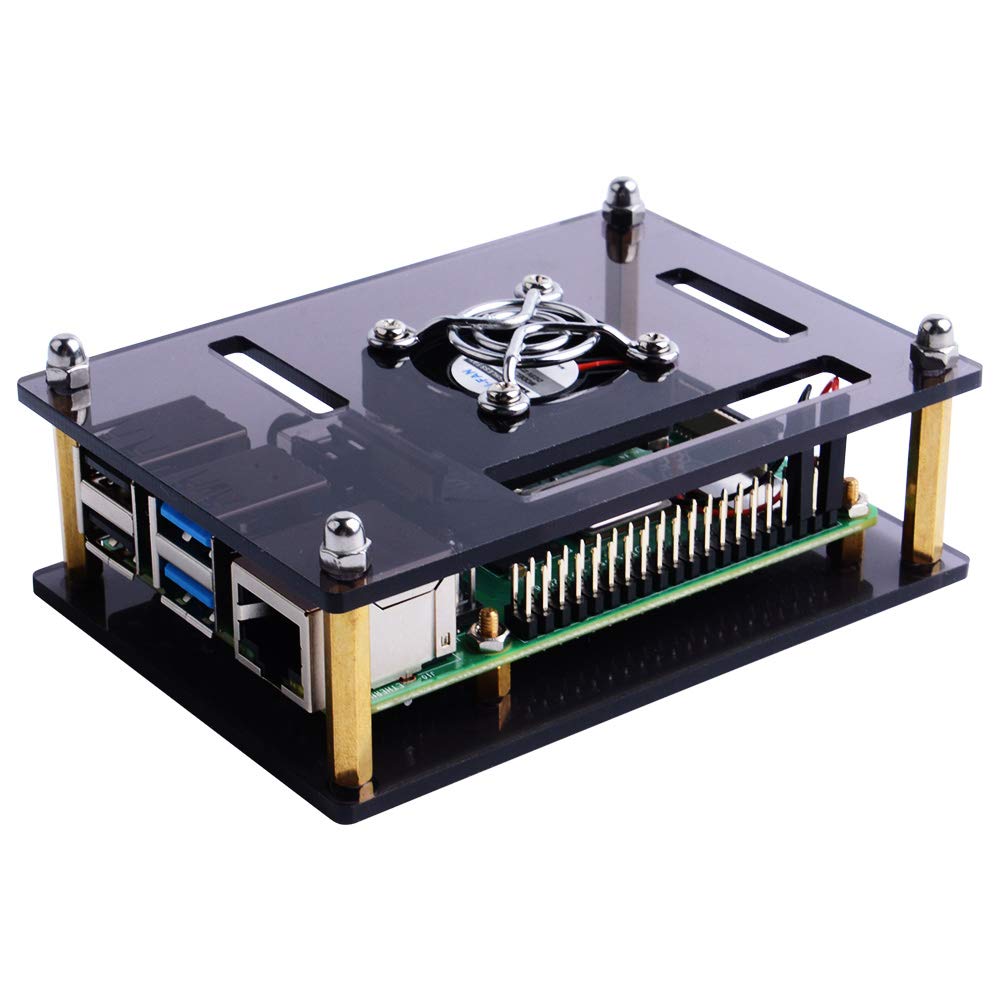
The GeeekPi Acrylic Case is a high-quality, transparent enclosure designed for Raspberry Pi 4 Model B and Raspberry Pi 3 Model B+. It features a cooling fan for optimal heat dissipation, easy assembly with included screwdriver, and full access to all ports, ensuring your Raspberry Pi remains functional and stylish.
P**S
Ugly
Ugly unit hard to build not worth the money
N**S
Cools the Raspberry Pi 4 efficiently
This case is excellent provided you are not going to run your RPi in a dirty or dusty environment, which I guess most of us will not. The case is easy to assemble with instructions that must have been improved recently as I found them straightforward and the assembly pretty much intuitive. The most difficult part was removing the protective paper from the acrylic pieces, a good pair of finger nails is recommended. When running, the fan can just about be heard but essentially it's quiet.I decided to test how the case & fan performed using Jeff Geerling's shell script (google 'Jeff Geerling The Raspberry Pi might not need a fan any more' for details). Thanks Jeff! His test routine 'stresses' the Pi by making it work hard through intensive calculations using all four of the available cores. The results I got for CPU temperature without and with the case & fan - not using the heat sinks and assembling the fan with the label pointing down for the latter - were:no fan, no upper deck: idle (low load) 47 degC; stressed (high load) 78 degC(If the CPU reaches 80 degC the Pi 'throttles back' by reducing the CPU clock frequency, thus reducing performance. 78 degC is too close for comfort!)fan below upper deck: idle (low load) 28 degC; stressed (high load) 47 degCA big improvement and comparable to the performance Jeff got from a range of cooling solutions, some costing twice the price as this case.I had an initial concern when I assembled the case that connecting the pi-camera (which I intend to do) would be difficult as the fan is very close to the camera port, so that the connecting ribbon cable to the camera would need to be bent sharply - not good. However, I thought 'why not put the fan ABOVE the upper deck?' A few minutes work with the provided screwdriver had the fan moved to the new position. And performance now?fan ABOVE upper deck: idle (low load) 29 degC; stressed (high load) 48 degCNo real difference, and probably if I'd run the tests several times, statistical error would have been as big.So in conclusion, an effective case and fan, very cost effective as performance is comparable to cooling solutions costing twice the price.(p.s if you do not fancy the brown acrylic, GeeekPi also do a clear plastic version. I just preferred the brown case!)
M**H
Keeping Raspberry Pi 4 temperatures under control
I’ve had the Pi 4 since a few days after launch and it’s been plagued with thermal throttling issues; temperatures regularly 85 degrees and above under full load. At the time of writing there were very few actively cooled cases around, so I was keen to try this one.Installation is pretty straight forward. Once built the case is very good, well made and stylish. Now I’ve got it set up and the Pi installed, temperatures have dropped to just under 60 degrees at full load and mid 40s when idling. So no more thermal throttling. Excellent!However there is one gotcha. The build instructions appear to show that the fan should be installed with the label facing outwards through the top of the case. I initially did this and the effect is to draw air from the body of the case and expel it through the top. Unfortunately in this orientation there is no effect on CPU temperature at all; it remains above 80 degrees under full load. So I tried turning the fan over so that the label points towards the interior, therefore blowing cooler air over the CPU and circuit board. As soon as I did this the temperature tumbled by nearly 20 degrees. The fan itself is virtually silent (this is the smaller fan in the Brown Case). At 3 feet it can just be heard as a slight high-pitched whine. At 6 feet (typical viewing distance when using the Pi as a media player via LibreELEC) it's completely inaudible.All-in-all a good case for the Pi 4 and I’m happy with the final result. Happy to recommend it. But I’m knocking a star off for not being clear about the most effective fan orientation.
W**Y
Not as easy as people have stated
So I got this case when I got my Pi 4.Don't be fooled by people who have stated the case is easy to assemble.The Instructions are terrible, for example , Step 2:"Put the Raspberry Pi Board on the acrylic panel as the picture shows and screw 4 nuts in!" (the ! is in the manual)However the picture just shows the board on it's own.I currently trying to assemble this through the pictures on the page.I don't believe that the current reviews are correct, it's not easy to install (maybe I'm missing something?)I've had a RP 1, 2 & 3 all with cases and never had a temp issues (I suppose it depends on what your using it for)If this doesn't work for me then I say wait... there will be pre fab cases out soon (like the ones for the 3) soon, simple config and drop the pi in.Edit: I've upped the rating to 3, basically the instructions you get in the box isn't great, however if you look at Case Assembly Steps shown it's easier, or do what I did, give it to my 12 year old daughter who had it together in 10 mins.However, I still have concerns about how open this case is, dust can build up, also the fan isn't going to make that much of a difference, it's not actually pointing down to the CPU
S**M
Amazing Quality, Lack of Instruction
The product itself is of amazing quality and holds the item very sturdily, however lacks instructions on how to assemble. This took me a good half an hour to assemble however it was worth it. Included screwdriver was flimsy and was not usable for assembly.
M**.
Works with Raspberry Pi 4
This case works fine with a Raspberry Pi 4. The minor comments I have are (1) the instructions aren't very clear; there are several types of screws and the instruction manual doesn't tell you which ones to use, leaving it somewhat of a guess; (2) the protective film is a bit hard to remove; (3) there is no instruction regarding which pins should be connected (you'll have to find a picture of the GPIO headers onine and plug into a 5V and a GND pin). Apart from that, the fan isn't too noisy and the thing looks nice.
Trustpilot
5 days ago
1 day ago