✨ Stick, Style, and Shine! ✨
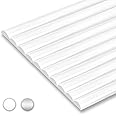
Tic Tac Tiles are 12"x12" peel-and-stick wall tiles designed for easy installation and long-lasting durability. With a stylish Polito Marble design, these self-adhesive tiles are perfect for transforming indoor spaces like kitchens and bathrooms, resisting moisture and heat while providing a chic, modern look.
| Brand | Tic Tac Tiles |
| Material | Vinyl |
| Size | 12x12 Inch |
| Color | Polito Marble |
| Finish Type | Polished |
| Style | Modern |
| Installation Type | Peel and Stick |
| Product Dimensions | 12"L x 12"W |
| Pattern | Marble |
| Item Weight | 0.92 Kilograms |
| Shape | Square |
| Edge Style | Square Edge |
| Unit Count | 10 Square Feet |
| Recommended Uses For Product | Bathroom, Kitchen, Laundry Room |
| Coverage | 9.1 sq ft. |
| Form Factor | Square |
| UPC | 850005604587 |
| Global Trade Identification Number | 00850012930068 |
| Manufacturer | Tic Tac Tiles |
| Item Weight | 2.03 pounds |
| Is Discontinued By Manufacturer | No |
| Finish | Polished |
| Item Package Quantity | 10 |
| Number Of Pieces | 1 |
| Batteries Included? | No |
| Batteries Required? | No |
T**I
Excellent
I love it. It’s very easy to install and sweetie good is it perfect
A**R
Nice update to kitchen
This is a rental house. We live here but have been doing a few updates. We started with contractors grade cabinets, painted them Swiss coffee and added Tic Tac tiles. The pattern and color was perfect next to out counter. I counted out 24 sheets with a 12x12” paper. I used 31. Once you start it is pretty easy. Follow starting directions on the back and start with grease free clean walls. I cut with a knife blade and scissors. They are pretty sticky. Peel backing slowly as you stick to walls. Smooth over. I had a few corners lift the next day. I added a few drops of glue. I did add a 1/4 round molding on top and caulked the edges and bottoms.Con. I would rather have this in a roll like wallpaper. It would be faster to install for me. Larger packages of tiles. I bought 3 packages of 10. I had to wait to finish one corner for a package of 5 to arrive and finish. Not a true 12x12 slightly smaller.In the end...Our landlord liked the tiles and may do this to his house. After a few weeks I’m very happy with the look and quality. I just wipe off if they get anything on them. They have a 3D look like glass/stone tiles.
M**L
Easy breezy
Quick and easy, looks great and sticks even better. Loving the way it came out. I also have the sensor lights up. I love my kitchen now
L**A
Cheap and faster alternative to tile backsplash
My husband and I pretty much are DIYers when it comes to our home renovation. We've been wanting to add a backsplash in our kitchen but have been lazy to do so. Then we researched about vinyl tile backsplash and decided to give this a try. Bought 3 boxes and it was enough to cover our kitchen.Pros:1. Strong adhesive (didn't need to buy extra adhesive)2. Looks nice & contemporary3. Easy application4. Easy to cutCons:1. Rubbery texture feeling (wiped down the backsplash with a damp towel and it stayed on still)2. Once you cut the tiles, some plastic crumbs falls out (not sure if that makes sense)3. Once you stick it on the wall, it's really hard to peel off so be careful when you apply it4. Peeling the backsplash apart can be tricky sometimes. I used a tweezer to helpTips:1. Sand your walls or at least make sure your walls are not too bumpy2. Clean your walls with a damp cloth to remove any dust3. Make sure your measurements are correct and get good scissors/exacto knife4. When you apply it on the wall, make sure to start with one corner and work your way slowly5. Line the edges to the next tiles to make it match6. Go watch some YouTube videos for extra help if needed7. Add walk caulk once finished to make it look more realistic8. Give your spouse a kiss for a job well done!This project took us about 4 hours to completeWill update if anything changes
M**R
Budget friendly Backsplash!
I used the Tic Tac Tiles on painted walls. I cleaned, lightly sanded and then cleaned again. Let it dry. I followed the instructions on the back of the packaging and it wasn’t bad. It took me longer than some; about 3 hours for what’s pictured, my hands are not as steady as they used to be and having to bend over to apply was a killer on the back.. I’m getting old ! This was definitely a budget friendly temporary solution.. I was thinking of doing something else when I get new counters, but depending on how this holds up, I may go this route again! That way, I can change it up without the mess and cost! I plan to caulk around the counter guard to give it a seamless look!
Trustpilot
1 month ago
1 month ago