


🚀 Unleash Your Creativity with Precision!
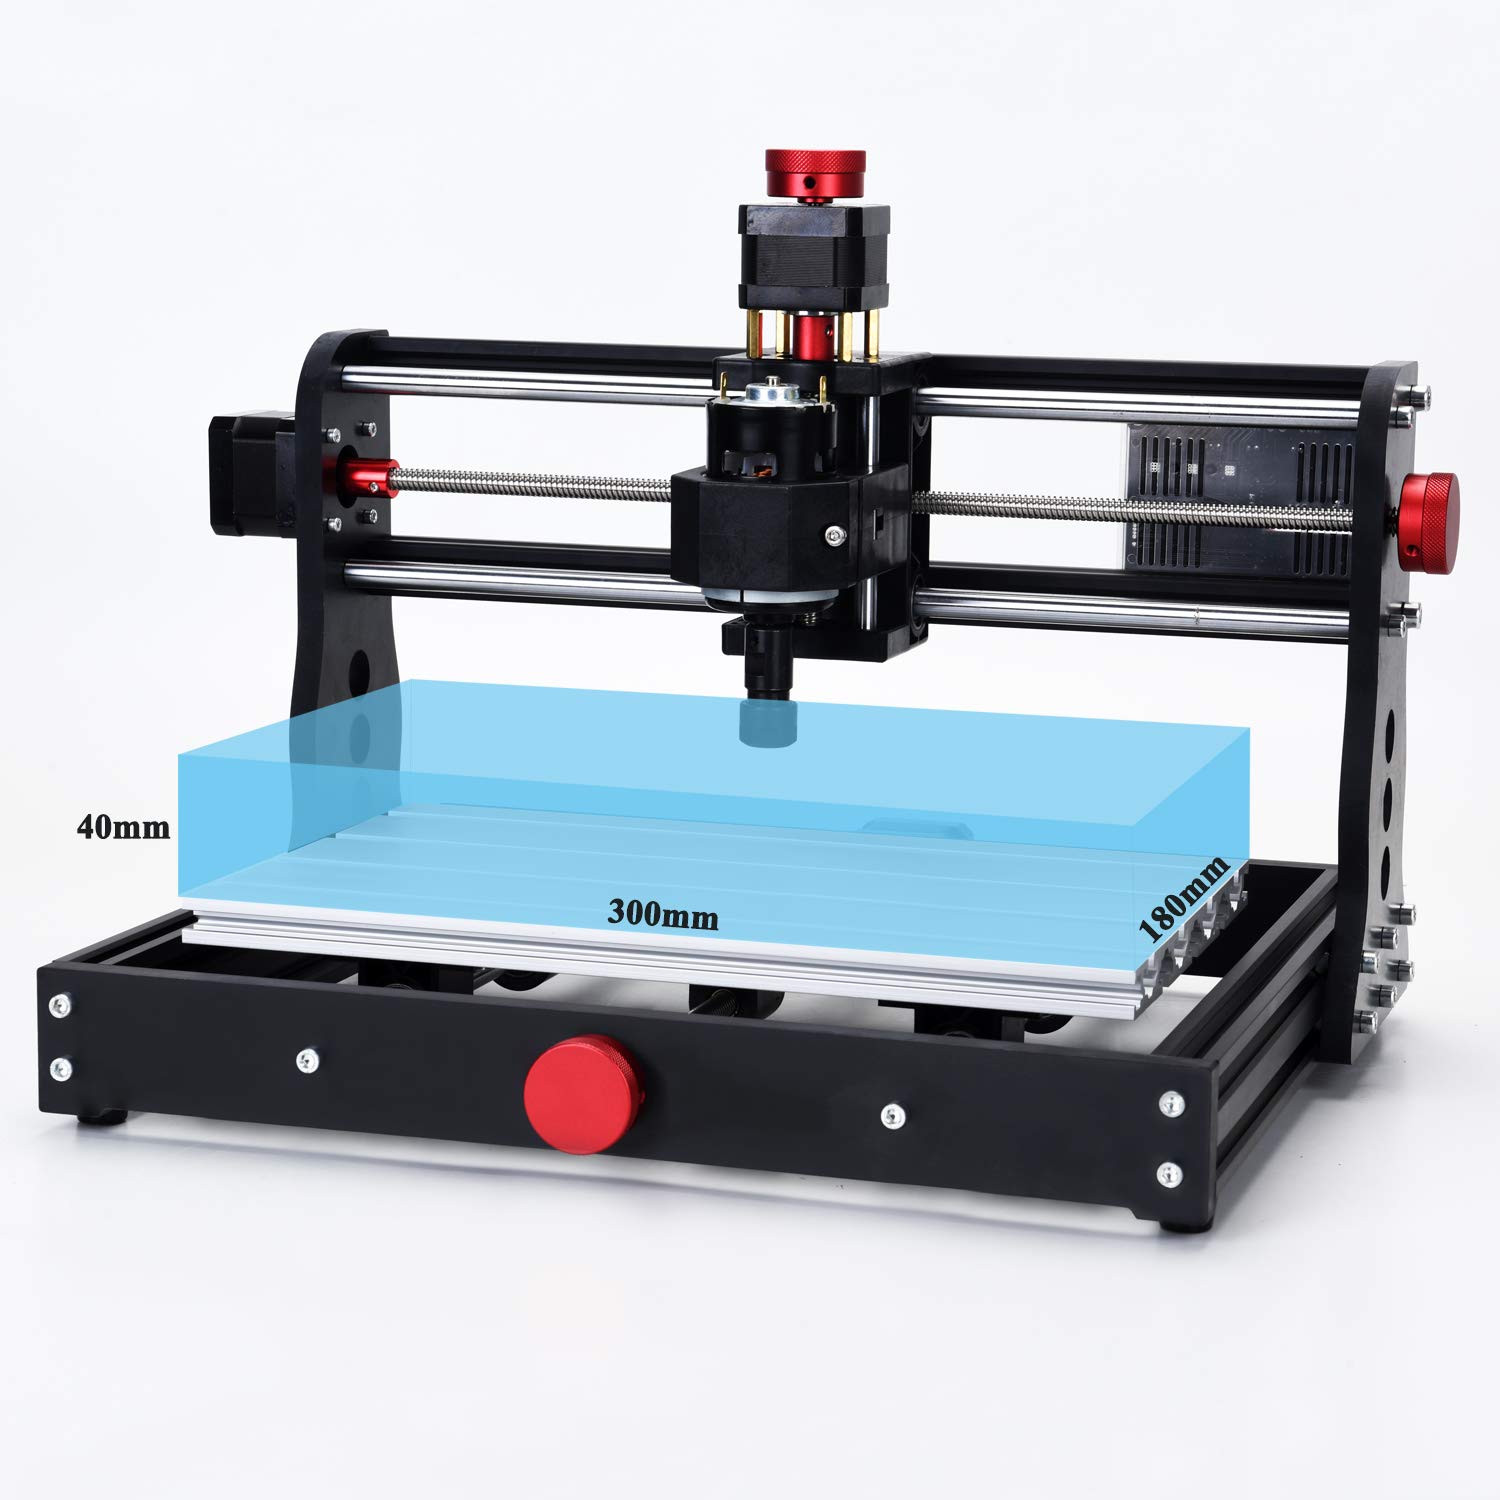
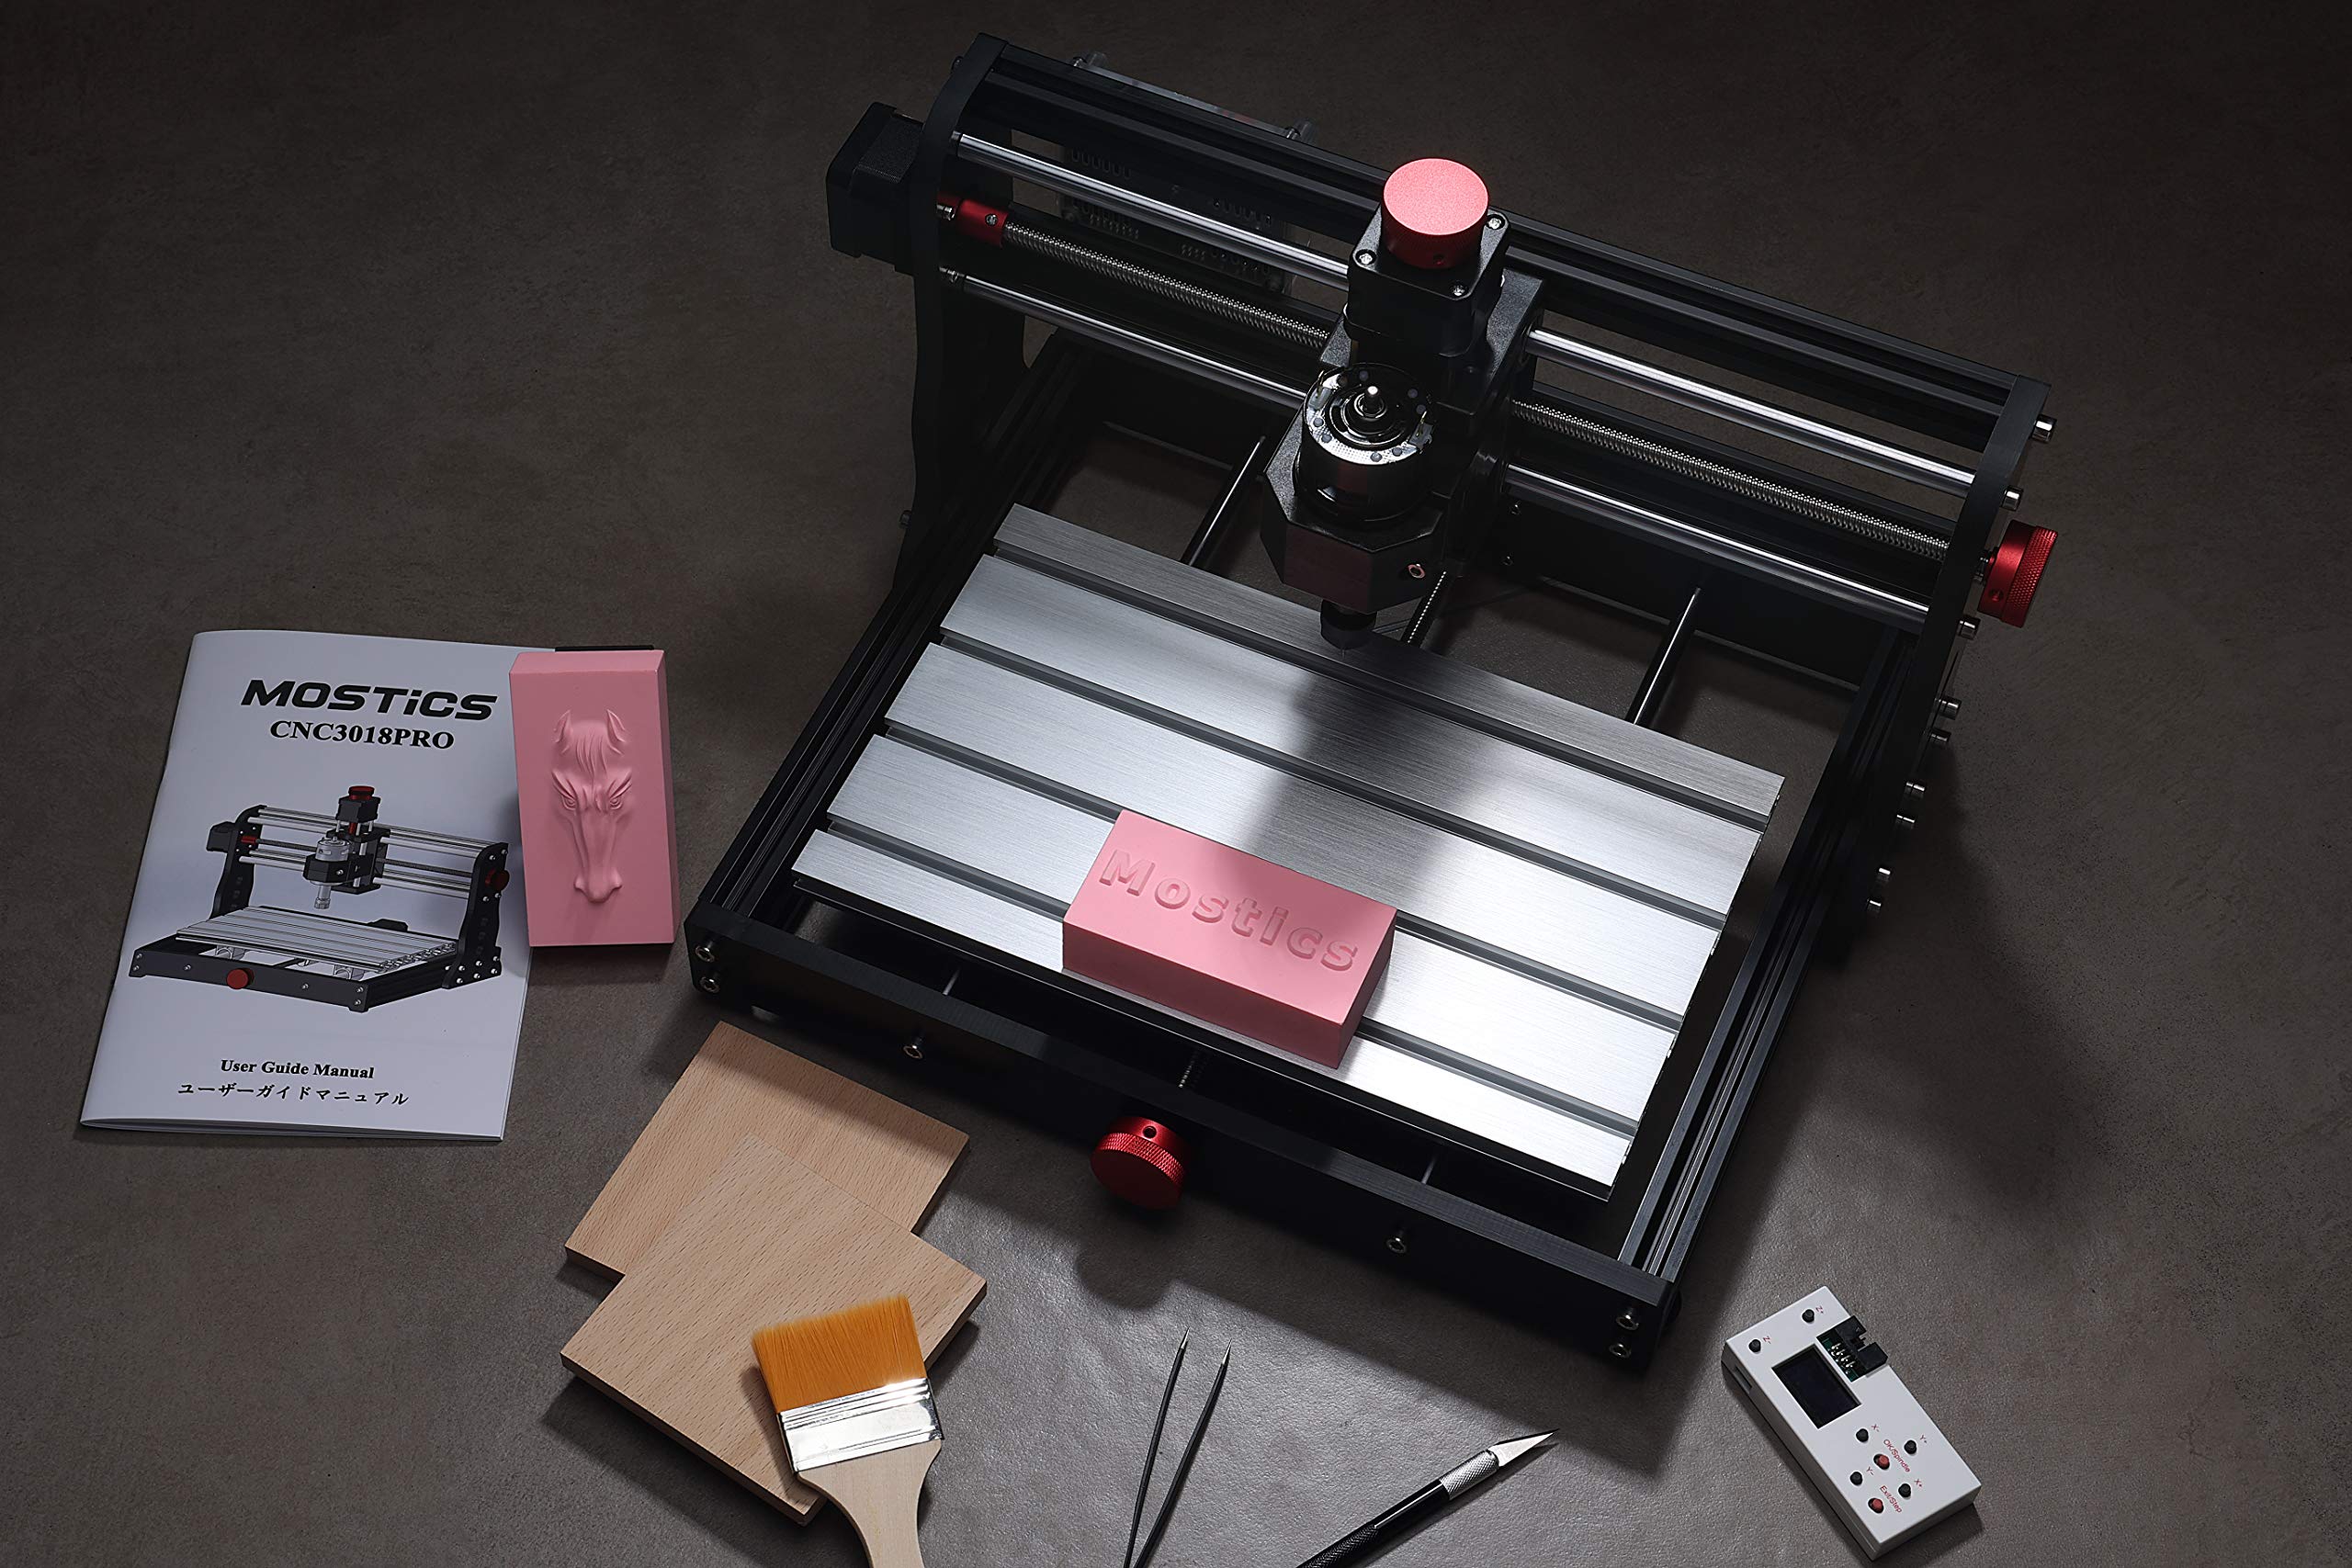
The Mostics 2 in 1 CNC 3018 Pro Router Machine is a powerful and versatile desktop mini CNC wood router kit designed for both beginners and seasoned creators. With a robust 5.5W power module and a spacious working area of 300x180x45mm, this machine excels in engraving and milling a variety of materials including wood, acrylic, and soft metals. It features an easy assembly process, offline control capabilities, and a commitment to customer support with a 12-month guarantee and lifetime technical assistance.
| Material | Aluminium |
| Base Type | Fixed |
| Power source | AC |
| Voltage | 24 Volts |
| Item Dimensions W x H | 42W x 28H centimetres |
S**6
Excellent bit of kit.
Bought this on a whim for my workshop and was really pleasantly surprised. Putting it together was a bit of a headache though it's mainly all the cables that you have to plug in. A good tip is to use the instructions on the memory stick which are more detailed than the book. I didn't but it would have been easier if I had. The instructions are all there, including fitting the limit switches, just take your time and it all falls into place. The whole thing went together flat and square with no adjustments needed.It's looks like quality engineering and it runs as smooth as butter. It's a pleasure to watch as it fiddles away quite hypnotically. I initially bought it for the router but quickly got hooked on the laser feature.As others have said, it doesn't come with creation software and there is quite a learning curve which is well worth it. In a nutshell you're going to have to create SVG images and turn them into g-code which you can run on the supplied free apps, candle and laser grbl. A few very, very helpful places for info on you tube are JD designs, louisiana hobby guy and for a free basic g-code creator search Bob's cnc. Easel and lightburn have full use free 30 day trial periods.It took me a couple of weeks as a complete to novice to create the things in my photos. The salvador Dali coaster was a test of the laser accuracy and though the photo doesn't do it justice, the detail of even the pores in the face are incredible. The downward lines are grain in the wood. I also made a door sign, some keys rings for my wife's work outing and engraved the front of the cat food pouch dispenser that I made in the man shed. Plus muliple other things, xmas decorations, boxes and such.It's worth remembering that it's a small project machine using up to a 3mm bit (supplied) so bigger stuff take a bit more time. It's also designed chiefly as a cnc so the laser speeds aren't what you'd get in a designated laser engraver. It seems to run at noticeable burn difference speed of around 1500 mm/min which is plenty for coasters and such. Photos are detailed and slow, the Dali pic took around 2 1/2 hours I think but the key rings were all done as a batch in under an hour.If you're routing pine etc, run it slow and shallow per pass to avoid chip out. Around 500mm/min, 0.5mm per pass. A good starting point for the laser is 1300 mm/min at 65% power on basswood and 100 mm/min at 100% x3passes to cut through. To engrave on slate mine runs at 1500/60%. To change the router for the laser, undo the two bolts fully and push the router from the bottom, it's tight but it will slide out. The laser fits into the four square notches, hold and re tighten.If you're new to this as I was, there's a bit to get your head round but it's well worth it to the point I've just bought a 4040pro as I now want to do bigger, faster, more ambitious things! Oh, the laser focus height on mine is 46mm from work-piece to laser casing. It's possibly standard for them all.
C**G
Lots to learn but worth doing
This is my first machine. I bought it in preference to other similar ones largely based on the reviews here. So far, it has lived up to what has been said about it. The build is fairly straightforward, written instructions are a bit limited but the photographs make up for that and I didn’t have any problems. A couple of small issues; 1 the laser control box isn’t mentioned. There is a pack of nuts and screws but you have to work out where to mount it. I had to do a bit of disassembly to fit it. 2, there is nothing to explain what the workpiece clamps are or how to use them. I had to watch a couple of YouTube videos to see what to do. There are also several spare nuts and bolts. Probably a good thing but it caused a bit of anxiety thinking I’d missed something in the build. The machine comes with the engraving spindle in place, you may want to swap it for the laser initially. The laser software is simple to use and I got some acceptable results straight away. The cutting software is rather more complicated. The supplied software, Grblcontrol, works by following GCODE. There are plenty of free examples on the internet but if you want to cut your own designs you’ll need more software. F-Engrave (it’s free) will generate GCODE that works well with the Mostik machine, but it needs DXF files. DrawPlus (also free) is a vector drawing package and will generate DXF files. If you are starting from scratch that’s all you need. If you’re starting from an existing image you’ll need to convert from .bmp .jpg etc. to a vector image .svg. GIMP (also free) has some excellent filters for converting to B&W or greyscale and for picking out lines and edges, get the G’MIC-Qt plugin. You can also use GIMP to convert the image to vectors using the paths tool, but Inkscape (free) is much better at it, using Trace Bitmap. So, to convert from an image to GCODE. 1. GIMP to get a B&W line drawing, 2. Inkscape to create a .svg file, 3. Drawplus to produce a DXF file, 4. F-Engrave to create the GCODE, 5. Grblcontrol to do the cutting. There are probably commercial products that will cut out several steps but I had most of the software and it’s all free. Overall, I’m very pleased with the machine, it’s a steep learning curve for the cutting version but worth the effort. The pictures show my first run through the process. Original image, converted image and carved image. The carving is too deep but I’m happy with it as a first attempt.
H**T
Good quality product
The media could not be loaded. Having used this for a while, I found it to be relatively simple to put together, set up and run using the laser, providing you read and check everything before starting. Practical skills and a bit of computer or IT knowledge will help! The grbl code needs amending from standard to what is given in the manual as some of the settings do not allow smooth operation. The settings in the manual are quite good as a starting point. Laser software is basic and you would be better spending some money to buy Lightburn or something similar. The Y axis was sticking slightly but has been resolved by upgrading the size with a 400 x 300 kit and the addition of limit switches. (Longer side rails and screws). I have used the router a couple of times but only for small items. Overall well worth the cost and the time it took to put together. There were no issues that couldn't be solved by looking online or asking fellow laser users.
P**L
Great value, super machine for small jobs.
I did a lot of research before buying this particular CNC machine. I’m very pleased with it. I am cutting letters onto blocks. I can position the work piece very easily using the xyz controller on my laptop or by turning the knobs. I wanted to have both options. I’m pleased I got this machine because I haven’t needed to buy any upgrades yet. It is well made, easy to set up and after working out the computer side of the process I’m getting the results I want. I am using ‘’vee” cutters for the lettering. Haven’t had the chance to use the laser yet. My machine came with every single bit required to use it out of the box including laser specs. The second picture shows a test piece of the letter M.
Trustpilot
4 days ago
1 month ago