🦖 Guard your gutters like a pro with Raptor – where strength meets smart design!
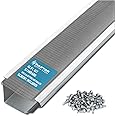
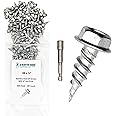
The Raptor Gutter Guard is a 48-foot contractor-grade stainless steel micro-mesh kit designed for 5-inch gutters and smaller. Featuring innovative V-Bend & Trough technology, it optimizes water flow while blocking leaves, pine needles, pests, and debris. Easy to install with included self-tapping screws, it offers unmatched durability with rust-resistant stainless steel and is WUI compliant and UL approved for rainwater collection. Backed by a 25-year warranty and US-based support, it delivers long-lasting gutter protection and peace of mind.


| Manufacturer | Gutterglove |
| Part Number | AMZ48 |
| Product Dimensions | 120.65 x 13.97 x 0.64 cm; 4.44 kg |
| Item model number | AMZ48 |
| Size | Stainless Steel 5" - 48FT |
| Colour | Mill Finish - Standard 5" |
| Finish | Stainless |
| Material | Stainless Steel |
| Shape | Rectangular |
| Installation method | Screw-In, self install |
| Item Package Quantity | 1 |
| Number of Pieces | 12 |
| Included Components | Installation Guide, Self-Tapping Screws |
| Batteries included? | No |
| Batteries Required? | No |
| Item Weight | 4.44 kg |
Trustpilot
2 weeks ago
2 months ago