🚀 Elevate your DIY game with ELEGOO Nano – small board, big innovation!
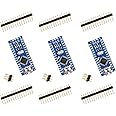
The ELEGOO Nano Board CH340/ATmega+328P is a compact, breadboard-friendly microcontroller compatible with Arduino Nano V3.0. Featuring a 16 MHz Microchip ATmega328P processor and CH340 USB-to-serial chip, it supports multiple power inputs with automatic source selection. Ideal for both beginners and pros, it offers more analog inputs and a smaller footprint to maximize your prototyping potential.


| Processor | 16 MHz |
| RAM | SRAM |
| Wireless Type | 802.11b |
| Brand | ELEGOO |
| Series | Nano |
| Item model number | EL-CB-005 |
| Operating System | FreeRTOS |
| Item Weight | 0.1 ounces |
| Product Dimensions | 1.9 x 0.4 x 0.7 inches |
| Item Dimensions LxWxH | 1.9 x 0.4 x 0.7 inches |
| Color | Nano 3.0 x 3 without cable |
| Processor Brand | Microchip Technology |
| Number of Processors | 1 |
| Manufacturer | ELEGOO |
| ASIN | B0713XK923 |
| Is Discontinued By Manufacturer | No |
| Date First Available | May 3, 2017 |
D**S
Nice product set and price, worked first time!
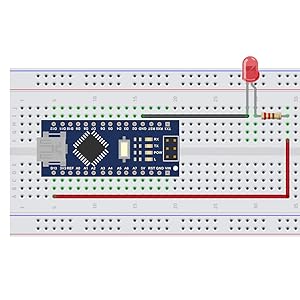
I'm still learning the depth of uses for the basic Nano, and bought these Elegoos in a pack of 3 because of the 328 chip and flexible configuration offered by the included pin sets. Simply: they all powered up and showed that they are functional via the the blinking LED sketch pre-installed, and took my IDE sketch first time every time. For my small, in-a-box sensor controller, they're ideal.
C**.
Great tiny project board! Works out of the box on Big Sur
What a great value - 3 nano boards for basically $5 each. It's a real ATmega chip, and even though the USB driver chip is not the more-ubiquitous FT brand, drivers are not needed in 2021. I love that it's a tiny arduino-compatible board that is very inexpensive and has only what I need to make a project out of it - no pin headers, just a USB connector, the basic LEDs, and through-holes. The unregulated power input is awesome (standard for nano style), I can just connect it to a 12v DC wall adapter that the rest of my project is already using.It's got a bunch of digital and analog ports, including 6 pulse-width modulation ports. I'm just getting back into Arduino, so this is probably pretty standard stuff, but it's cool to see so much potential in a tiny computer that is now the least-expensive part of almost project.2021 update for Macs using Big Sur - it works out of the box now. Don't install any extra drivers, just connect it and install Arduino IDE 1.8.3 (marked experimental version). In Arduino IDE, set Board to "Arduino AVR Boards > Arduino Nano" and for Processor choose "ATmega328P". For Port, choose the one that starts with "/dev/cu.usbserial" or "dev/tty.usbserial" and then you're good to go.My only complaint about this board is the USB mini style connector. It would be nice to see micro USB or even USB-C, but it's a really minor thing - cables are not expensive and most of us have an old USB mini cable collecting dust somewhere.
X**R
Works Perfectly!!!
I bought these for a project that involves controlling a vfd. I was able to upload my sketch without downloading any drivers.
H**N
Your Arduino IDE version changes what board/processor you need to select.
As for the board: so far so good. Cheap, works as intended, an annoyance to setup as others have mentioned, and I'd rather have a micro USB, but overall I'm satisfied. One star off for the difficulty in setup (read on for how I got mine to work; it literally involved a random hunch), otherwise a good board for permanently embedding in a project as its small and inexpensive.----- Instructions for use current as of 6/27/2020 -----Just got one of my boards working. I was following the advice of other reviewers who mentioned you need to select Arduino Nano as your board and ATmega328P (Old Bootloader) as your processor. Turns out this might have worked in the past, or for particular people's setups, but it did not work for mine. Here's how I got things to function:First off, I'm using the 1.8.13 version of the Arduino IDE, which is the most current as of this review (6/27/2020). I can't guarantee this is what caused the issue, but I'm going to assume its part of it. I'm running Windows 10 Home, 64 bit, version 10.0.17134 Build 17134. Your mileage may vary if you are running a different version or a different OS entirely.When I initially plugged the nano into my computer, I could not see any COM port appear. I had already installed the CH340 drivers (you can do so from elegoo.com/download, or from Sparkfun at https://learn.sparkfun.com/tutorials/how-to-install-ch340-drivers/all). Turns out my first mistake was a simple one: I didn't use a data cable. The cable I found lying around turned out to be for power only. Keep this in mind. The way you can tell is if the Nano starts running the LED blink program, but is not discovered by your computer. The blink program will run as it comes preloaded so it will run when the board is powered on. This means either you have a power-only cable, or somehow the data pins have been damaged (less likely that only those pins specifically would be damaged, but who knows... its possible). Switching out the cable fixed the discovery issue.I still couldn't upload to the board though. Once the board was discoverable, I then began following video instructions from the Sparkfun page I linked to above. They said to re-run the CH340 driver executable, uninstall the drivers, then reinstall them. This time I got a message saying the drivers had been installed correctly, rather than having been "pre-installed" as was mentioned before. I tried uploading again, but no luck. Still, the drivers do need to be installed correctly so this was probably a secondary issue. Who knows, but I'm going with that. I could now see a new populated COM port, so I knew the Nano was being seen now.I once again set my IDE settings to Arduino Nano as the board, ATmega328P (Old Bootloader) as the processor, and finally the new COM port as the port. Still nothing. As a last ditch effort, I tried switching the board to Arduino Uno."Done uploading."What do you know... it worked. Why? Who knows... but it did. I hope this helps somebody else out with this odd situation.
T**R
Super Value
I ordered two sets (six Nanos). All tested perfectly. For MAC, use the web address on the order page and download the NANO files, the serial driver will be in that package. It won't be recognized in your Arduino IDE otherwise. Simple process to download and unzip and execute. Restart and you now have a port you can work with in the IDE. Choose Arduino Nano and make sure the AT mega328P processor is selected so you can talk to the boot loader successfully. The download package has all the instructions, it's very easy and worked just as they said it would on my MAC.I tested all six in the following manner:plug in and ensure l13 is blinking (comes preloaded with "Blink").load program of your own choosing and check to see if it works (program should activate l13 and interact with serial console)press reset button to make sure the Nano reset button worksreload Blink and checkBoom - you have an awesome $4.26 Arduino ready to do great things for you.Again all of mine tested perfectly. You have to solder the headers in and the space is limited so be careful. Not the best platform for prototyping but, once you've figured out what you want your Arduino to do, these are my main "deployment" Arduino platforms. Cost efficient (They're a steal) and very space saving. I highly recommend for trouble free, super inexpensive Arduino deployment.UPDATE: I ordered six more nanos, performed the same test as above and all tested perfectly. I'm stocking up while they are inexpensive. The quality consistency of this particular product is excellent. I have had one nano blinking for two weeks now nonstop. Just checking to see if it dies but it just keeps going and going and going...
Trustpilot
1 week ago
2 days ago