


🧶 Weave Your Way to Fashion Revival!
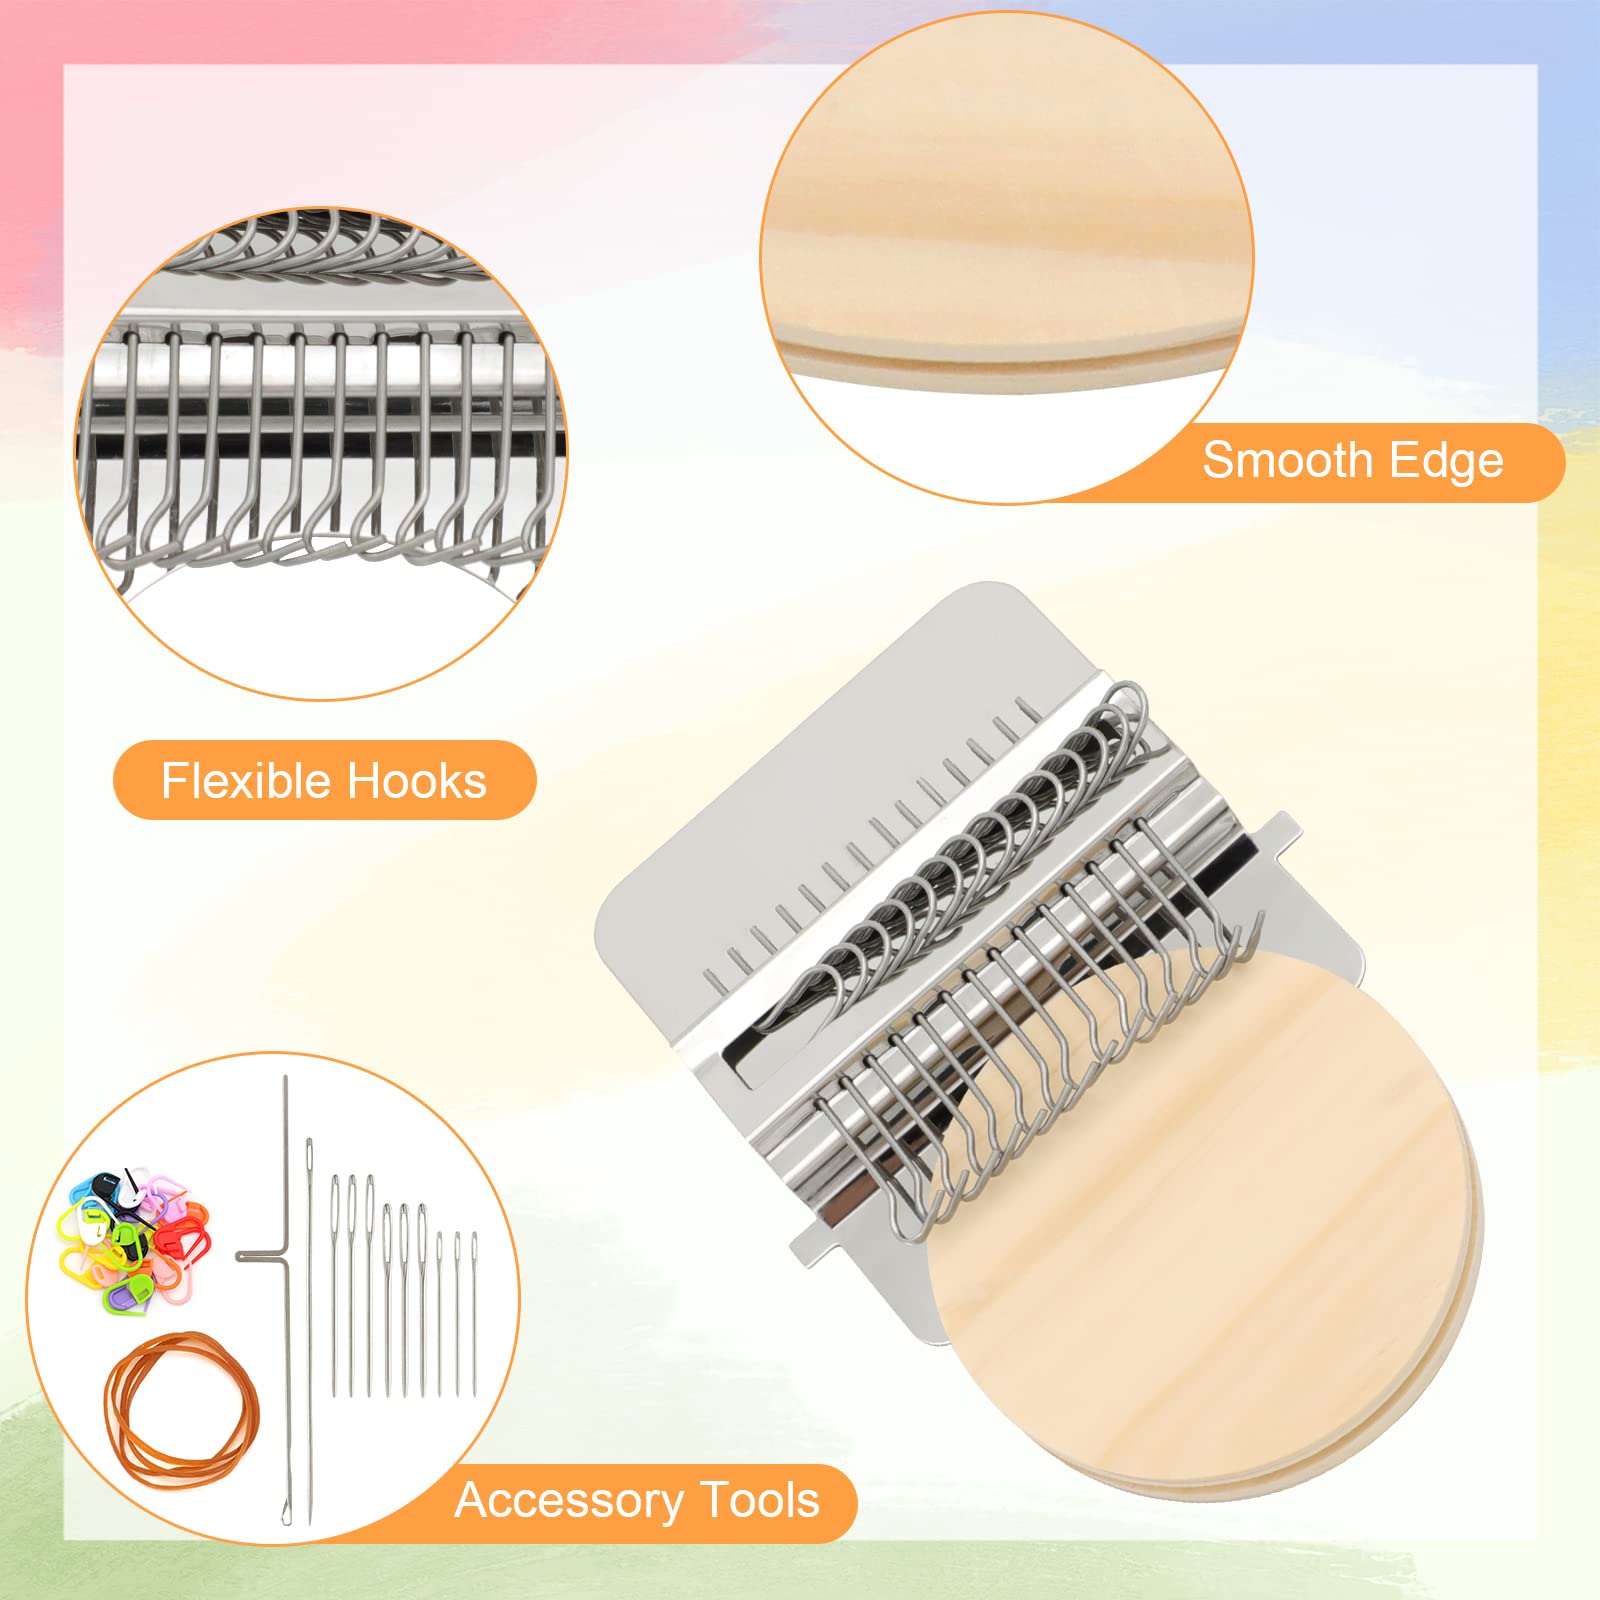
The Darning Mini Loom Machine is a compact and user-friendly weaving tool designed for quick and effective mending of clothes. Featuring 14 hooks and a wooden disc, it allows users to create intricate patterns while repairing jeans, socks, and more. Ideal for beginners and seasoned crafters alike, this loom promotes creativity and enhances hand-eye coordination. Each purchase includes essential accessories and a satisfaction guarantee.
J**.
My Great-niece and I Face-timed learning how to use our looms -- Such fun!
Getting Started1. If you’re mending a hole, first, trim threads off the tear.2. Take out your darning disk, the loom (metal plate with hooks), and the two rubber bands.3. With a pencil, mark off the area you’re going to be patching (it can’t be wider than the number of hooks you have – it can be longer, but not wider.4. Center your patch area over your darning disk and hold it in place with the rubber band in the side grooves. Smooth out the fabric.5. Place loom under the top of the darning disk. Line up the bottoms of your hooks with what will be the top of your finished patch. Attach the loom to the disk groove with the second rubber band.6. Select threads: can use different colors for the warp thread (vertical) and the weave thread (horizontal) – probably a good idea to use a different color for warp and weave at first so you don’t get confused. (Start with white for the weave thread for now.)7. Warping the loom – Set all of your hooks to be upright. Thread one of the embroidery needles in the tube with a length of warp thread without knotting it. Insert the needle about ½” below the bottom line of your patch (on the right) and bring it through the material at the bottom line. Pull the thread through, leaving a 3” tail at the bottom. With your hand, loop the thread around the first hook (on the right), and then pass the needle down through the material just to the left of your first thread on the bottom line. Leaving a 3” tail, cut the thread. Repeat until all the hooks are loaded with warp thread (1 or more colors).8. Turn all the hooks to the right. Take out the really long needle (that we’ll use for tamping the threads) and put it on a saucer so you won’t lose it when you set it down (you’re going to be picking it up and putting it down a lot). Thread your embroidery needle with a long piece of weave thread. Find the right bottom corner of your pencil drawing and make a tiny upward stitch, leaving a 3”tail of thread. Turn your needle backwards and slide the eye of the threaded needle through the warp threads that are sticking up at the base of the hooks at the top (from right to left). Make a tiny upward stitch at the bottom left corner of your pencil drawing.9. Turn all the hooks to the left. Take the tamping needle and pass it through all the threads and tamp the weave thread down until it is straight along the bottom of the patch. Pass eye of the weave needle through the raised warp threads up near the hooks from left to right. Pull the thread through. Make a tiny stitch on the right side, just above the last stitch, to anchor your weave thread. (Make sure you haven’t created a knot.)10. Turn all the hooks to the right. Take the tamping needle and pass it through all the threads and tamp the weave thread down until you have two straight lines of weave threads. Continue this process until you have reached the top of your patch. Get as close as you possibly can to the hooks.11. Remove the loom. Take the rubber bands off the loom and the darning disk. Very carefully (without pulling), move your hooks upright and remove them from the warp threads. (See “Make a pocket”). Take your embroidery needle with the weave thread and go through each of the top loops, catching a bit of fabric under each loop so you are firmly securing the patch. To tidy up the top, gently tug on each of the tails of your weave threads.12. Finishing: Turn the fabric over and pull the bottom tail threads through to the back. Thread your needle with each tail and weave it back through the fabric behind the patch.Make a pocketIf you’re not darning a hole, but are weaving just on a piece of fabric, once you have carefully removed your hooks, you can pull on your vertical warp threads to finish off the top of your woven pocket.https://youtu.be/DOmm8HL5fwY
C**E
East to use if you watch a few YouTube videos first
First I want to address the elephant in the room, the sharp metal piece. Mine isn’t too bad, but I did cover the band anchors with the adhesive parts of a bandaid. I don’t think it is the sharpness of these points that is destroying the rubber bands, I think the bands are old/bad quality. I ended up securing it with a length of embroidery floss. I might invest in silicone bands. The how to video I watched used shasiko thread. I can see why. Embroidery floss isn’t the perfect solution because it isn’t spun together making it easy to weave through the individual threads rather than through the loops. I think lace to fingering weight yarn would work better. The included needles are blunt point which is fine for knits. Woven material will require the purchase of crewel embroidery needles.Pros: it comes with everything you need except for clear instructions. Extra parts are included. I broke 2 out of the 6 bands before I switched to tying in with floss. Mine had nicely smoothed wood that I treated with beeswax for a little protection.
L**Y
For small projects
This was good for me and for the price it beats others out there, it can be disappointing when you start trying to get it work but trying is the key word, keep trying till you feel like it’s okay. I failed so many times cause the rubber band was no strong enough it wasn’t tightened . At the end I finished patching up my jeans in not time.
W**D
How to make sharp edges comfortable, you need edge trim protectors.
I got this to mend jeans and they work well but for the sharp edges on the metal. I did some research and figured you need Edge Trim Protectors to fix this. It makes using the tool much more comfortable. I bought some strips of “Tueascaulk Edge Trim protectors” for use here and to also use in other metals I have with sharp edges. I used some hot glue and cut the trim to the turns and glued them on to make it easier to use. I did not put it at the bottom of the tool so not to obstruct the disc groove it needs to fit into to secure to the patch area.Hope this helps anyone else wondering how to fix those sharp edges.
A**S
Not speedy weaving & maybe too hard for kids under 12?
Hard to keep warp even, but doable. Lovely weaving fun for adult if not fussy wanting perfect result especially. Keep cotton threads on cotton, yarn on yarn, etc. The larger patches are, the more difficult, but many hooks extra are fine. I used 22 out of 28. Cotton loom warp and pearl cotton in simple tabby. Tried pattern, found threads crossing confusing so opted back to tabby. Actually enjoyable absorbing, good distraction of fun! I like it. Edges don't seem sharp or rough.
S**W
I love this, needs a cover for metal, very sharp edges.
I repaired these shorts as soon as I received this kit, and it was very easy to use. The elastics are covered in fabric which is very nice, however they are too small for the darning loom, so I'm most likely going to just use some rubber bands I have around the house. I will also have to hot glue the edges around the metal, because I am afraid I will cut myself on them.
W**A
Great loom, But !!
I had ordered a smaller loom with14 needles and I liked it so well, that I ordered a 21 needle loom, which is the larger loom. When it came the needles on the loom were bent and twisted. Hope I can get them straightened out, so I can use this loom. Very disappointed that this has happened. I really don't want to mess around and have to send it back. It is always so disappointing when this happens. But the first loom was great 👍
A**S
Easy to use
Over all this is exactly what I was looking for to patch minor holes in my hoodies and jeans.I can use embroidery floss to add in small weaved patches to cover up minor fixes and make the patches as obnoxious or subtle as I want.I do recommend using embroidery floss with this and not regular thread. Without the thickness of embroidery floss the weaves are very loose.
Trustpilot
2 months ago
1 day ago
