🌿 Elevate Your Garden Game with DIY Paving Magic!
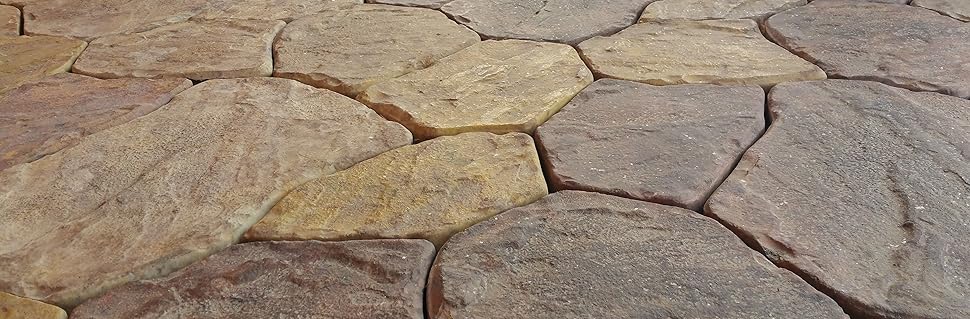
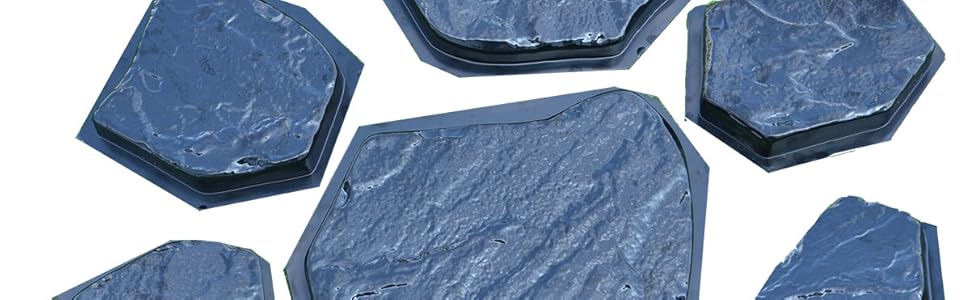
The SvitMolds Concrete Molds set includes 6 durable ABS plastic molds designed for creating beautiful pavement stones for your garden paths and patios. Each mold covers an area of 0.37 square meters and features various textures, allowing for personalized designs. With a thickness of 38 mm, these molds are reusable and can be painted in any color to match your outdoor aesthetic.
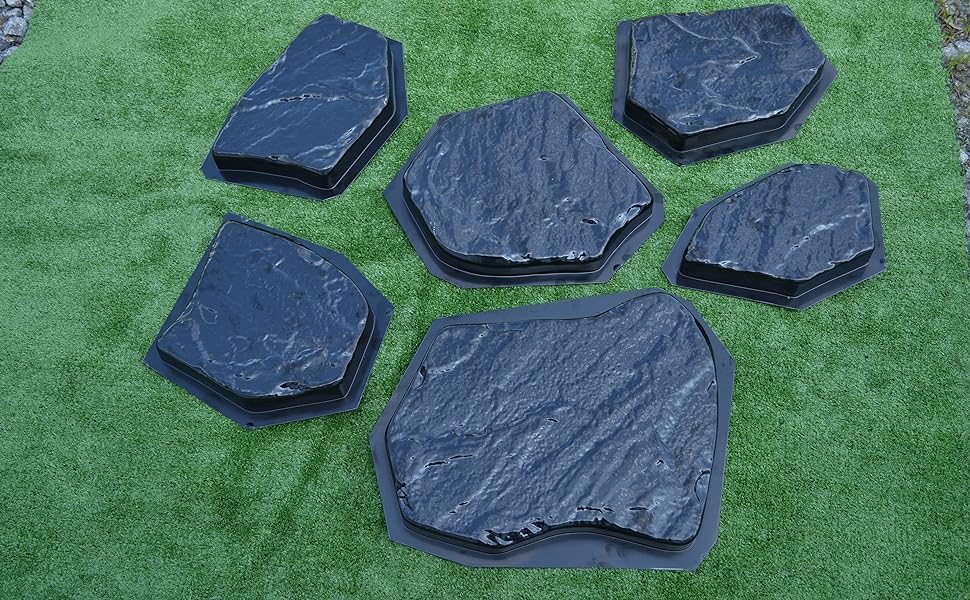

| Material Type | Plastic |
| Item Shape | Square |
| Color | multi-color |
D**D
Very Good Moulds
Update - I stopped using Pam cooking spray and have begun using corn oil. Reason being, the Pam would cause small air bubbles which ended up on the top of the stone. Instead, I just pour a small amount of corn oil into the mould and then wipe it all around the inside. I also figured out that just scooping a small amount of concrete into the mould while it is on the vibrating table will allow the air bubbles to escape much better. The concrete kind of bleeds out and covers the entire mould. Then just add a bit more concrete and wait for bubbles to dissipate, then add some more and so on. I am using Quickrete 5000 High Early Strength concrete from Home Depot. Through my Home Depot app the 80# bag is $3.98, but in the store it's $6+. I am also using Rapid Set Concrete Pharmacy Flow Control, one 2oz. bag per bag of cement. Three quarts of clean cold water (mark a gallon container on the outside with a sharpie and you'll have the same mix each time). I use the Quickrete color additive also, but using one container for about four bags of concrete. I picked up a 1 1/4 cubic foot cement mixer from Harbor Freight for $169 - 20% coupon and it mixes one bag at a time. Keep in mind that there will be a bit of leftover concrete from each bag, so either toss it or subtract a little mix and water. I have some other moulds that I am making so the excess goes into those extra moulds. For my setup I bought 3/4" plywood and six 2x4s. Cut the 4x8 plywood in half to make two 2x8 tables and supported them with the 2x4s cut into two foot lengths. I took an old hand sander and strapped it to the top of the table on one end and then I pour and vibrate on that end, then move the filled moulds to the opposite end of the table. Let the set for 12 hours and then make another set. They are hard ABS plastic and seem to hold up very well. The first pour were a bit tough to release from the moulds, but every pour thereafter has been a very easy release. It's down to a science now and I'm considering purchasing another set of these moulds to speed up the manufacturing process - I need 160 of these stones. They shipped super fast from Kiev. And to the manufacturer of these moulds - thank you very much. You've provided a very decent product at a reasonable price and your attention to order processing and shipping is noticeably prompt. Kudos.
M**S
These are wonderful!
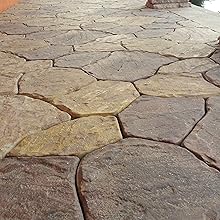
I love these. I used old cooking oil (canola and olive) as mold release and swooshed a bit on paper towel to help get the concrete hardened out of the molds. I also used a massager, the log kind for athletes wrapped in a trash bag to keep it clean, and put a cat litter box on top of it upside down, then put a mold at a time on top of that, to shake out the bubbles that form (cheap shaker table). Home Depot, maybe Amazon too, sells polypropylene sheets about 1/2” or so thick, that replace the slag you would normally put under pavers. Saves your back. The patio I made was about 45 bags of 50 pound each high strength crack resistant concrete. I am not strong enough to move 80 pound bags (a lady). Screed the sand, put down a barrier layer, and tamp down the pavers. I dyed some of them at random. I used pigments but heard you can just add paint too. Took 24 sun hours for them to cure completely, and for a few, instead of cutting with a saw, I used popsicle sticks to partition where I wanted a half sized piece, and forced them into the mold once the concrete had started to set. For filler around the pavers, I used high grade stuff, ~ $25 a bag near me, not the filler you can get at HD. It is called Polybind dust, comes in 2 colors and fills up to 6” gaps. I used it on my driveway too, rather than the caulk filler many use when spaces between concrete are a trip hazard. Have had patio 2 summers now. Looks great. Sealed it with some high $$ stuff. Not one weed came up, and I live near woods. Awesome product. Buy two sets if you can, of molds. Work goes faster. Peace. ADDED A THIRD PHOTO 10/22/2024. THESE ARE THE PAVERS TWO YEARS LATER. IT IS FALL, THEY HAVE NEVER HAD A WEED, and HOLD UP GREAT.
R**X
These molds work very well and the results are exceptional!
I've made over 130 stones so far and I have learned a lot about the process. Here's some tips I think are helpful:1. If you plan to make a lot of stones, get at least 2 sets of molds. I started with one set, but quickly realized that 2 sets would speed things up.2. i started off using Quikrete 5000, as it has a high strength early set. This means I can make 12 stones a day, however it gets expensive buying pre-mixed concrete. I'm now switching to buying 100 lbs bags of Portland cement and bags of sand to mix my own concrete.3. I use the least expensive cooking spray as a release agent. Be sure to wipe all surfaces inside the mold with a paper towel so there is no excess.4. To really bring out the stone detail of the molds, I make a slurry of mortar mix and water, and brush it on the inside bottom of the mold, before pouring in the concrete. This also helps in eliminating air bubbles.5. Regarding air bubbles, you must get the concrete to "settle" in to the mold. I fill the mold, bounce it on a board to level it out, and then vibrate the molds on a table. I've found that using my SawzAll (without a blade) works great. I put the molds on the table, and put the sawzall nose down on the table and let it run for a minute or more. This works great for bringing the air bubbles up. I also recommend putting a layer of Duct tape on the outside bottom of the molds to protect them especially when vibrating.6. To color the concrete for a more Stone like look, I add acrylic latex paint to the mix. This turns out to be less expensive than the bottled colorants, and adds strength to the concrete.7. To make the stones look more real, I've started using Oxide Pigments to simulate iron rust in some stones. I'm going to experiment with greenish veins as well. If you decide to try this, add your release agent to the mold, then brush in some pigments before adding the slurry coat and concrete.And Have Fun!
Trustpilot
1 day ago
2 months ago