


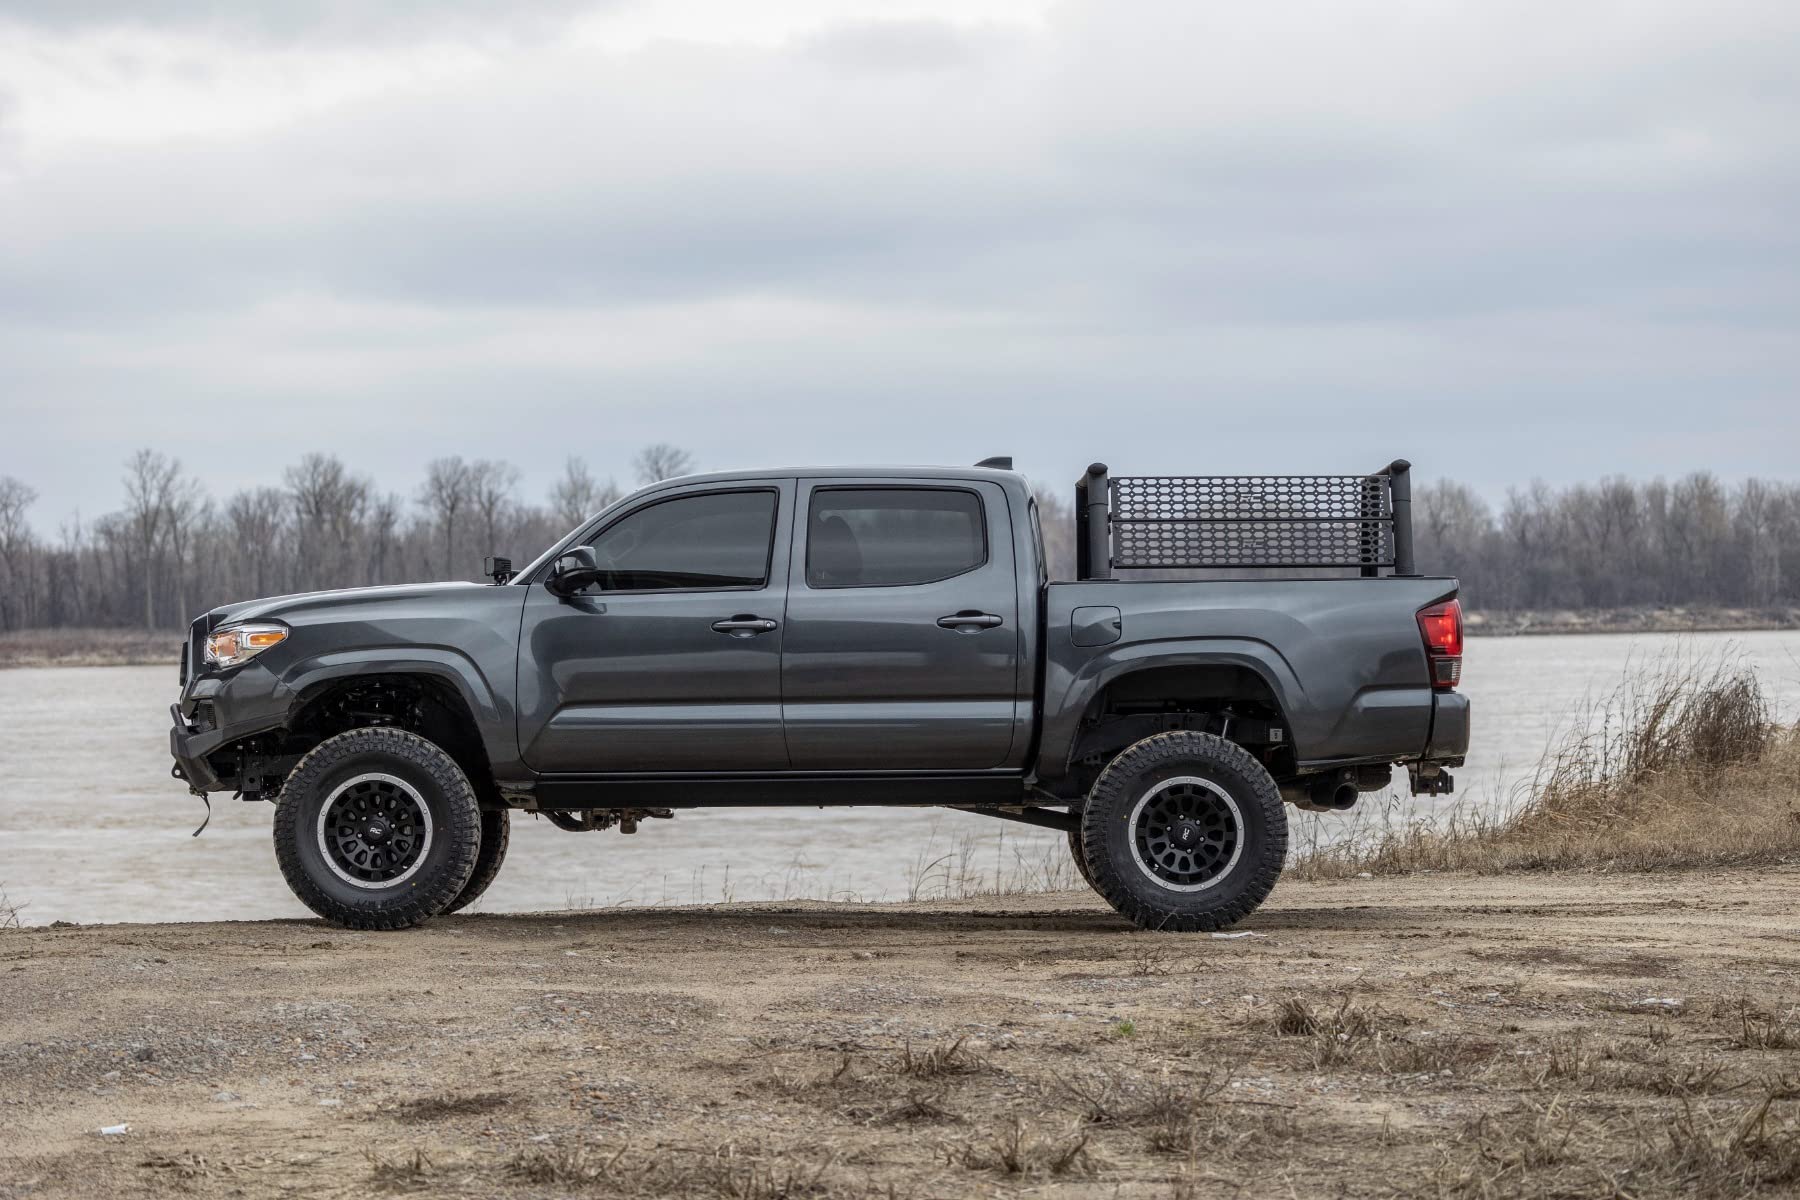
🚀 Elevate Your Tacoma Experience!
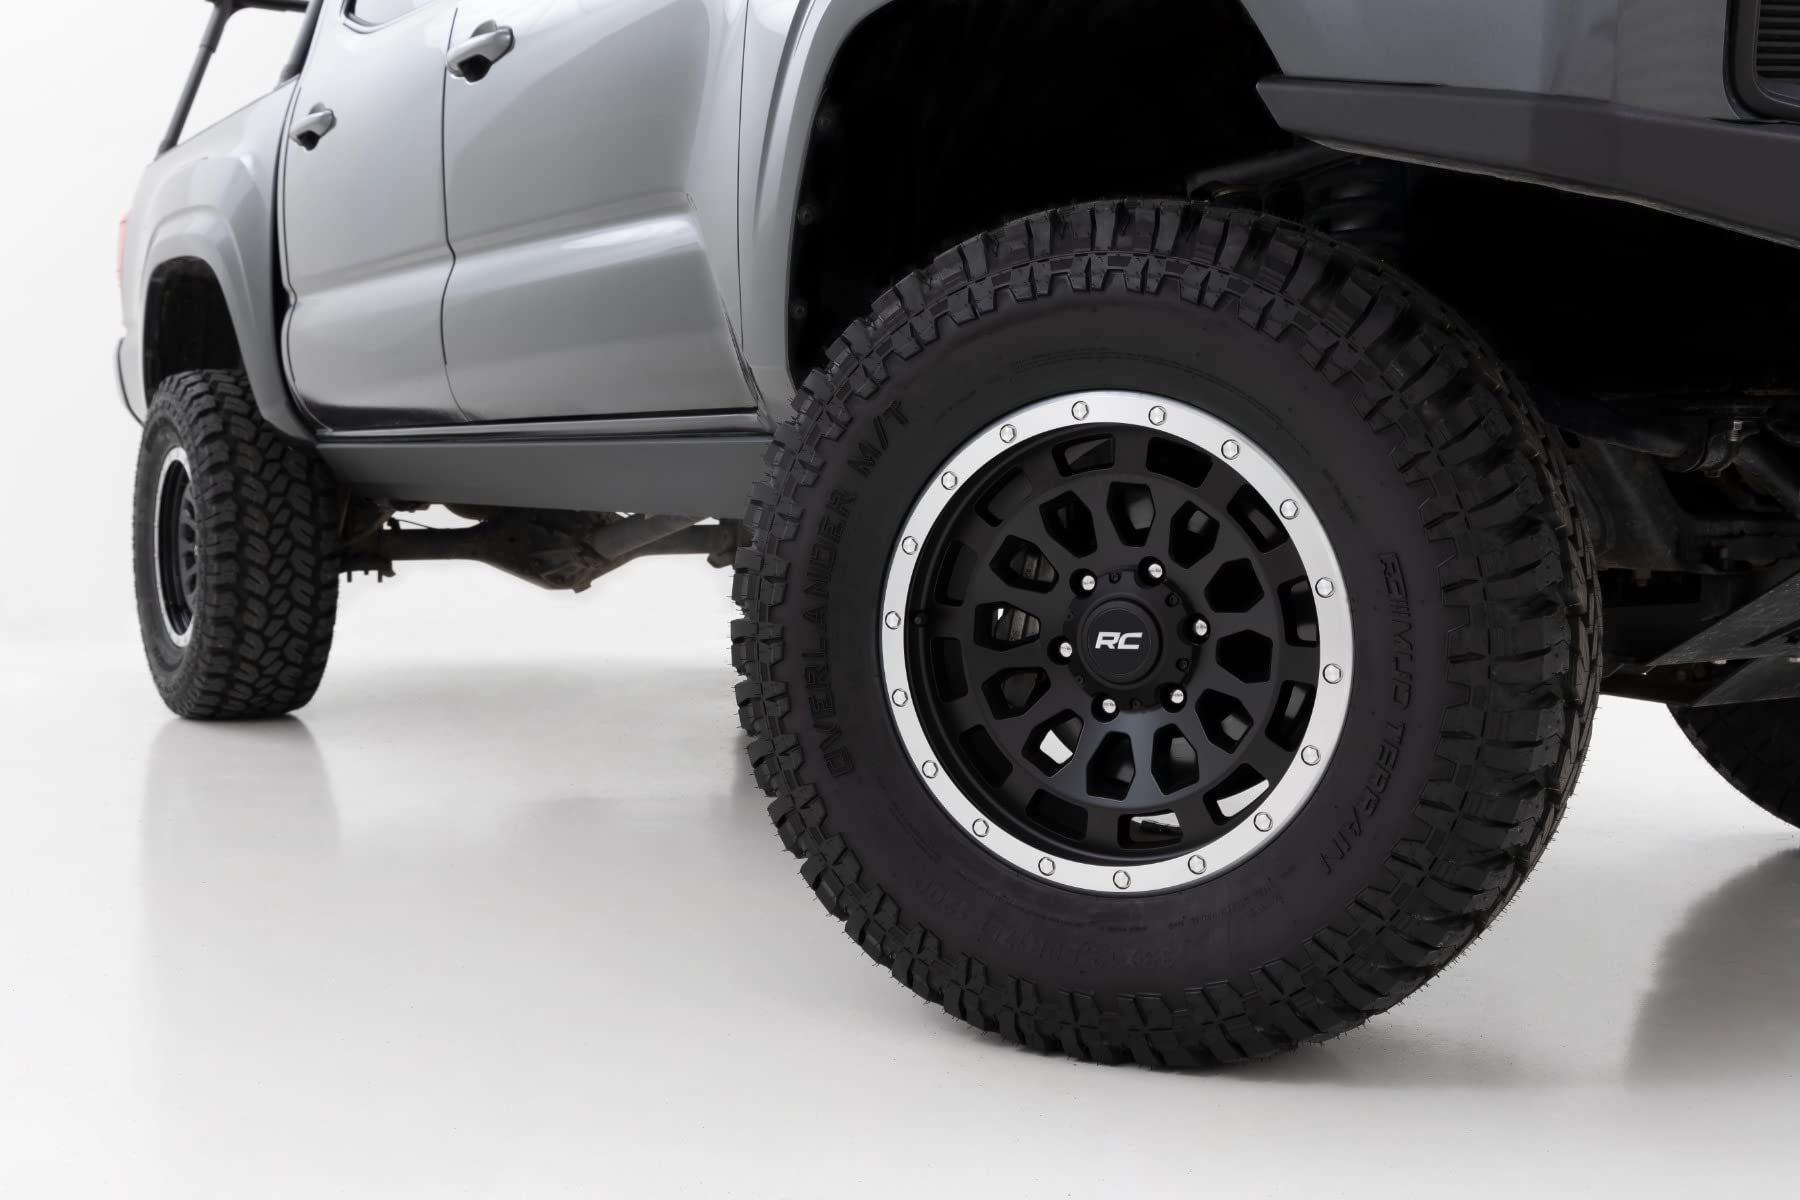
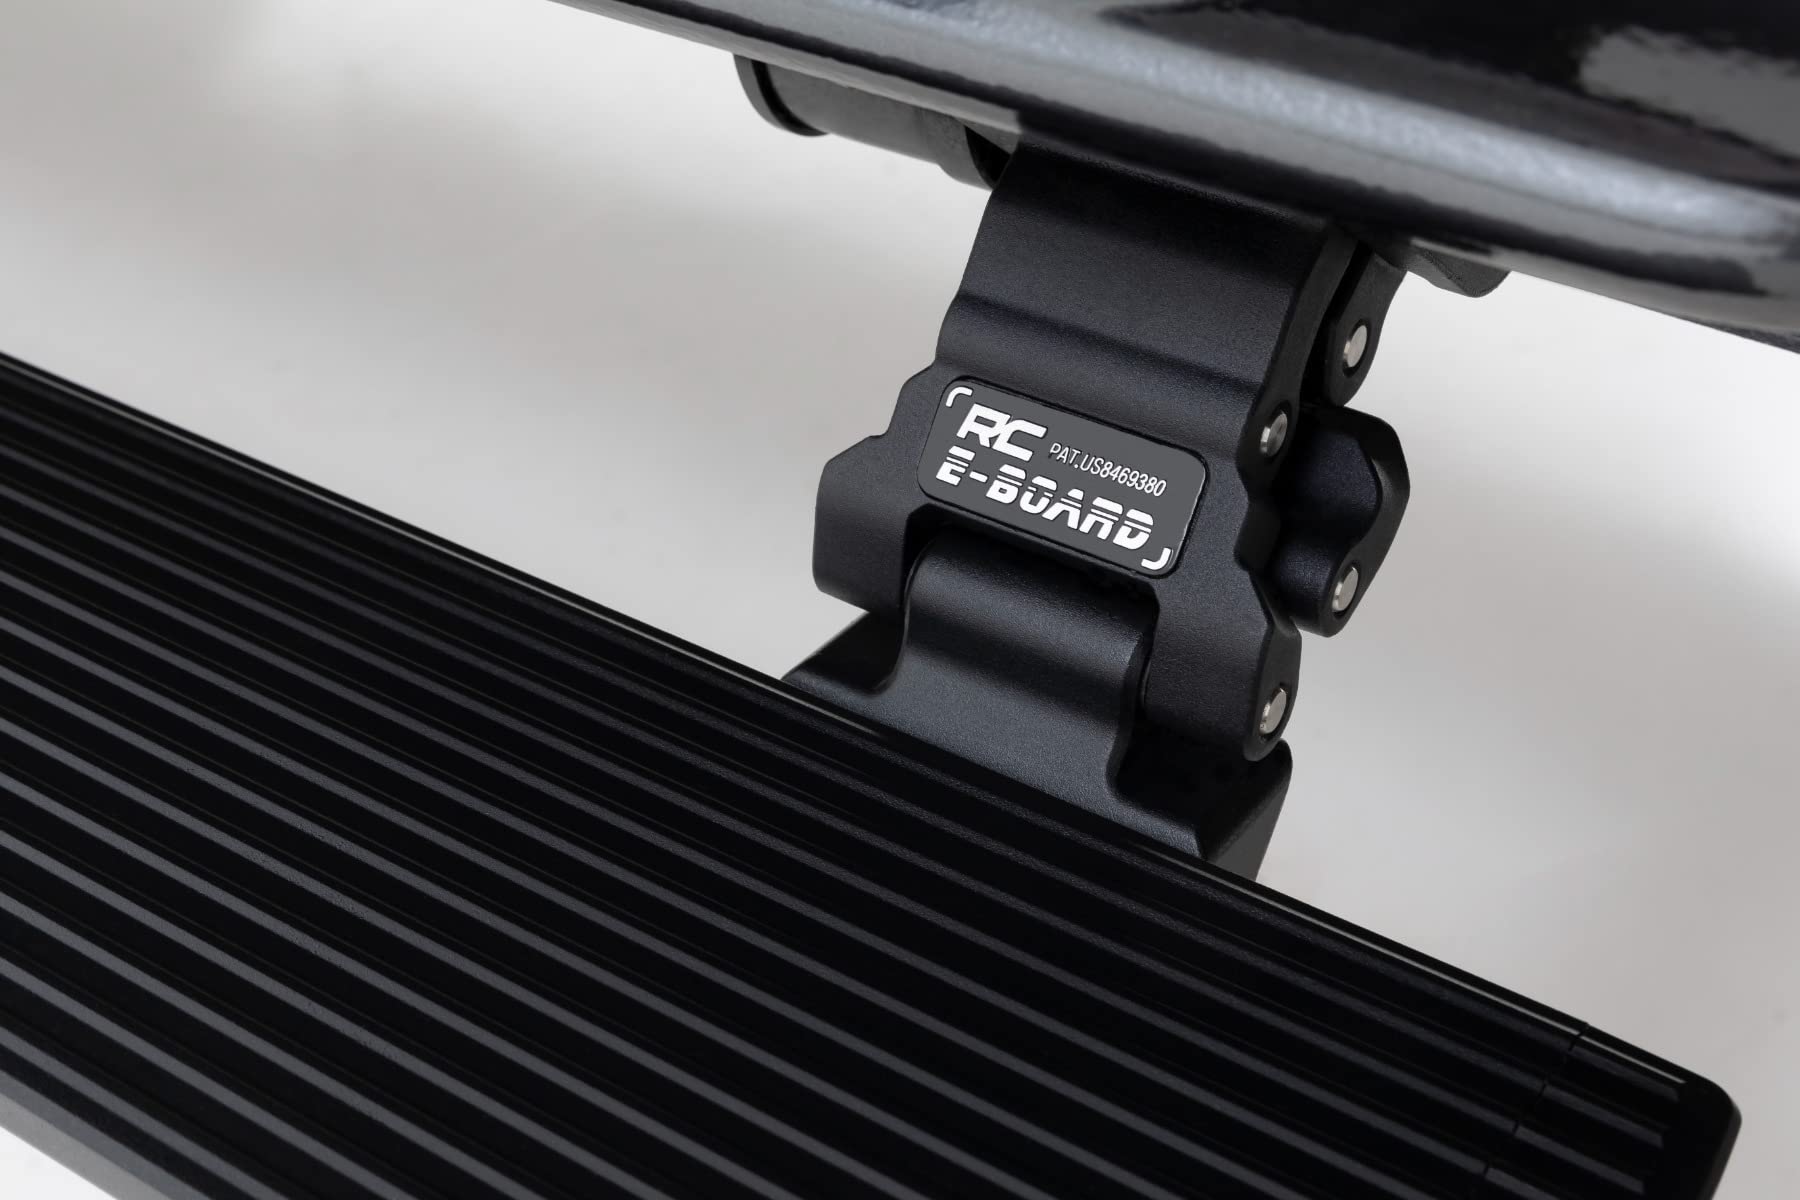
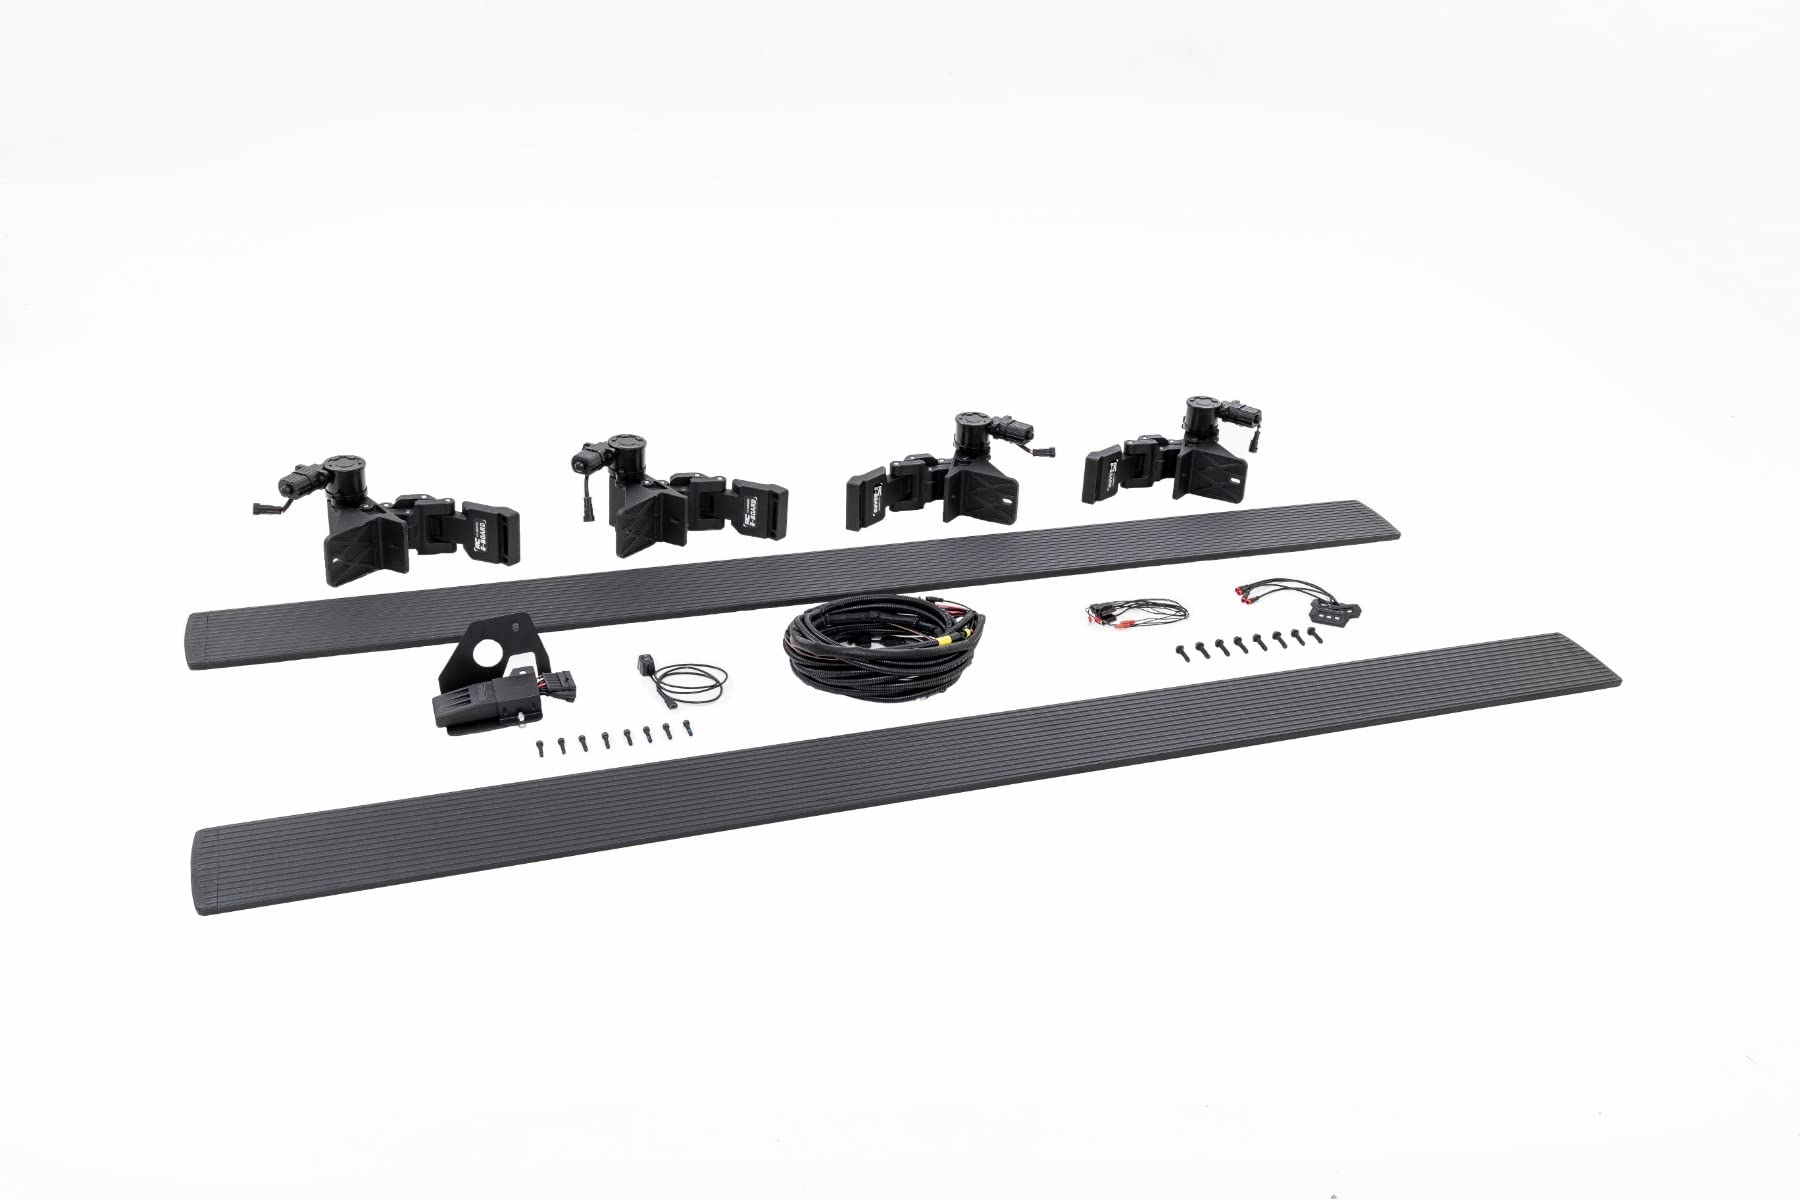
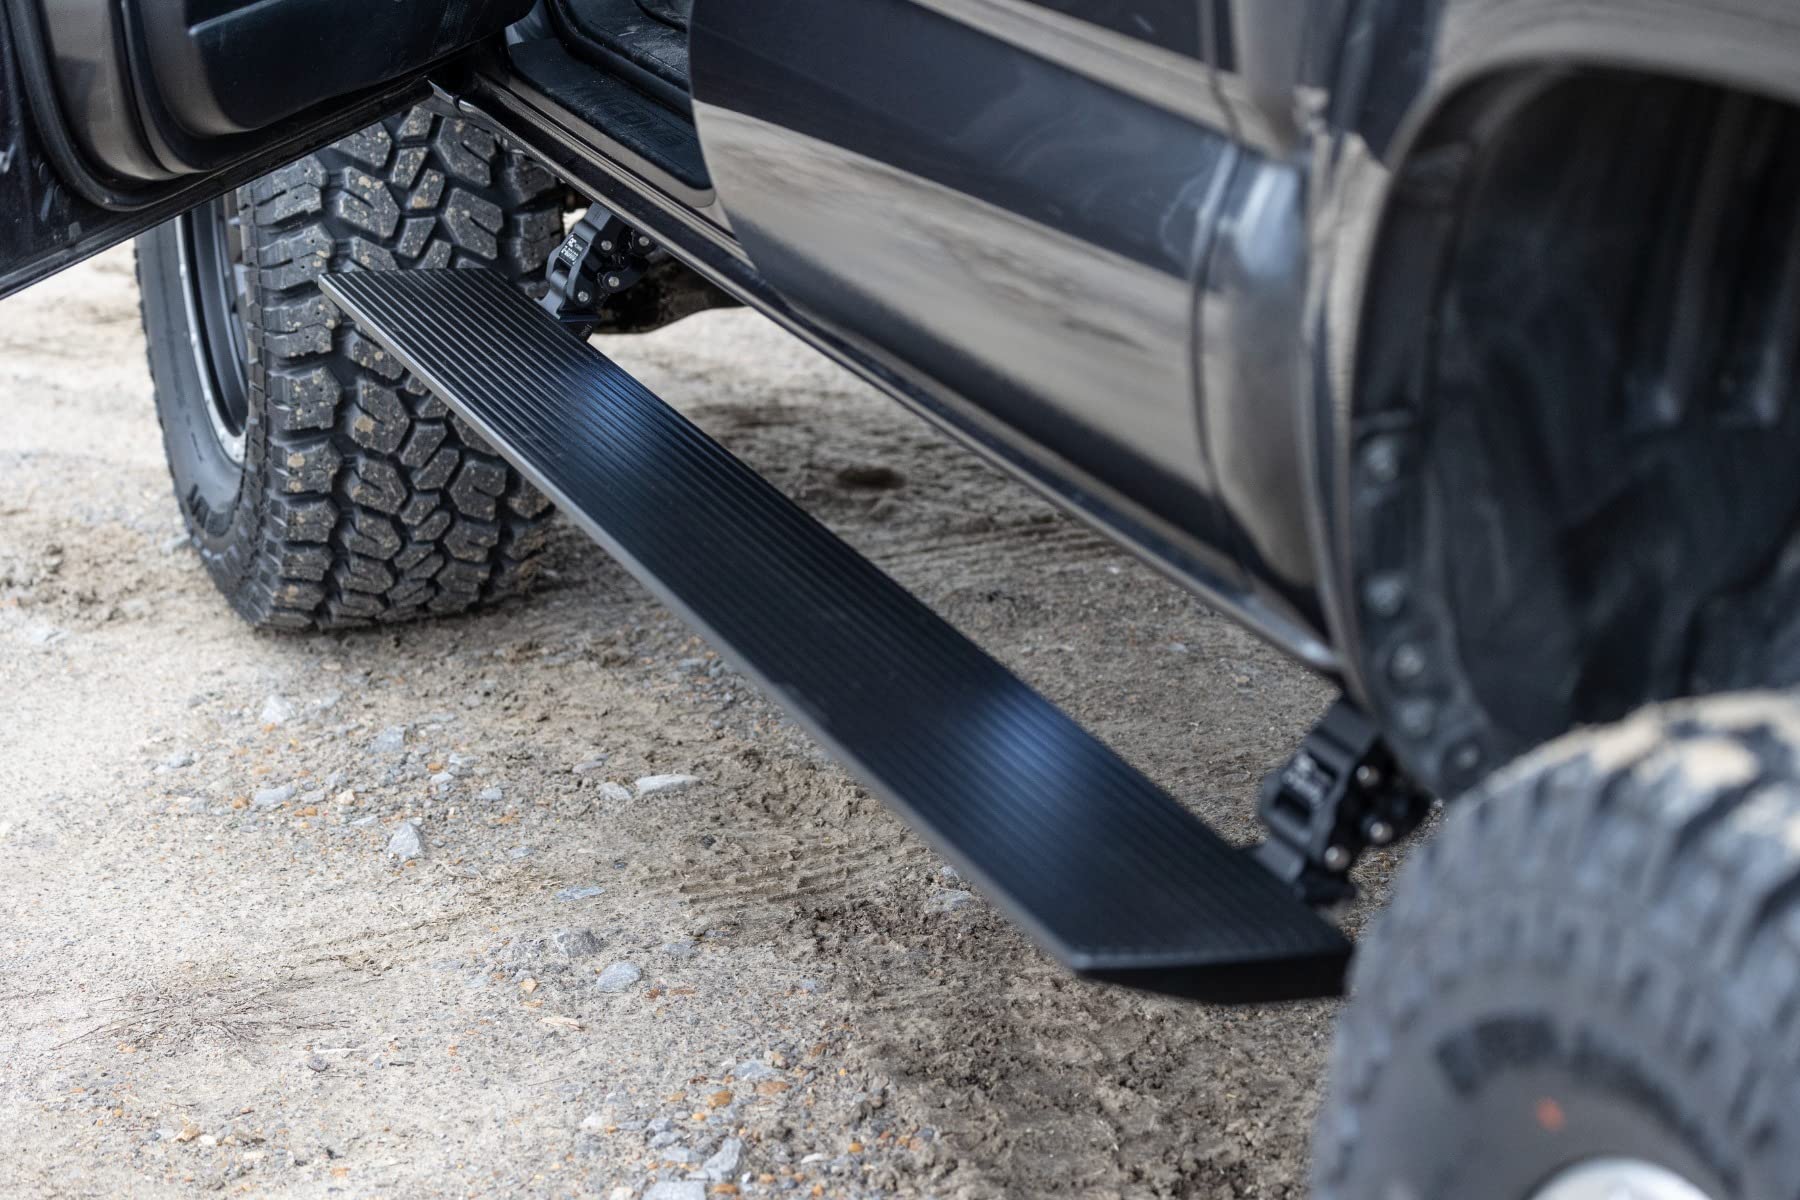
The Rough Country Power Running Boards are designed specifically for 2005-2023 Toyota Tacoma Double Cab models. These 6-inch, lightweight aluminum boards feature dual-motor technology for reliable performance in extreme climates, an anti-slip surface for safety, integrated LED lights for visibility, and a robust 660 lb weight capacity per side. Backed by a Limited Lifetime Replacement Warranty, they offer both style and functionality.
| Manufacturer | Rough Country |
| Brand | Rough Country |
| Model | Rough Country LED Power Running Boards for 2005-2023 Toyota Tacoma - PSR652110 |
| Item Weight | 68.9 pounds |
| Product Dimensions | 10 x 10 x 10 inches |
| Country of Origin | China |
| Item model number | PSR652110 |
| Exterior | Aluminum |
| Manufacturer Part Number | PSR652110 |
| Position | Lower |
| Special Features | 660 lb. weight capacity per side., Fits Double Cab models ONLY., Automatic ‘SAFE-STOP’ engages if blockage is detected., Interior bypass switch for manual override. |
| Construction | Drilling Required: No |
K**E
Great running boards, with some caveats (mainly lack of installation guides online)
I'm going to preface this with the fact that there is next to no installation documentation of this specific running board set for a Tacoma. I have a 2023 TRD Off-Road Tacoma. I'm going to put my installation process as part of my review for these running boards because if there was better documentation on how to install these boards, I imagine a lot more people would have them (I do recommend them both for looks and for functionality).The installation process:There are maybe 2 YouTube videos of people with these running boards, but they are fairly poor-quality install videos, if they can even be called that.One of the more useful videos I watched was actually for a different model of Rough Country power running boards for an entirely different truck, but the installation process was essentially the same. The video still did some things wrong though.One of the more common questions I see online about these running boards is why Rough Country includes these weird spacer washers with a slot in them. These aren't mentioned in the instruction manual included (which is specific for the Tacoma). In fact, the bolts that are included with this kit are actually flange bolts, which have a kind of serrated washer already machined onto it, and typically washers aren't meant to be used with these types of bolts. Fun fact, the spacers actually don't even fit where you would put washers for the install process, so unless they were meant to go between the body of the truck, and the actually running board motor hanger, then there really isn't a place for them to go. I did not use them for my install process, and everything looks and works great (one of the comments on the YouTube video I mentioned above mentioned the fact that these spacers are not necessary anyways as long as everything fits right).Now that we have that out of the way, here was the process I followed to install the boards.Firstly, I installed the module bracket under the driver side of the vehicle which is close to beneath the driver's seat (but under the truck). If your truck is new (in my case, it was only about 1 week old from being delivered from Toyota to the Toyota dealership), then you may have some plastic screws to remove in order to actually install this module (as well as for the motor hangers later on). It just takes 2 bolts to attach, and it's fairly clear where it's supposed to be placed when you're looking under a vehicle. A picture is included of the installation location in the instruction manual.After installing the module bracket, untangle and hook up all the wires into the module into their appropriate places. There are 4 total plugs to insert into the module.Next step would be to remove the scuff plate (that plastic trim that rests slightly over the carpet and is close to where the door closes inside the cab). It is fairly easy to remove, but with all plastic be careful to not pull too hard at once or you could snap some plastic tabs, making it more difficult to reinstall after the job. You're going to need to remove all 4 scuff plates in the truck to get under the carpet in the front, but also to run your sensor wires to the rear of the cabin (I will elaborate later). In order to get under the carpet to run the wires, you will also need to remove the plastic trim which is next to where the front scuff plates were, but closer in the direction of the engine of the vehicle. There should be a single plastic screw on both of these plastic trim pieces (one by the driver's seat, one by the passenger's seat). With a little bit of wiggling, you should be able to remove it once the screw is off (There are some plastic tabs holding it in place to the edges of the cab. With the driver's side front scuff plate removed along with the additional piece of trim next to it, you're going to need to unhook a plastic clip that is holding the carpet down to the floor of the cab, be careful to not break them.Next Carefully lift up the carpet and bend it in such a way that you can lift/bend the carpet to be in front of the driver pedals (Note, I did not remove any seats to do any part of this installation process). You'll need to get under the carpet and the pad and locate the rubber seal pictured in the instruction manual. I sliced a little line in it with a box cutter knife so I could run the brown, white, and black wire bundle from under the vehicle up into the cavity in that rubber seal. I used a phone flashlight and pointed it down into the recess where the rubber seal is, so I could see where to fish the wire to from under the truck. The black wire is the wire you will hook the on/off switch to (This can really go wherever you want it to, if it can reach. I don't like to see wires, so I hid the switch behind the center console and ran it under the carpet of the floor where the driver's feet would be. If you don't install the switch at all, the running boards will work as normal, but you won't have a way to turn them off without disconnecting them from the vehicle battery). The white wire will need to be routed under the carpet, behind the center console, to the passenger front side of the vehicle and routed into the channel under where the scuff plate was. The brown wire will be routed to the driver's side channel where the scuff plate was.Once those wires are around the locations mentioned above, you will need to loosen up the door weather stripping around the area of the cab where the driver and passenger front seatbelts are (around all 4 doors) We will be running the magnet door sensors through the beam where the seat belt is located, close to the floor of the cab. I used an old metal hanger that was cut and straightened out to help with fishing wires into their appropriate place. You may have to fight it a little bit, but eventually you will be able to route the wires appropriately to where nothing will rub on them, and they will fit nicely. There are actually two sensors, a ground, and a plug which is all one piece, which is we it has to be run this way. The end with the plug will be installed near the front of the cab for the front door, just below where the door latches to close. It uses 3M adhesive to attach to the vehicle. The rear sensor that was fished through the spacer between the front and rear doorways will adhere more to the bottom of the front of the rear cab door, because there isn't enough length to run it to the same position as the front cab sensor. There is also a ground wire that is close to this sensor, which will be attached to the center bolt which is holding one of the door hinges to the door. This is also displayed in the instructions, but the location of the sensor was not clear in the instructions. You'll repeat this process for the other side of the vehicle for the front and back cab space.After this process you can guesstimate where to place the magnets on the door of the truck so that they align well with the sensors when the doors are closed. I did not remove the adhesive at this point, I waited till the very end to just to make sure I could get a good alignment once everything was aligned properly and electrical was connected to the battery. You will need to push the weather stripping back into place in order to close the truck doors, so I recommend doing this at this step in the process, just make sure to tuck the wire in nicely so there isn't too much play, and you don't force a wire in a position that could damage it.Attaching the motors/hangers was fairly simple, and as mentioned above don't use the slotted spacer washers and it will only take a few minutes to install. Takes a 10mm socket to install with the provided bolts.Run all the wires above the crevices between the frame and cab so as to avoid running wires where they could get cut by debris or a rock or something. Hook each wire up to the associated motor hanger, it will have a label on each one for where it is supposed to go, near the plug tip. Once you are confident there isn't any undue stress on any wires, you can zip tie them into place (or wait to check to make sure all the electrical works and zip tie at the very end).At this point now that they won't be in the way, you can install the running boards onto the hangers, using a 5mm allen key and the associated screws. They can be a little tough to align with the sliders, would probably be easier with two people but you'll eventually get them lined up and screwed in. Once they are attached, it's a good idea to get the hangers and all the other bolts torqued down. I used a typical socket wrench, there wasn't a torque spec with the instruction sheet, so I went fairly tight, but I didn't want to put too much pressure on anything, so I really didn't crank it down much.Before hooking the running boards to the battery, the instructions also mention adjusting the ebrake bracket to make sure it isn't getting rubbed or pinched by the motor hangers near the rear of the vehicle. In my case, they weren't touching when engaged or disengaged, so I didn't do anything with it.To run the cable to the battery of the vehicle, I tried to keep it behind the heatshield as the path to the battery from under the vehicle does run it close to an exhaust or catalytic convertor or something. Luckily there is room to run it behind the heatshields around it and then up into the engine bay, avoiding any moving parts. This is the only part I needed a second person to help with. I used that same metal hanger from earlier to pass the cable from below the truck to someone standing by the truck with the hood up so we could route the cable nicely to the battery. Loosen the bolts on the battery (unhook neutral first (black), hook up the positive end (red), and then hook up the neutral end).Assuming your magnets are aligned correctly, you should be able to open your doors and see that the running boards are now working (assuming you either didn't attach the kill switch or left it in the on position)! You'll want to actually remove the backing off of the magnets to properly adhere them to your truck door with the 3M on them. There is some extra 3M included in the kit, which I needed for this part, because when I removed the backing and put them in the same spot on the rear cab doors, the sensors weren't picking up the signal anymore, so I had to move the magnets a little lower on the door than where it visually seemed like they should go. They worked just fine after that. I chose to not install the LED step lights yet, but they are also 3M backed and plug in near to where your motor hangers are.Once you are confident everything is working as expected, start putting the carpet back if you haven't already, being sure to secure it down with the white tabs. Then put the scuff plates back and any trim you removed in reverse order. No wires should be visible aside from the magnet sensor wires coming out from under the weather stripping in the doorjambs.It should tuck in nicely against the bottom of the cab and look really slick!The actual review:The installation process I outlined above took me nearly 6 hours (If I did it again after having done it, and with my instructions laid out like above it, I could probably do it in 2 hours or less). It was long, but with mostly vague instructions, and poor videos online, I was left mostly in the dark. I've also never done any electrical work on a vehicle or run cables/wiring under carpet before.Visually, I think they look really nice. Tacoma's aren't exactly big trucks... and so I typically don't love the look of static running boards on them. These fix that problem. I'm not big into off roading, so I can't speak to their functionality as rock sliders, but my understanding is they will not perform as such. Though it is nice to have the ability to turn them off, in the event that you are worried they will come down on top of a rock or something. (They do supposedly have an auto stop and retract functionality built in, but I haven't had the chance to test that out, nor do I really want to chance denting them or scuffing them up). Fall is just starting, and in my state, we haven't received any snowfall yet, so I can't speak for how well they work in the cold. I do keep the truck garaged 100% of the time it is home, so even during the winter I imagine I won't have many issues (it is a semi heated garage as well, since the furnace is in the garage).Functionality-wise they do their job. They provide a nice deep drop step, lower than any typical running boards would have. My wife is short, and we are soon to have a 3" lift with 33" wheels/tires, so the truck will be significantly taller than it is in its current state.I think this set of running boards is far superior to Amp Research running boards that splice into the OBD II system. I can only imagine how many manufacture warranties get voided by splicing, especially if you actually break something or short something in the process. This is a true plug and play set of power running boards that requires no true modifications to the vehicle. Not only that, but at the time of this review, I can't really even seem to find if Amp Research still makes their running boards for the Tacoma.... and they are much more expensive. I paid $1k USD for these, and I would recommend them at that price.Hopefully these instructions and this review can help people who are on the fence about these boards, I'm definitely a fan of them!
W**T
Nice but not as nice as Amp Research.
Fairly easy to install but instructions are lacking. Boards seem a little weak when you step on them (I'm about 120lbs) and noisy when they open and close.
A**R
Works great looks great too
The media could not be loaded. Works great I have a background in electrical and it took a little over 2 hours to install the kit. It’s not hard to mount the rails or run the wiring under the truck. I did need some extra wire to make the connections for the door triggers. The in box instructions are very basic, but there are some good videos on YouTube that will help. I’m very happy with the product.
Trustpilot
3 weeks ago
2 weeks ago