
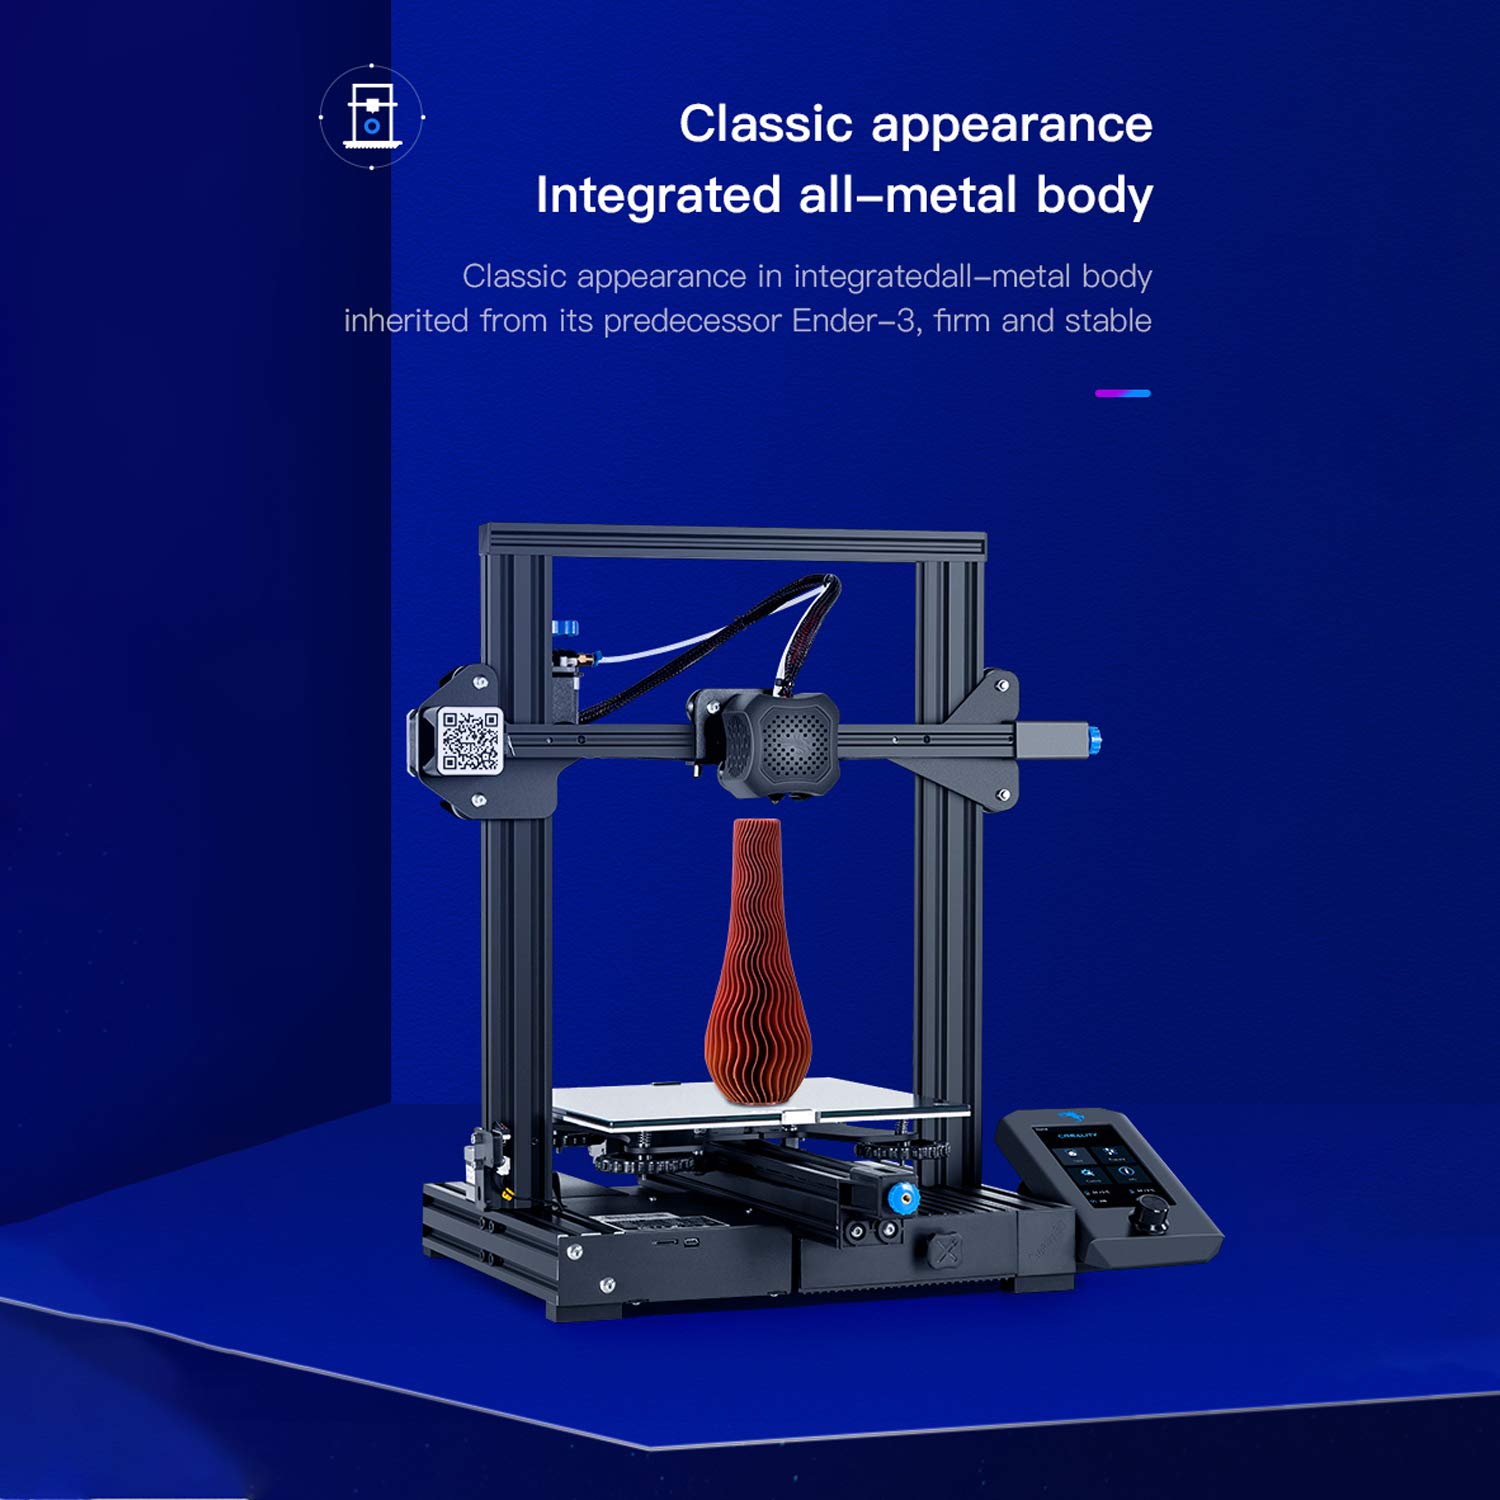


Creality Ender-3X 3D Printer Upgraded Version from Ender-3 with Tempered Glass 5PCS 0.4mm Nozzle Resume Printing Build Volume 8.7" x 8.7" x 9.8"The value of buying ender-3x 1,1*creality ender 3 2,1*Tempered Glass Plate(Upgraded 3D Printer Platform Heated Bed Build Surface ) 3,5 nozzles4, Convenient to solve the problem of hotbed warped5, affordable price, good service● MK - 8 extruder greatly reduces plugging risk and bad extrusion ● creality ender 3x with POM wheel makes it move noiseless, smoothly and durable ● One-piece structure provides large printing size ● Semi-knockdown package ensures quick assemble ● Safety protected power supply, reaching 110 Deg.C in about 5 minutes ● Additional power cut protection function to meet the needs of fast heating and longtime printing ● CNC machining of Y - rail mounting groove to ensure precise positioning and printing quality ● New viscose platform sticker solves warping problem General Brand: Creality3D Type: DIY Model: Ender - 3X Engraving Accuracy: 0.1mm Nozzle quantity: Single Nozzle diameter: 0.4mm Product forming size: 220 x 220 x 250mm Layer thickness: 0.1-0.4mm Print speed: Max. 180mm/s Supporting material: ABS,PLA,TPU File format: G-code,OBJ,STL Packing Type: unassembled packing Voltage Range: AC 100 - 265V ( input ) Connector Type: SD cardThank you for your purchase, if there is any operational problem, please contact the seller in time, thank you
E**.
Great printer for the money but you need to enjoy tinkering.
This has been a great printer so far. It took about 2 hours to setup the printer correctly and my first 3 prints were perfect. Don't just slap this machine together, I highly recommend taking your time and following the YouTube videos for setup and bed leveling from Tomb of 3D printed horrors. Getting your uprights square and x-axis arm straight is key, take your time. The glass bed is excellent but I do recommend three things. Tip #1: Clean the bed with alcohol before using it the first time and if you have adhesion issues. Tip #2: You only need patience, not tools, to remove a print if you wait for the bed to cool down, they just pop off. Tip #3: compress your springs fully before leveling, it helps with bed wobble due to the mass of the glass. FYI: in my case I needed to move the Z-stop up slightly before I could level at all. Setup right, this is a great printer for the money. Happy printing!
C**S
Can’t be beat for the price
I’d been looking to upgrade to a new printer that allowed me to use different filament types that my Davinci couldn’t print. I decided on an Ender 3 but the market is flooded with them. I chose this one because of the glass bed as I’ve read that the metal bed are known to come warped. This was also one of the cheaper models.It arrived and it was packaged very nice. It took about an hour to fully assembly. The instructions aren’t the greatest (all pictures, no words) but the pictures showed all the detail needed to assemble. I also found that extra hardware was included.After assembley the first think I did was print a dial indicator holder (on my other printer) so I could level the bed. I’m a machinist by trade so I can’t bring myself to “level” a bed using the nozzle - the nozzle is used to set the Z offset. Anyway I found the bed was only warped by .003” which is pretty darn good.I then set the nozzle height and adjusted the Z offset in the controls. This is where I ran into the only issue I have with this machine. The machine doesn’t recognize the Z offset on the control - the only way to set adjust it is in your slicer. After visiting several forums I found a possible fix is to update the Marlin firmware. I haven’t tried this yet because I don’t have the hardware at the moment.I used Cura as my slicer and so far I’ve made several upgrade parts for the printer itself. It prints like a dream. I’m using all stock firmware setting and Cura settings. I did build a custom enclosure but my first prints were without it. I’m also not using the glass build plate at the moment.Overall it’s an awesome machine aside the Z offset.
J**G
Best kit for the $
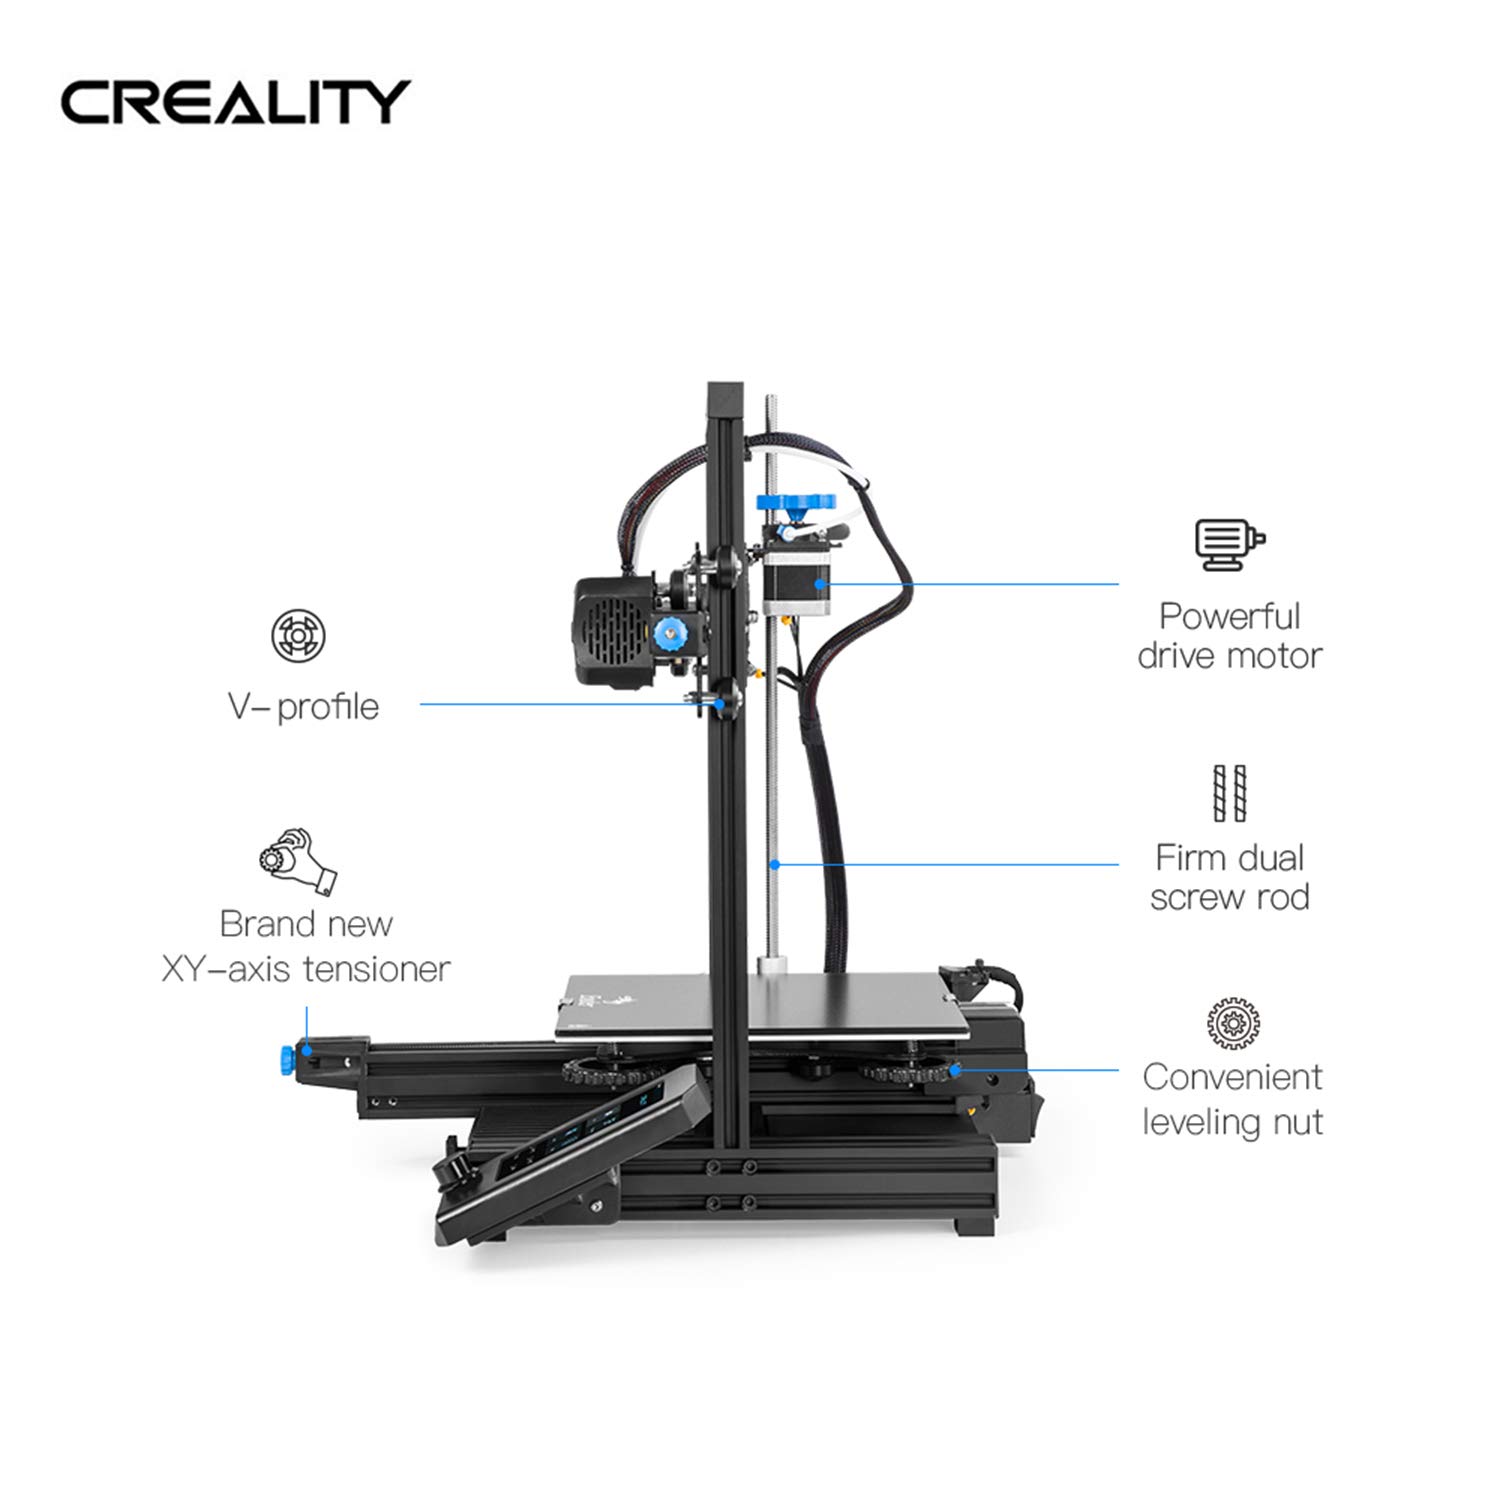
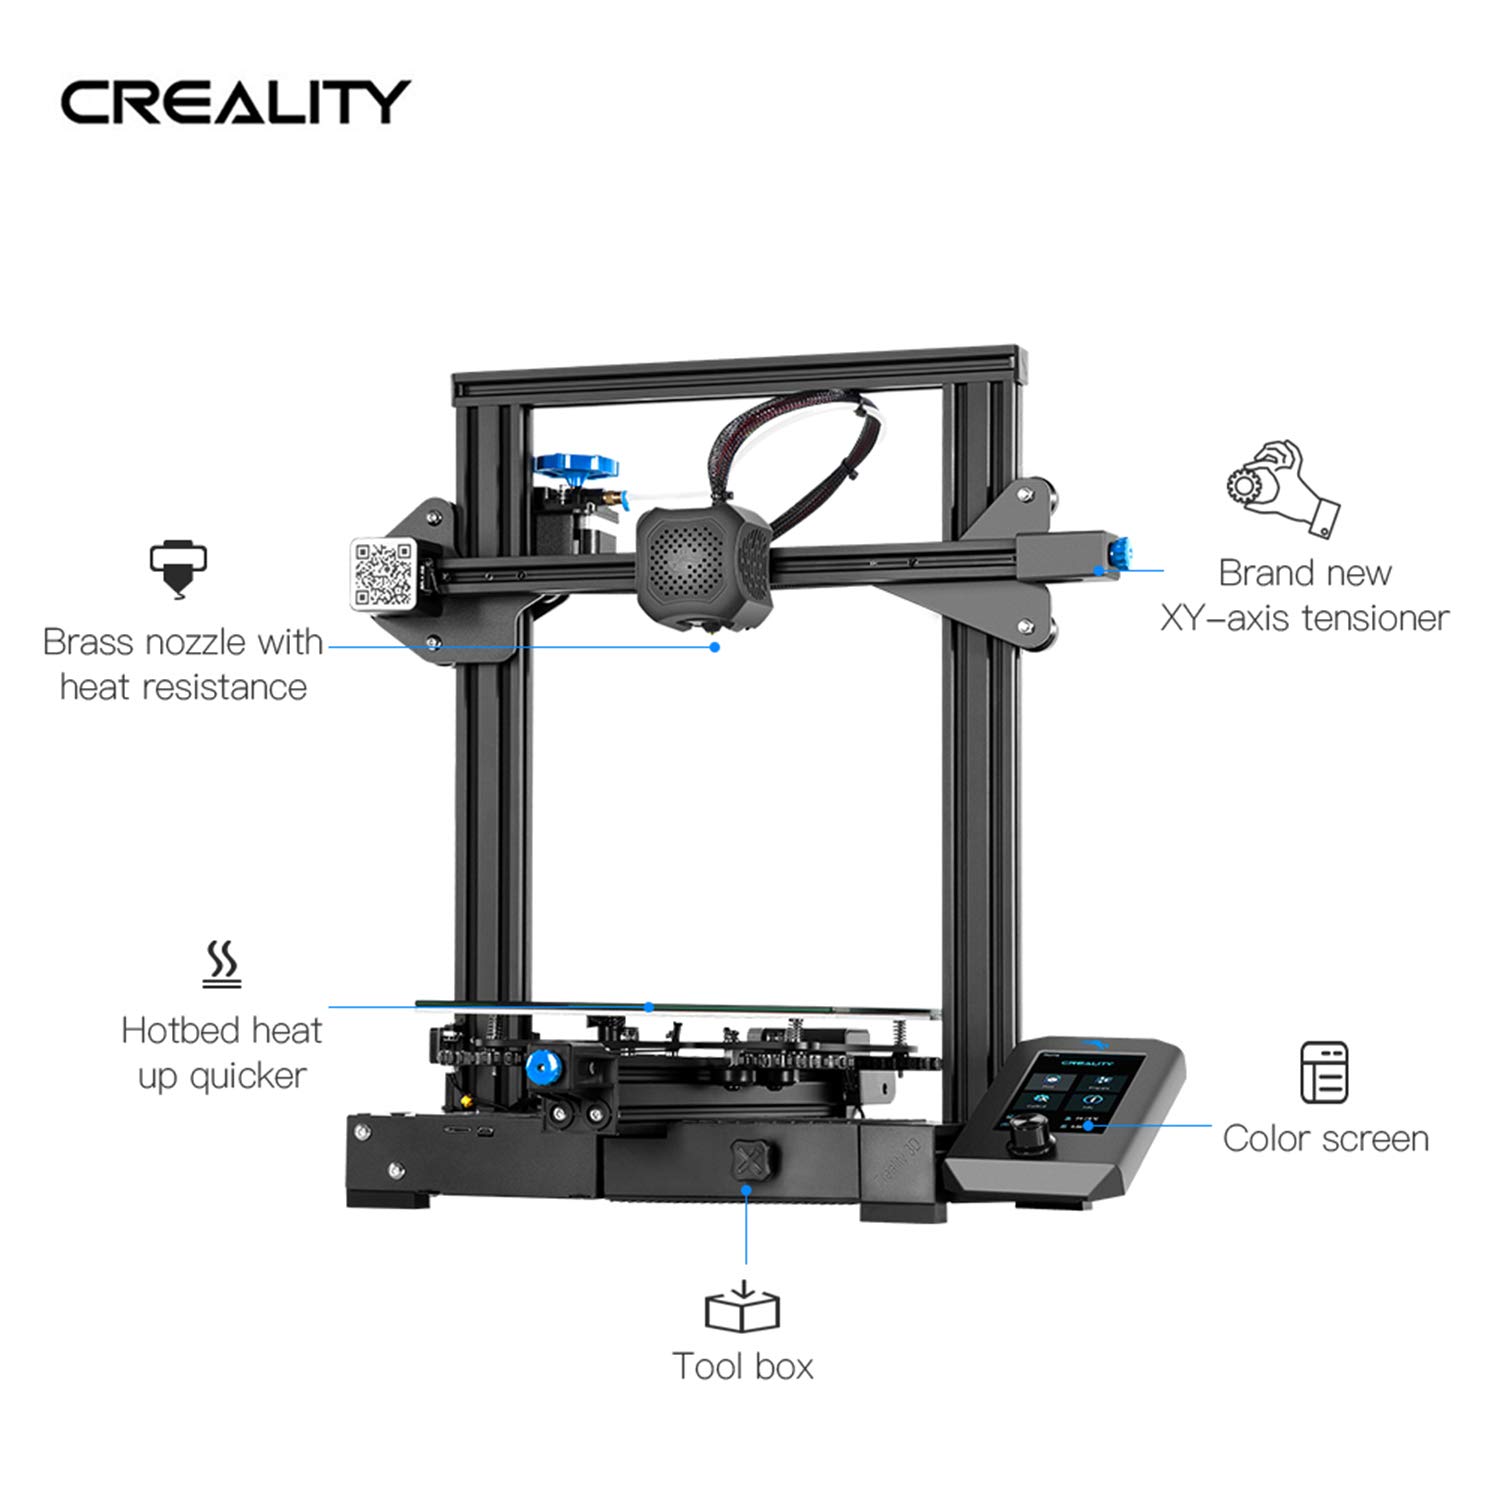
I'm new to 3d printing but the general consensus was in terms of filament based printers the Ender 3 was the model to go with. However, I found on Amazon this 3X was available with a coupon making it the most affordable option. So how does this (the 3X) compare to the 3 vs 3 Pro? Specs are scarce but from assembling the 3X I had the following conclusions:1. The 3X has a glass plate/bed which is a must do in my opinion. I tried the mat and I had a lot of trouble with prints sticking, breaking some prints trying to remove them, and damaging the mat trying to scrape it clean.2. Some upgrades included. For example, the extruder has a silicone cover over it where my understanding is the basic Ender 3 just had some type of insulating material. Many people mentioned the Bowden tube coming off and 3d printing some retaining clips but I found those clips already included in the kit.3. Extra tips. I had 5 extra tips/nozzles included but I also think there were 2-3 already in kit as well.Overall, it seems like a lot of small upgrades have been included but still unclear to me if this sits between the 3 and 3 Pro or if this is the top end model. However, the general consensus is the Pro model doesn't offer anything compelling for the price difference.Setup: Setup took me about an hour or so. All the required tools were included. There are several YouTube videos on setting up the machine and I paid close detail to those things (making sure the wheels were tight, the Z screw nuts were loosened to prevent binding, etc. I highly recommend watching the videos and taking your time setting up.I leveled the bed using the paper test method (seeing if a piece of paper slides under the extruder with some resistance). This is a very important step and I spent a lot of time tweaking and adjusting to make sure all 4 corners and the center were level.I test printed the dog on the memory card and it was flawless the 1st try but again I took my time assembling and then leveling the bed plate.Pros:1. Complete kit: tools are included to assemble and a small amount of test filament. It is enough to test the machine works but wasn't enough to complete the shortest pre-loaded print (the dog print)2. Great value: I was amazed how good the quality of prints are for a $200 machine.3. Easy to use. Once you load your object to print onto the SD card it is an easy process to start printing. If you need to stop or adjust something the menu allows for those options. There are even options to pause and resume printing in the case of a power outage or filament change.Cons:1. Test filament doesn't to a full test print. I was able to test print about 80-90% of the dog test print.2. The provided binder clips too small. They're fine for the mat but wouldn't clip on when using the glass. This is a $1 fix buying a larger size set of binder clips at the store.Printable upgrades: I highly recommend downloading some of the printable upgrades. You can look on the thingiverse website or search for Ender 3 upgrades. I added the fan cover along with the open filament arms as some of my first prints. If you filament doesn't feed correctly you're going to have failed prints.Also buy: I bought some cheap glue sticks which I wipe over the work area of the glass bed. This seems to help the first layer to stick to the glass but also makes the entire print easier to remove. Painter's tape is apparently popular as well. I mentioned the larger binder clips already. And obviously have extra filament on hand.3d Printing Process:1. Download a SLT file or design your own in CAD (I use TinkerCAD). This represents a 3d model of what you want to print.2. Import the SLT into a Slicer (I use Cura). The slicer takes in information about the type of printer, the materials being printed, and determines your model needs temporary supports to ensure your overhangs print properly. This then generates a GCode file which is a layer by layer definition of what to print.3. Load the GCode file onto a SD card4. Insert the SD card into the Ender 3 and pick the file to print.Troubleshooting: I'm not a pro yet but these are some common issues I ran into already.1. Base layer misprint. Starting off the printer draws a line on the left side of the bed. If that line isn't appearing and/or doesn't look right you should stop the print. You may not have your material fed all the way into the machine or the bed isn't level.2. Misprint (tangled filament). This happened to me on the first big print I tried. I watched the first few layers go down and went to bed. I woke up expecting to see all my nice printed pieces but instead found a jumbled mess of filament. Upon closer inspection I found the filament spool had layers of filament stuck under lower layers (this is a common thing that can happen) which prevented the spool from unwinding. I found the 3d printed filament arm helps with this but you can also respool the filament as well if needed.3. Sloppy prints. If your prints are stringy, patchy, etc there is a good chance you have some print settings wrong and the printer can't work effectively with the material. Simply load your slicer and verify the settings. (See my note below about TPE/TPU.)4. Low filament. If you catch this early enough you can pause the print, replace it, and resume. I've never tried this instead I look at how much filament is estimated and make sure I have that much plus a safety margin on the spool otherwise I switch spools.Misc notes: You don't see many articles, videos, etc mention the 3X. However, it seems like the printable upgrades and slicer profiles that are for the Ender 3 work on the 3X.TPE/TPU: My first experience with this material (it is flexible material) was it didn't work well. However, because of the playable nature of this material you need to turn retraction off otherwise it gets bunched up when being retracted which causes it to stop feeding. Though in general, you should check your print settings and compare to the material you are printing. This includes your print speed/heat settings/retraction/etc.
Trustpilot
5 days ago
3 days ago
