
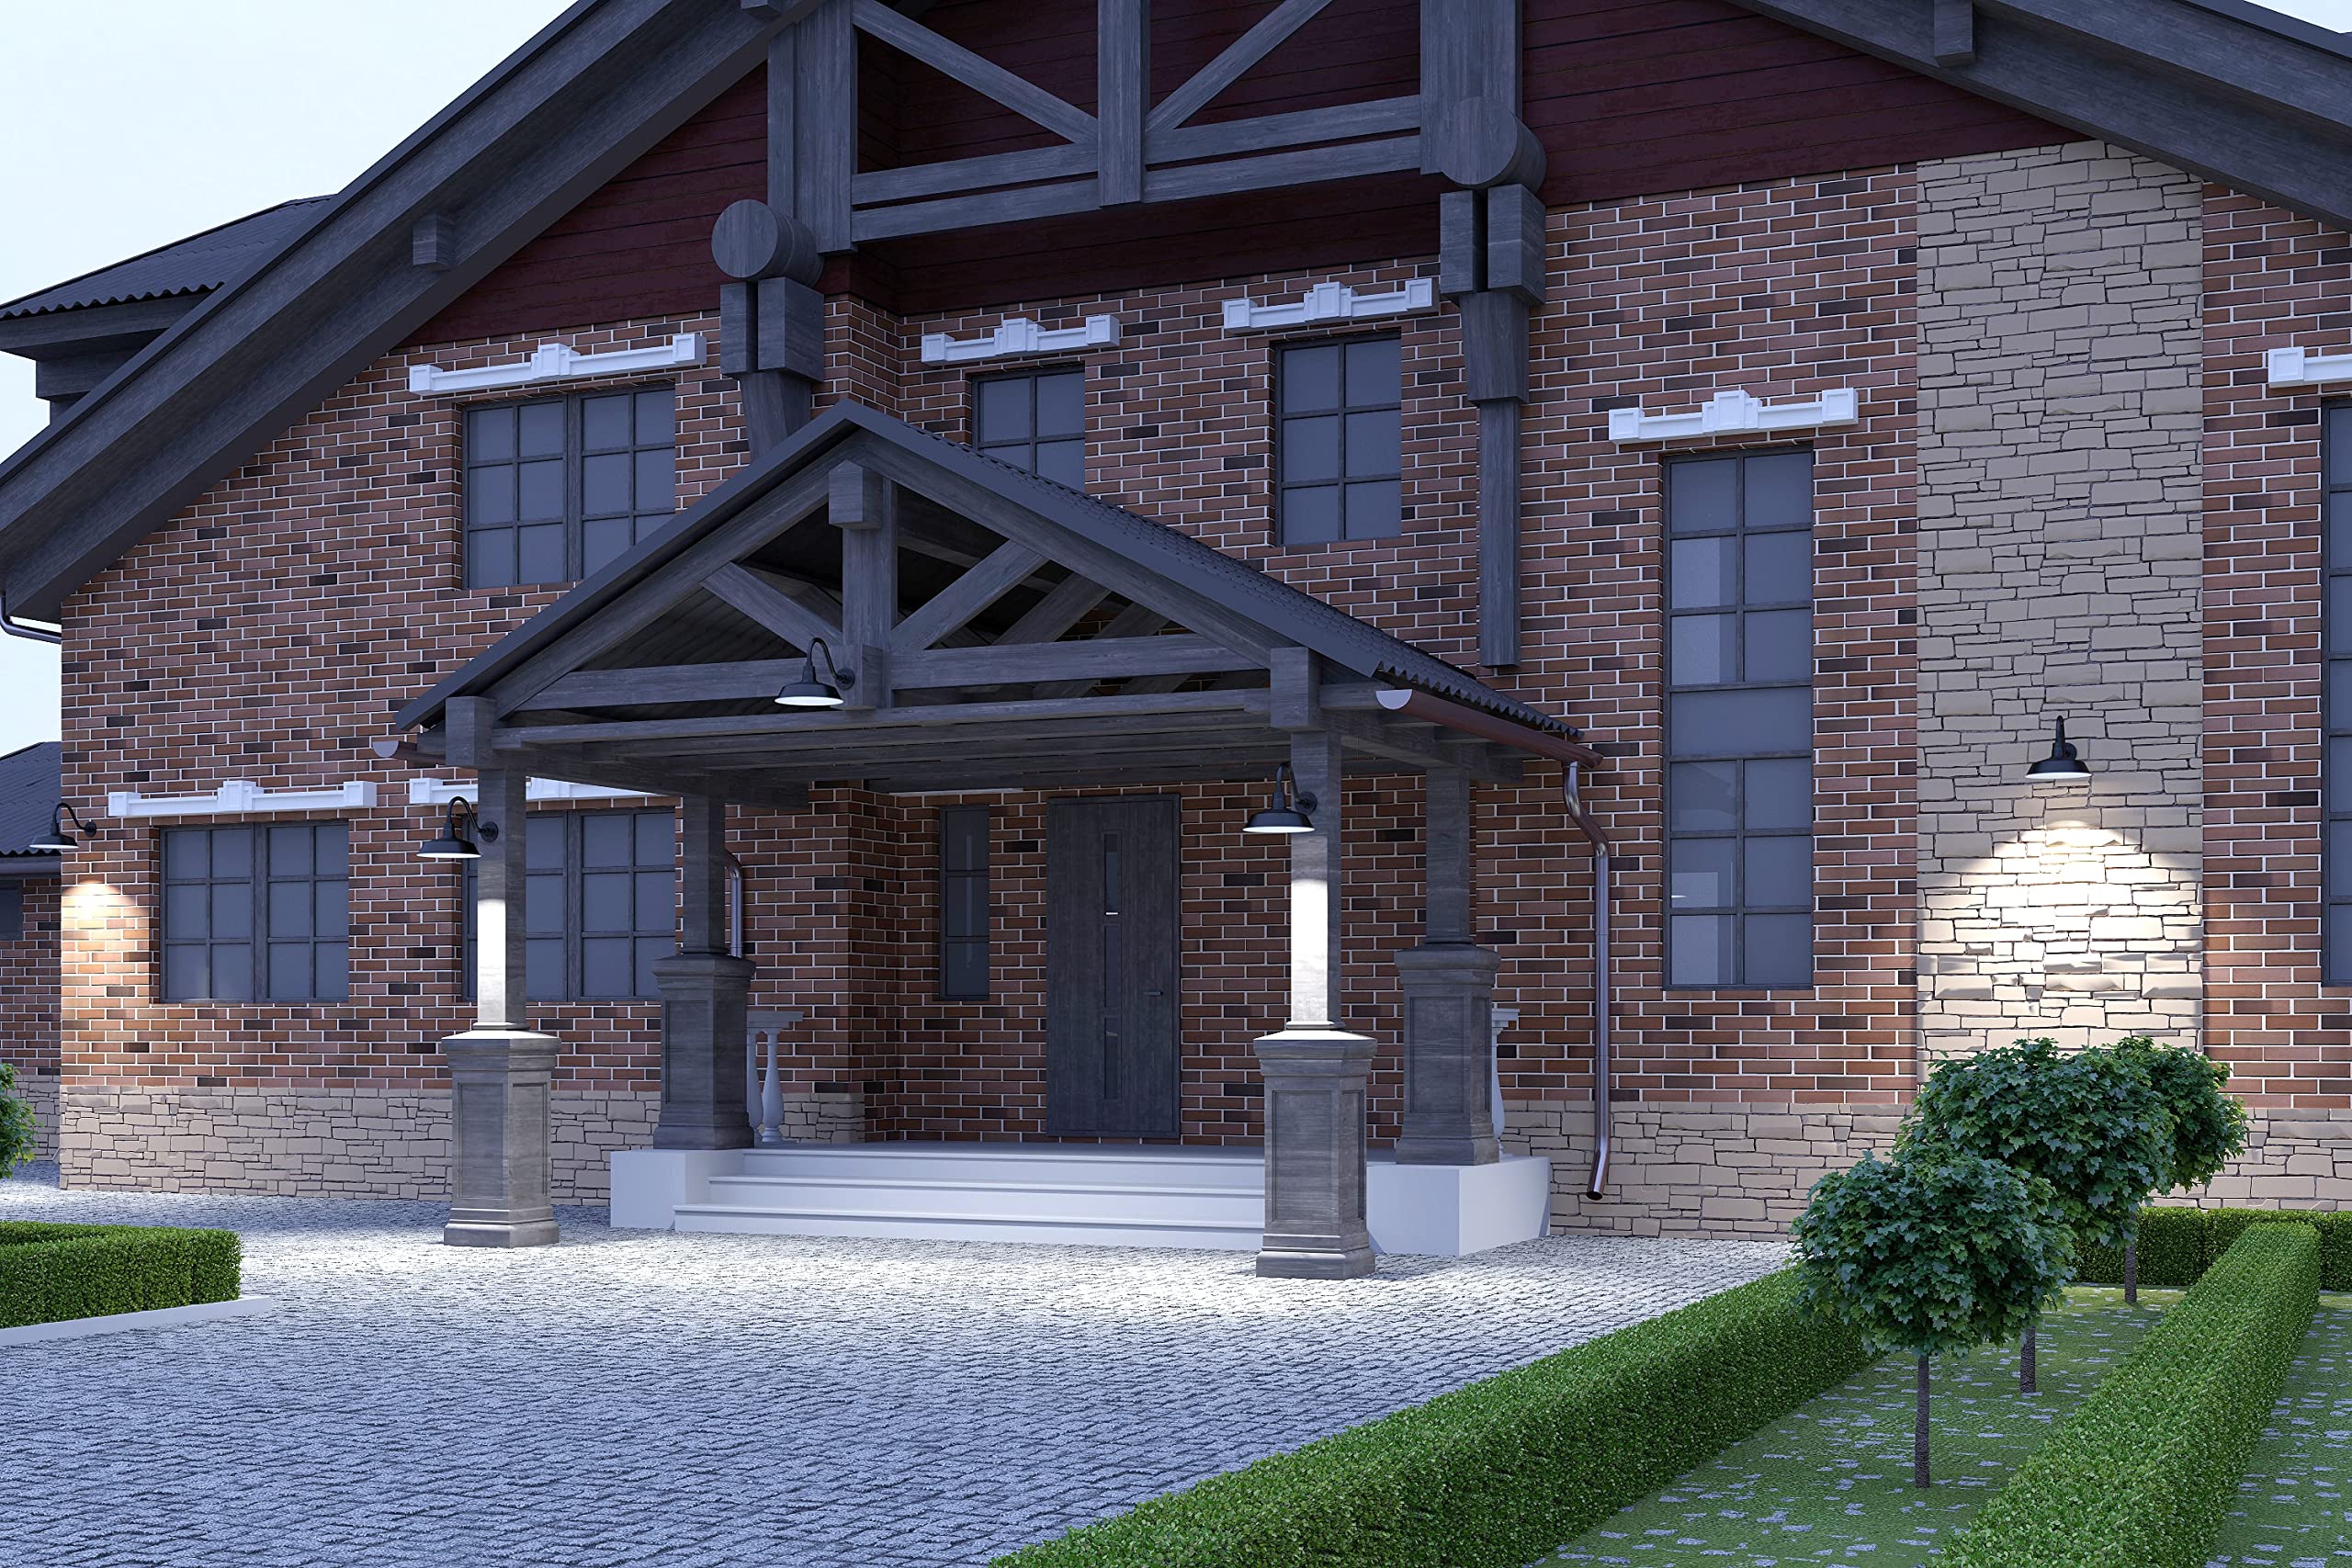
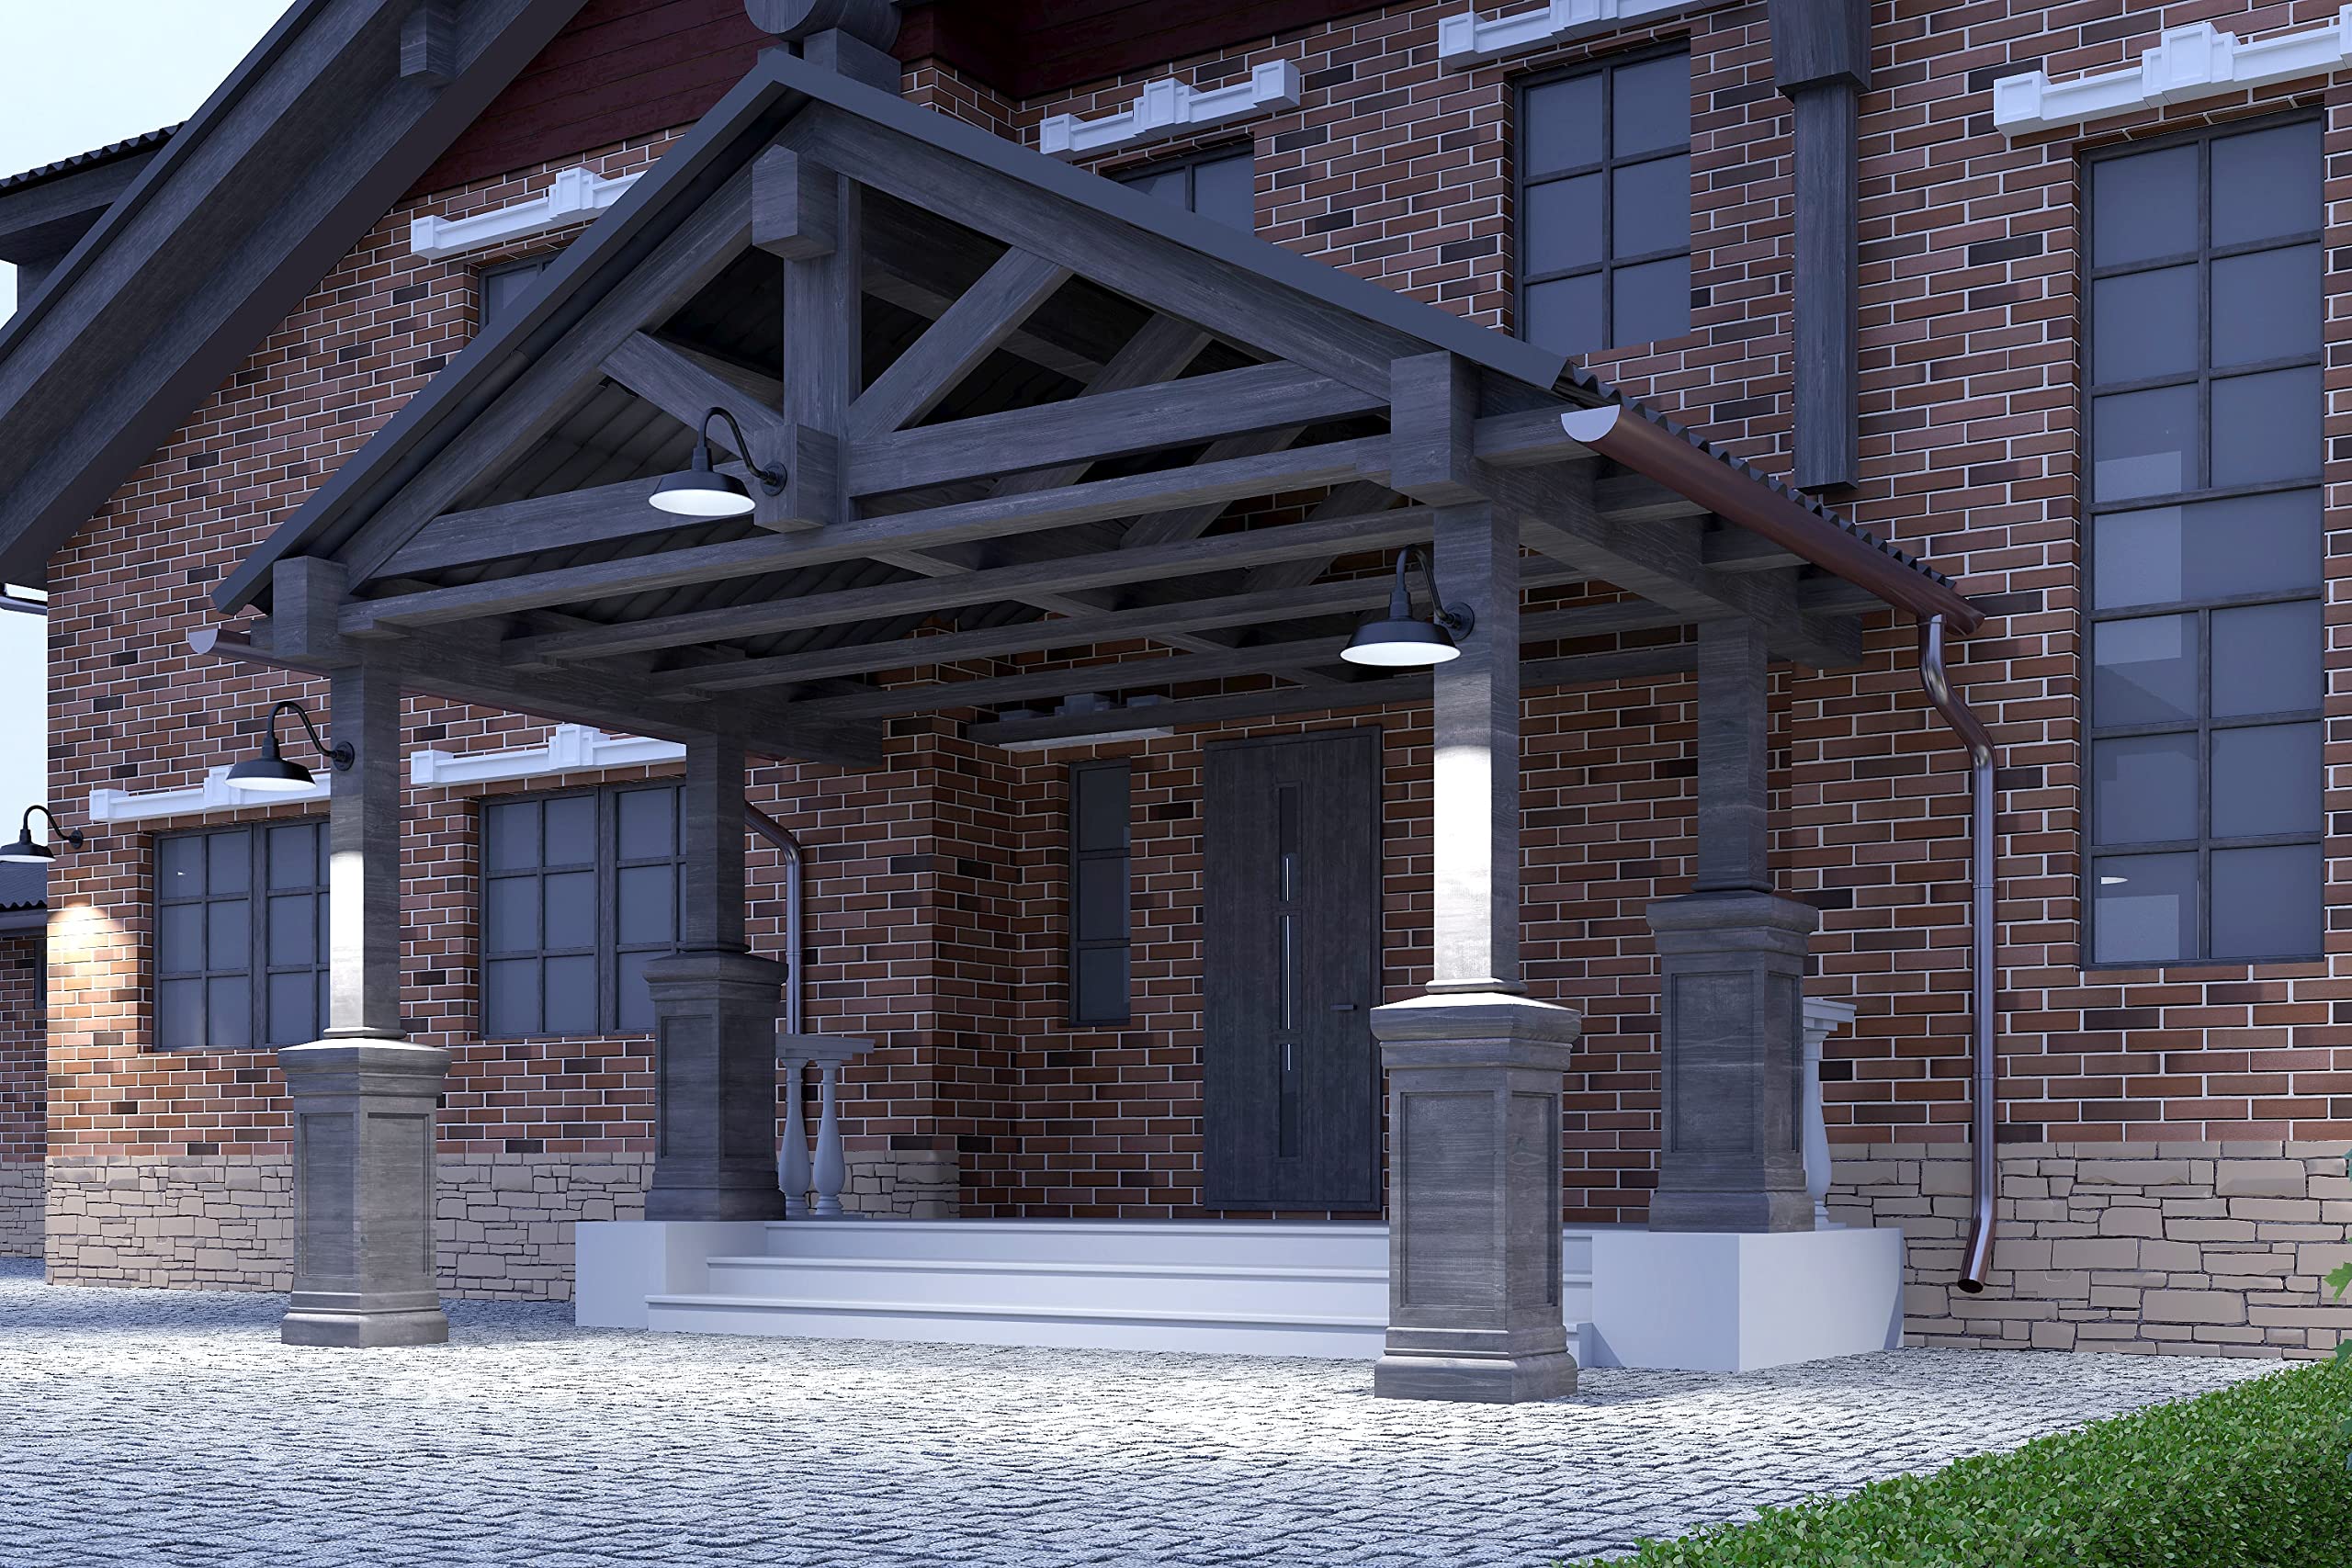


🌟 Light Up Your Life with Vintage Charm!
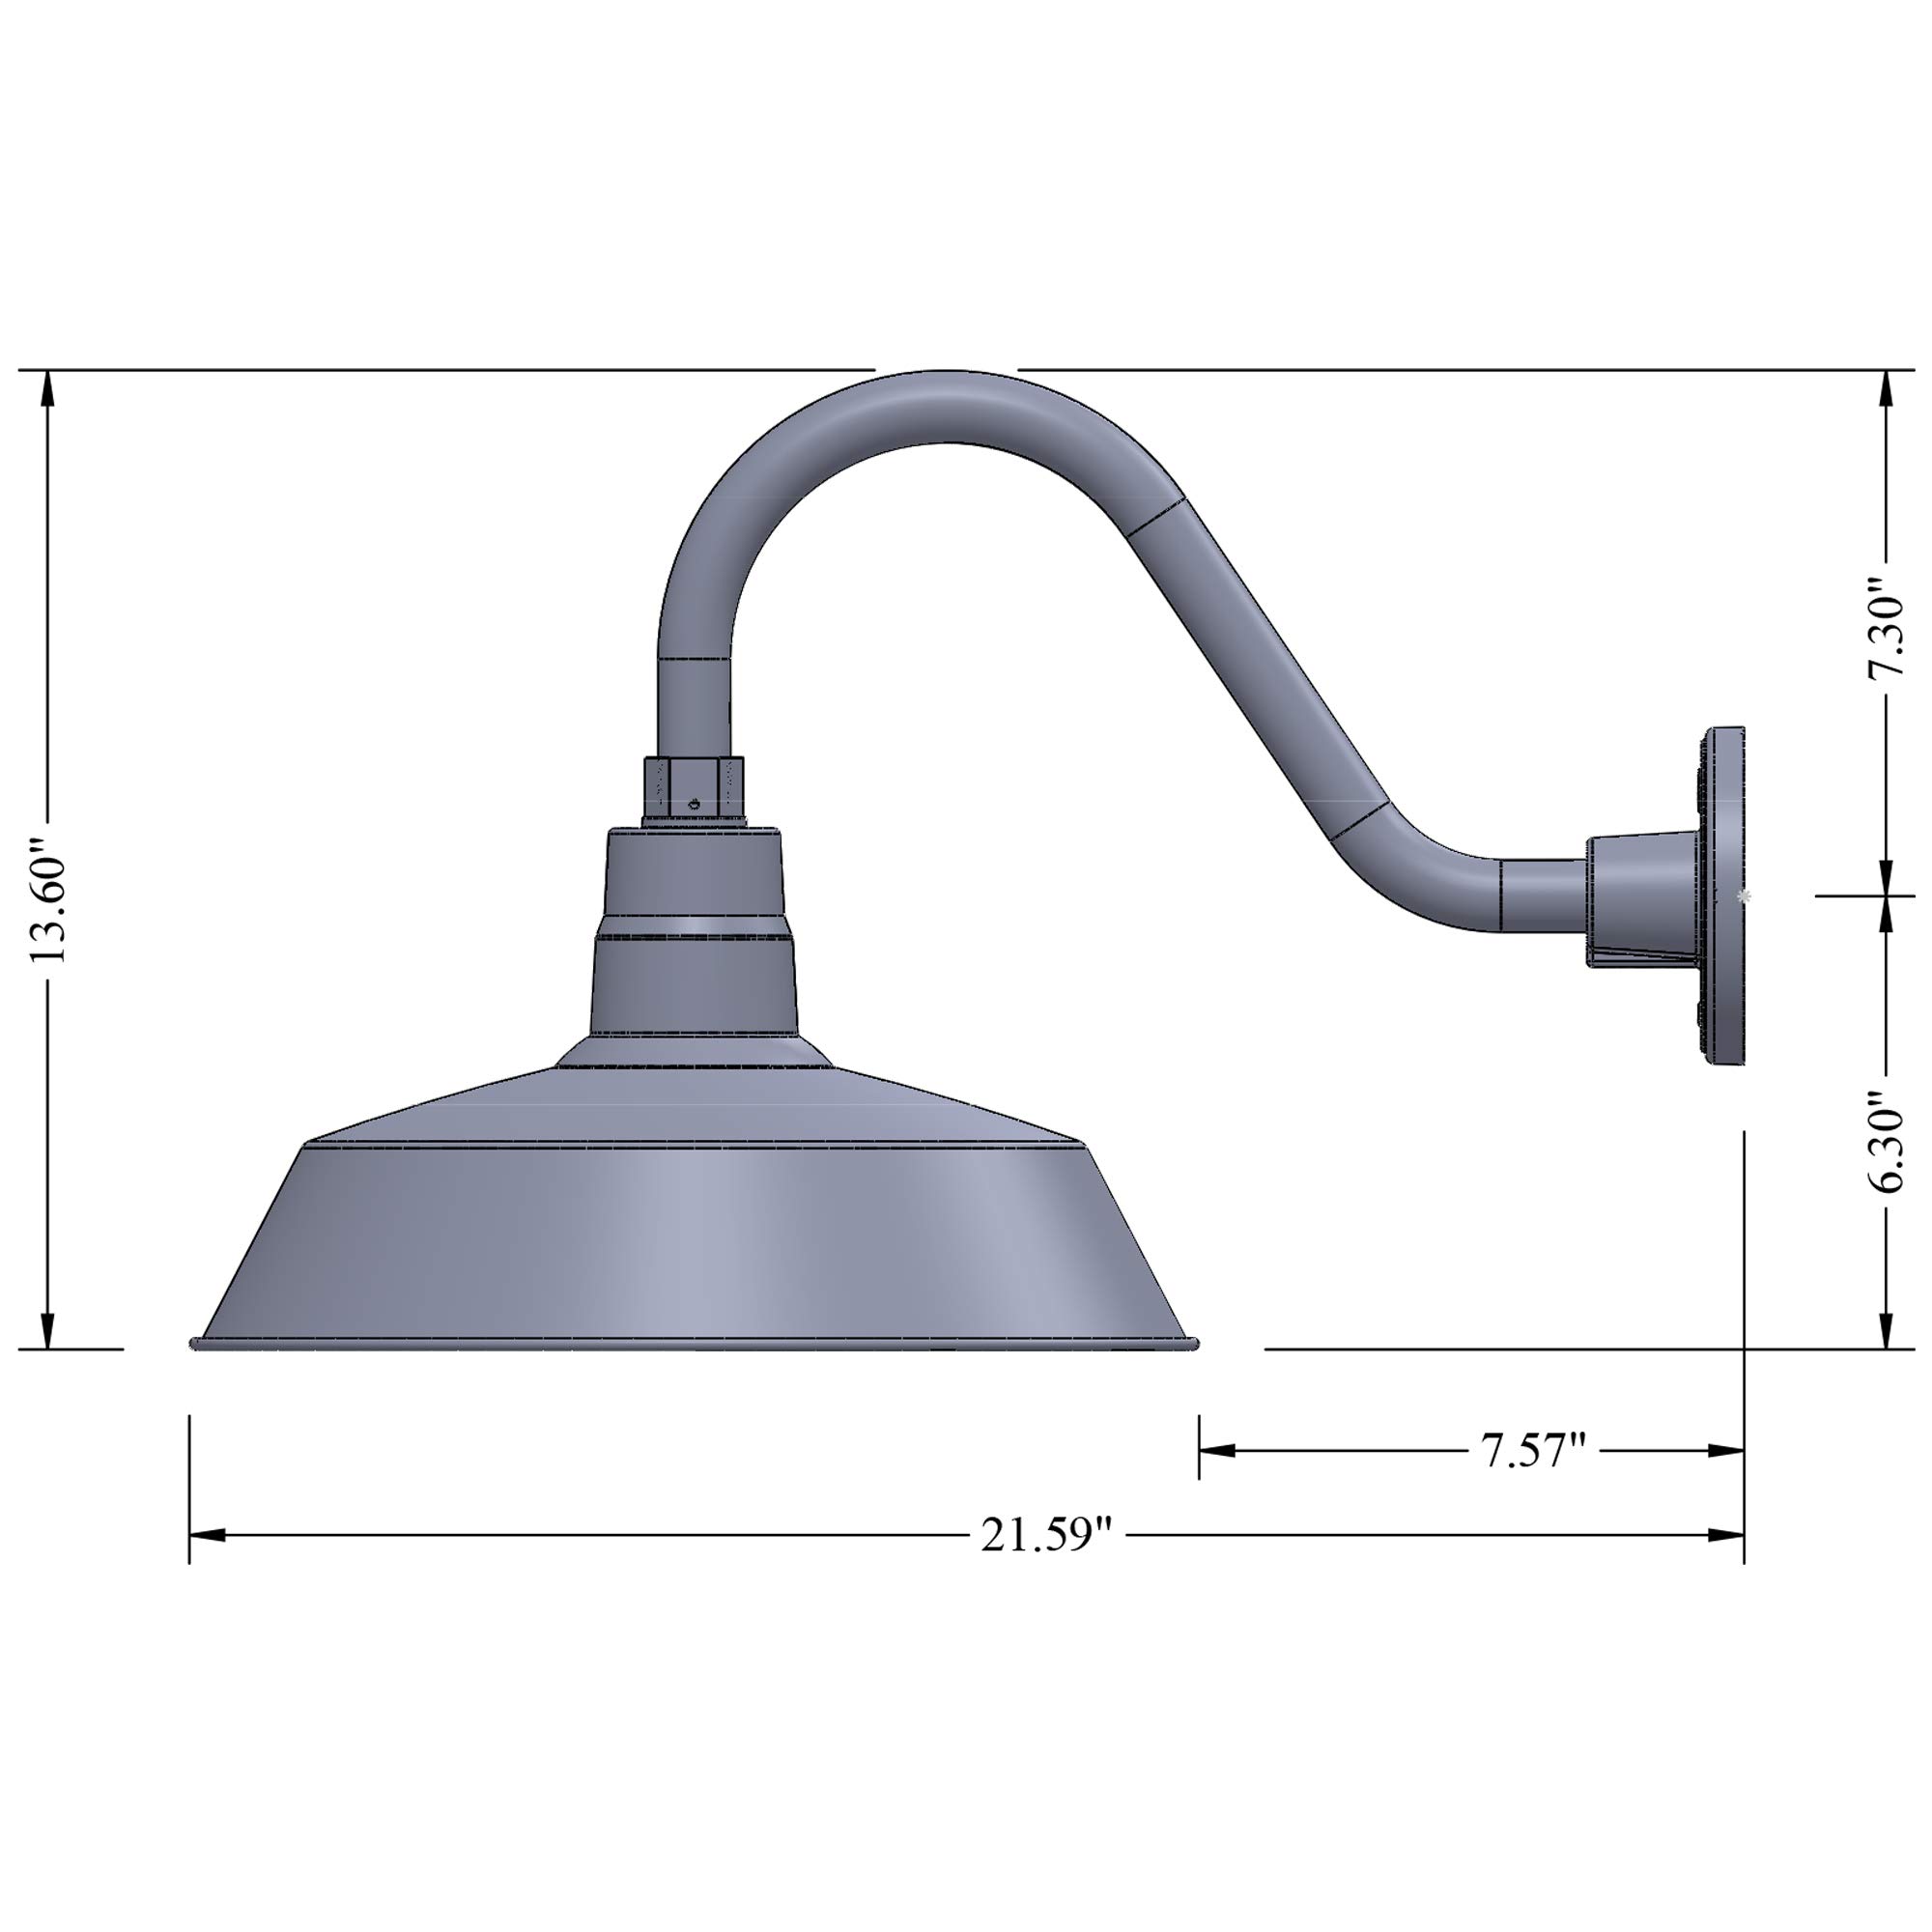
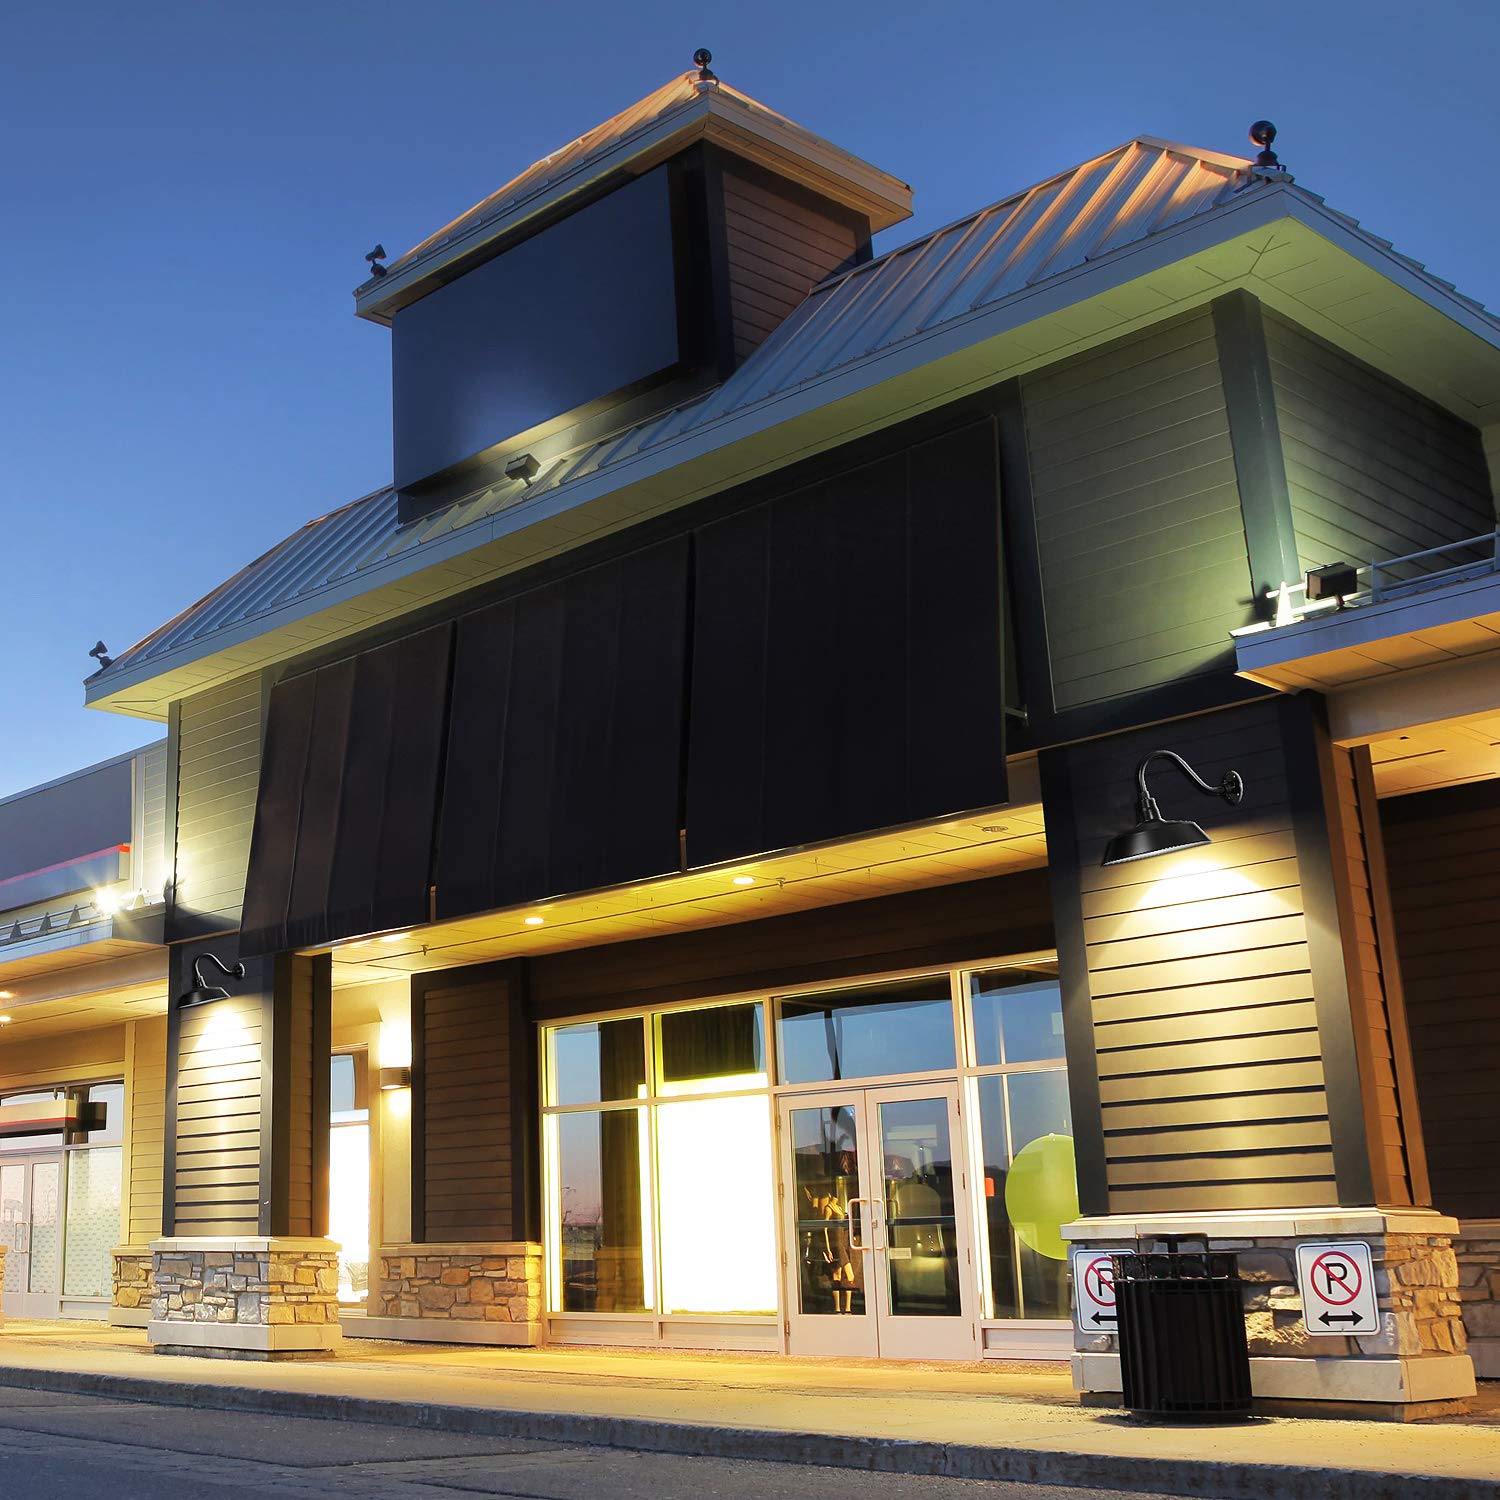
The 14in. Satin Black Outdoor Gooseneck Barn Light Fixture combines vintage aesthetics with modern functionality. Featuring a durable design, this fixture is UL Listed for wet locations and is compatible with various bulb types, making it perfect for illuminating outdoor spaces like barns, storefronts, and awnings.
R**.
Looking Sharp!
We installed two of the gooseneck barn lights over our garage door. They made such a difference to the look of our house! They are sturdy and well built. The installation was relatively easy and the price was easy, too ... easy on our budget!
C**N
Heavy duty in the wind
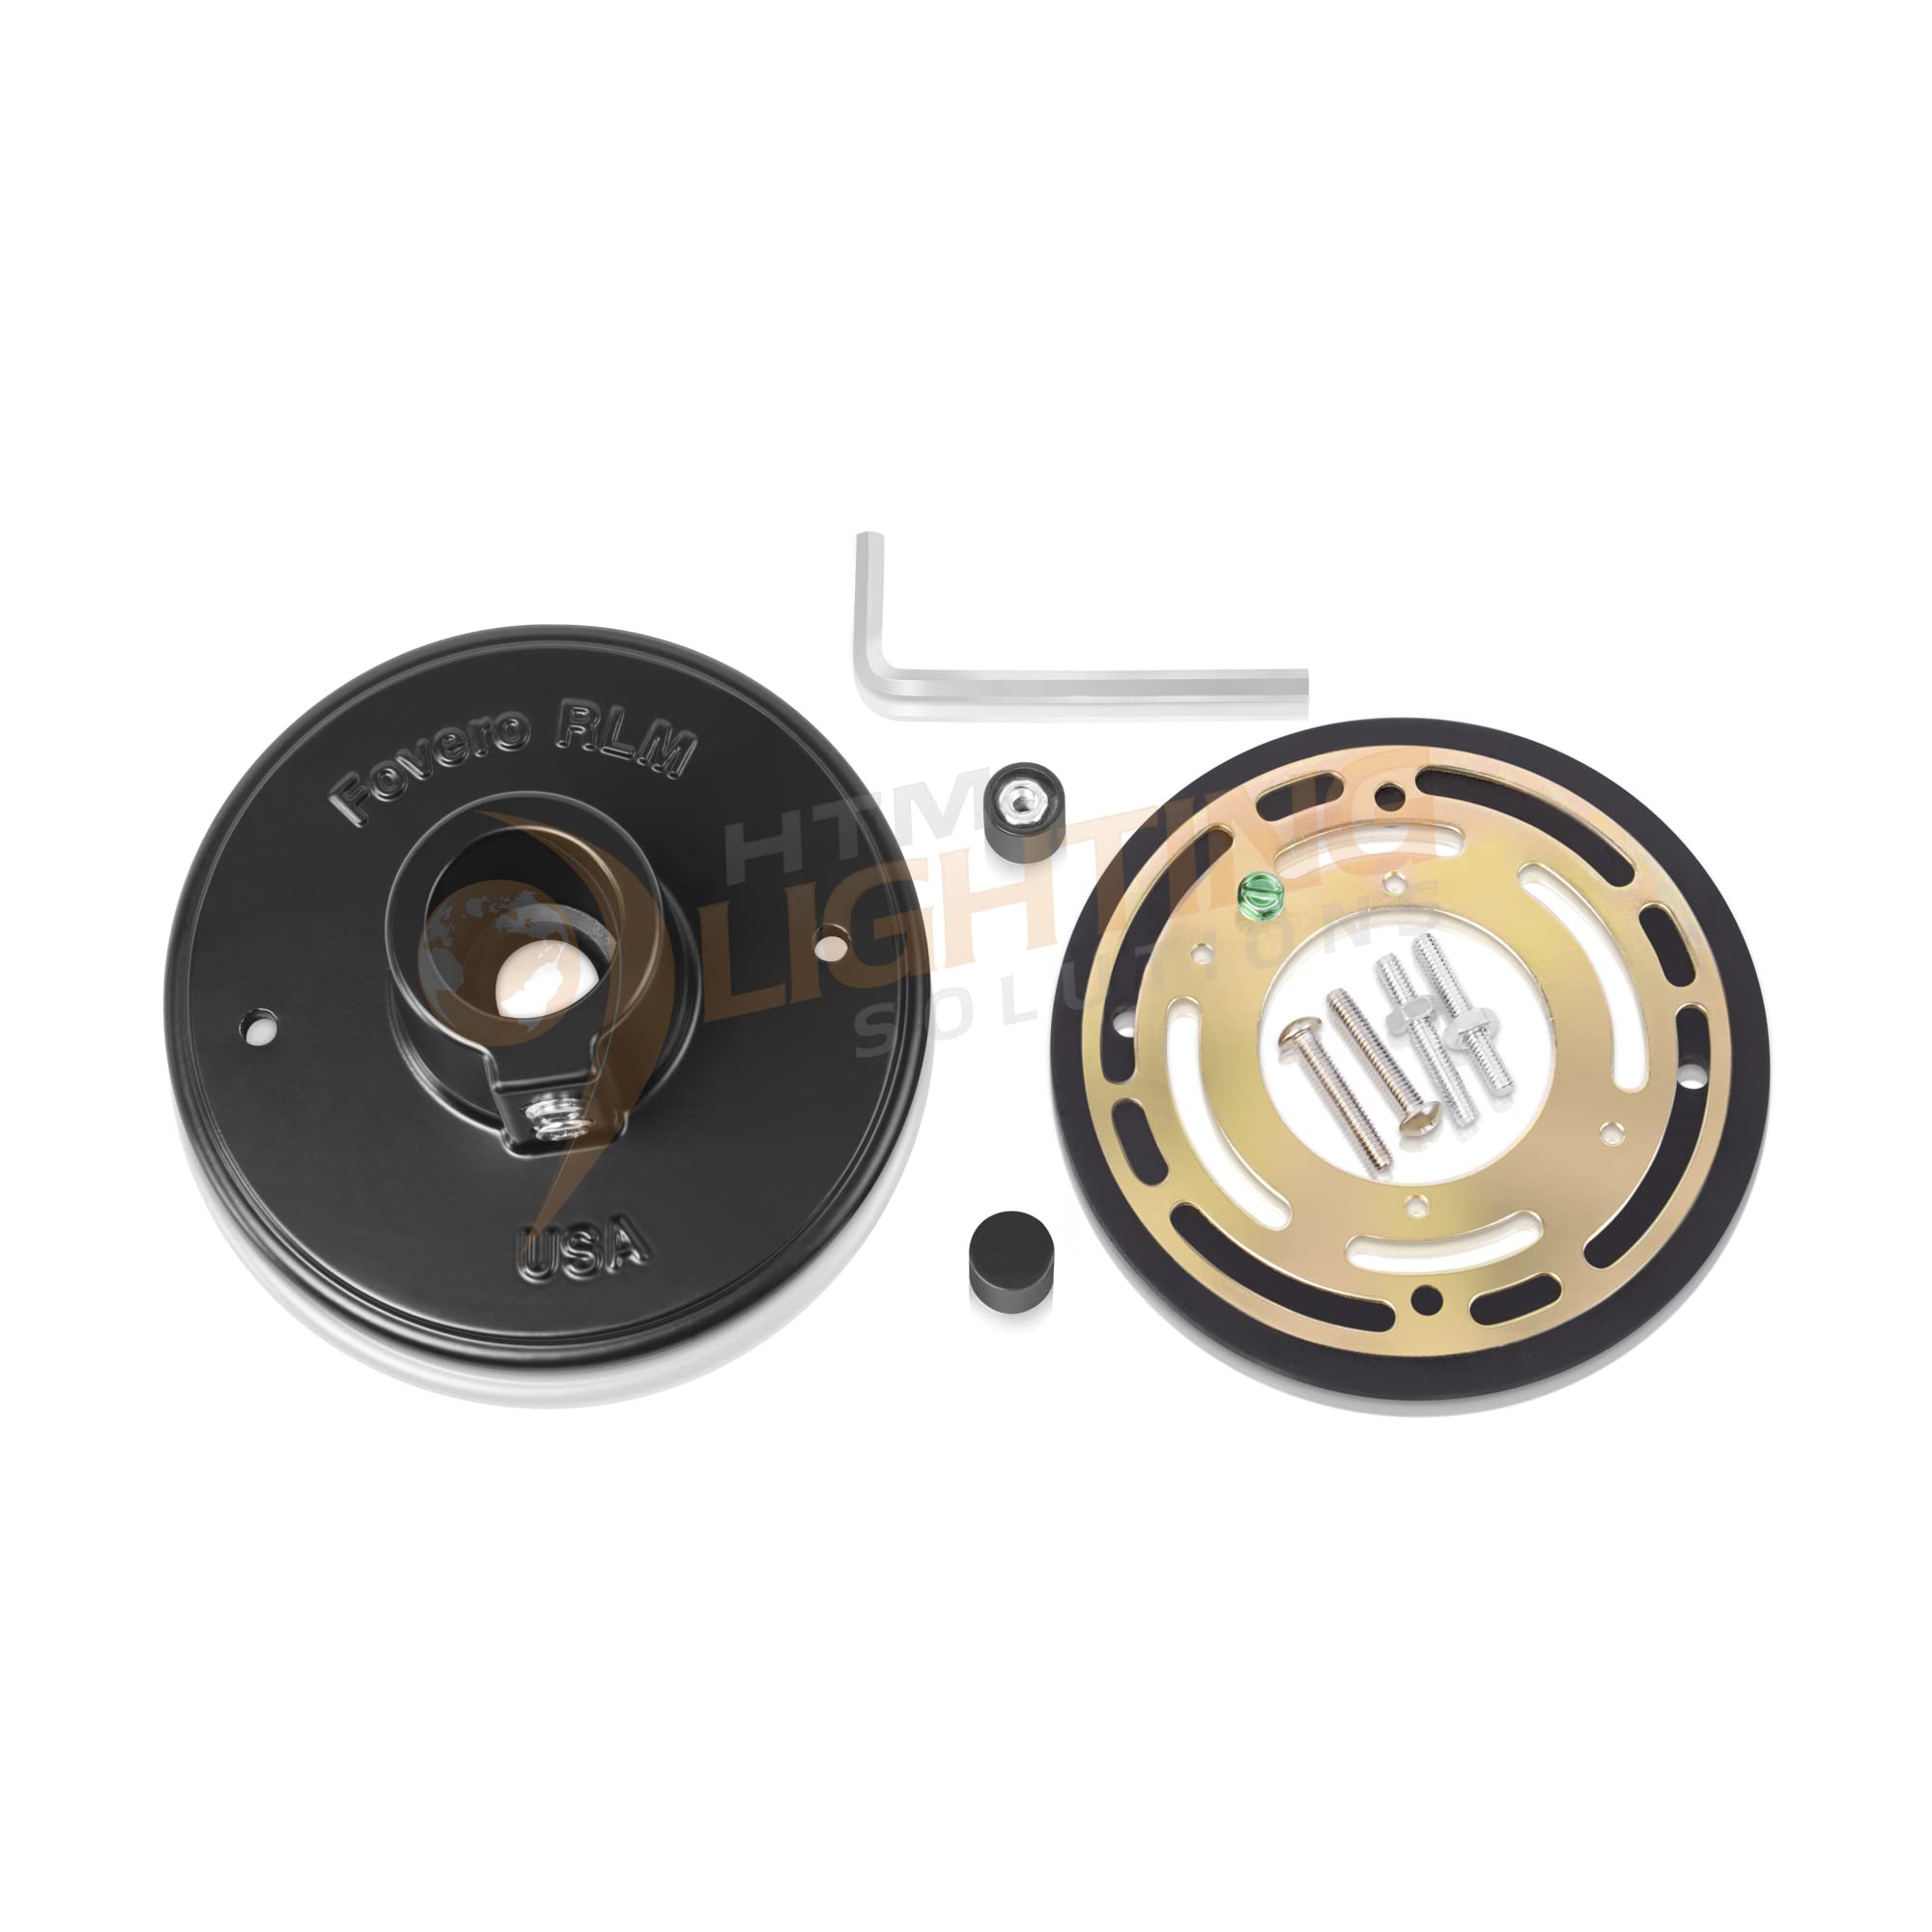
We live in Northern AZ and the wind is very strong from all directions. These lights are mounted on a steel building and replace lighter duty, and weight, lights that rotated in the wind. The pictures show 4 screw bases but now come with 2 holes. One thing to note, these lights are manufactured in China, not the USA as the bases seem to indicate. If mounting on a standard box you'll need 2 #10 x 5/8" screws to mount the base screw plates to the box (not included). You'll also have to trim the #8 screws that mount the under plate to the base. If working alone trim the wires a little long and wrap the ground wire first around the screw. It'll allow you to let the light hang till you get the wire nuts attached. As noted in other reviews, the weather gasket is rubber (nice touch). Don't forget to thread the wires through it before mounting the light. Ask me how I know. While the pipe from light to base wiggles a little in the base, it'll be fine one you tighten the two set screws on the bottom. One final note, use a 2' level to make sure the screw plate that mounts the base, and the light itself, is level.
J**O
Well made
Seems like light has good construction and easy to assemble but of course it’s made in China so I will update review after a year of it being outside and see if it’s still up and working. Up over a week now so far so good.
M**L
Nice LIghts BUT, Confirm You have the Hardware Needed Before Installing!
Hello, here is my review of the 14in. White Outdoor Gooseneck Barn Light Fixture with 14.5 in. Long Extension Arm - Wall Sconce and why I only gave it a 4-Star rating.You'll notice in the pictures that my lights are green, not white. I bought the white ones and painted them the same color green as the trim on my workshop so they matched. I'll see how they hold up, but that's the reason for the different color. HTM currently doesn't offer these lights in green, though I sent them a request to add that color in the future as many buyers like the green.I purchased a 2-pack of these lights to install on the exterior of my metal workshop. My plan was to simply remove two old and broken motion lights and install these on the existing round metal surface-mounted weatherproof electrical boxes. Sadly, an installation that should have taken only 30 minutes including the removal of the old lights, took longer because of two simple things that never should have happened.The pictures of the mounting plate shown in the Amazon listing are not current and lights did not come with the correct screws needed to attach them to my electrical boxes. There can be no easier installation than what I was attempting, yet, in my case, old pictures and missing screws resulted in lost time.Specific things potential buyers of this light need to know as of today:1. The pictured light in this (and other HTM listings) show 4 holes in the base-plate for mounting the light. NOTICE: The lights currently shipping only have 2 holes in the mounting plate. HTM confirmed this in a phone call I made to them. If you need 4 holes. to mount the light, be aware of this.2. The kit now also includes additional hardware needed to mount it with only 2 holes. The pictures don't show the additional hardware but it comes with a bunch of screws and some brackets that aren't shown in the listing. HOWEVER, the one thing the hardware kit was missing that I needed was the screws to screw the light directly to a standard weatherproof box like I have. Had those screws been included, I would have been golden. Because they weren't included, I searched for over an hour for the matching perfect length screws in the right threads and size so I could secure the lights to the boxes. I was fortunate to have a very large collection of spare screws yet I still struggled to find the right ones. For many people in this situation, you should plan a trip to the local hardware store for the screws you need before attempting to mount the lights. Would the additional hardware now provided in with the lights allow me to mount the light without the screws I was missing? No, the hardware kit still had no screws to attach the brackets to the boxes.In spite of the screw problem, I'm really glad I bought them. They seem to be well-built, they assembled easily, they are very strong and they look very nice once they're in place.Before posting this review, I contacted HTM both by email and phone to provide them feedback around this review. They replied to my email and immediately answered my phone call and seemed genuinely interested in my feedback. I'm hoping they will address what is needed soon, in the meantime, you know what I know now.Take Care!
C**S
Seemingly high-quality, Sturdy, Packaged Well, Installation...well...Read My Comments
So I really like the style of this exterior light fixture. The quality seems very good it’s very heavy duty, the packaging was great everything arrived safely, and it’s really straightforward to assemble the fixture itself. I was really curious to see how installation to the house was going to go, since a lot of reviewer’s said it was a snap, but then there were a few people that said it was almost impossible.It all comes down to the size of the electrical box you are attaching the light to. This light feels very industrial in build quality so maybe it was designed to go into a commercial building which may have a different size electrical box as a standard I’m not sure? For me however I did have a round box which matches the attachment at the back of the fixture, however the holes in the plate on the light were I believe 4 inches apart whereas the vertical holes on my electrical box top to bottom were somewhere around 3 inches and the horizontal ones left to right were somewhere around 3 1/2 inches. If the holes in box I have would’ve been further apart than the holes in the fixtures plate I imagine I could’ve used an adapter but because the holes in the plate were wider than the holes in the actual box the official way to do this would’ve been to put a new box in by drilling a larger hole in the siding of my house to accommodate the larger sized box. Because that task was slightly above my comfort level of electrical work I opted to go a different route that did work but not sure it’s the best solution for everyone. I decided to simply measure the hole placement of my electrical box and transfer those measurements to the lighting fixtures plate and drill new holes in the lighting fixture plate. It was a little tedious but worked just fine. It took me about 3 1/2 hours to do three fixtures with some interruptions. Had the plate matched my electrical box it probably would’ve taken me less than an hour. My lights are fairly protected from the rain but I’m still going to use a black caulk or silicon to fill in the original holes to keep them water tight. So other than the insulation issue everything else is great. The only other small thing I would’ve changed if I was designing this light as I would’ve made the screws the same color as the light so that you don’t have silver screws on an all black light. I’ll probably toss some black paint on the screws or use a black sharpie or something just to make them blend in better although you really can’t see them even being silver unless you’re really trying to look for them. The instructions do call for some waterproof silicone or glue to create a watertight seal of the fixture where it attaches to your house, I think if your light is fairly protected like mine is with an overhang you don’t really need to worry about that, it does come with a rubber gasket and if you want to be extra safe you can add an additional foam gasket that you can pick up on Amazon for a couple bucks. When you’re assembling the light you screw the saucer section to the gooseneck and I did use some Teflon plumbers tape on those threads just to be extra safe as a water tight seal. I just wanted to write this because there are conflicting reviews and I can see how both reviews could be right (the good experiences and the bad experiences) it all depends on the size electrical box you are attaching this to. Other than that it’s super basic easy installation. Oh thought of one last thing. You can’t tilt this fixture so if your house has siding that has a slight angle the fixture will be angled ever so slightly as is the case with our house, didn’t bother us though.
Trustpilot
2 days ago
2 weeks ago
