

🧩 Elevate your craft game with the ultimate sewing command center!
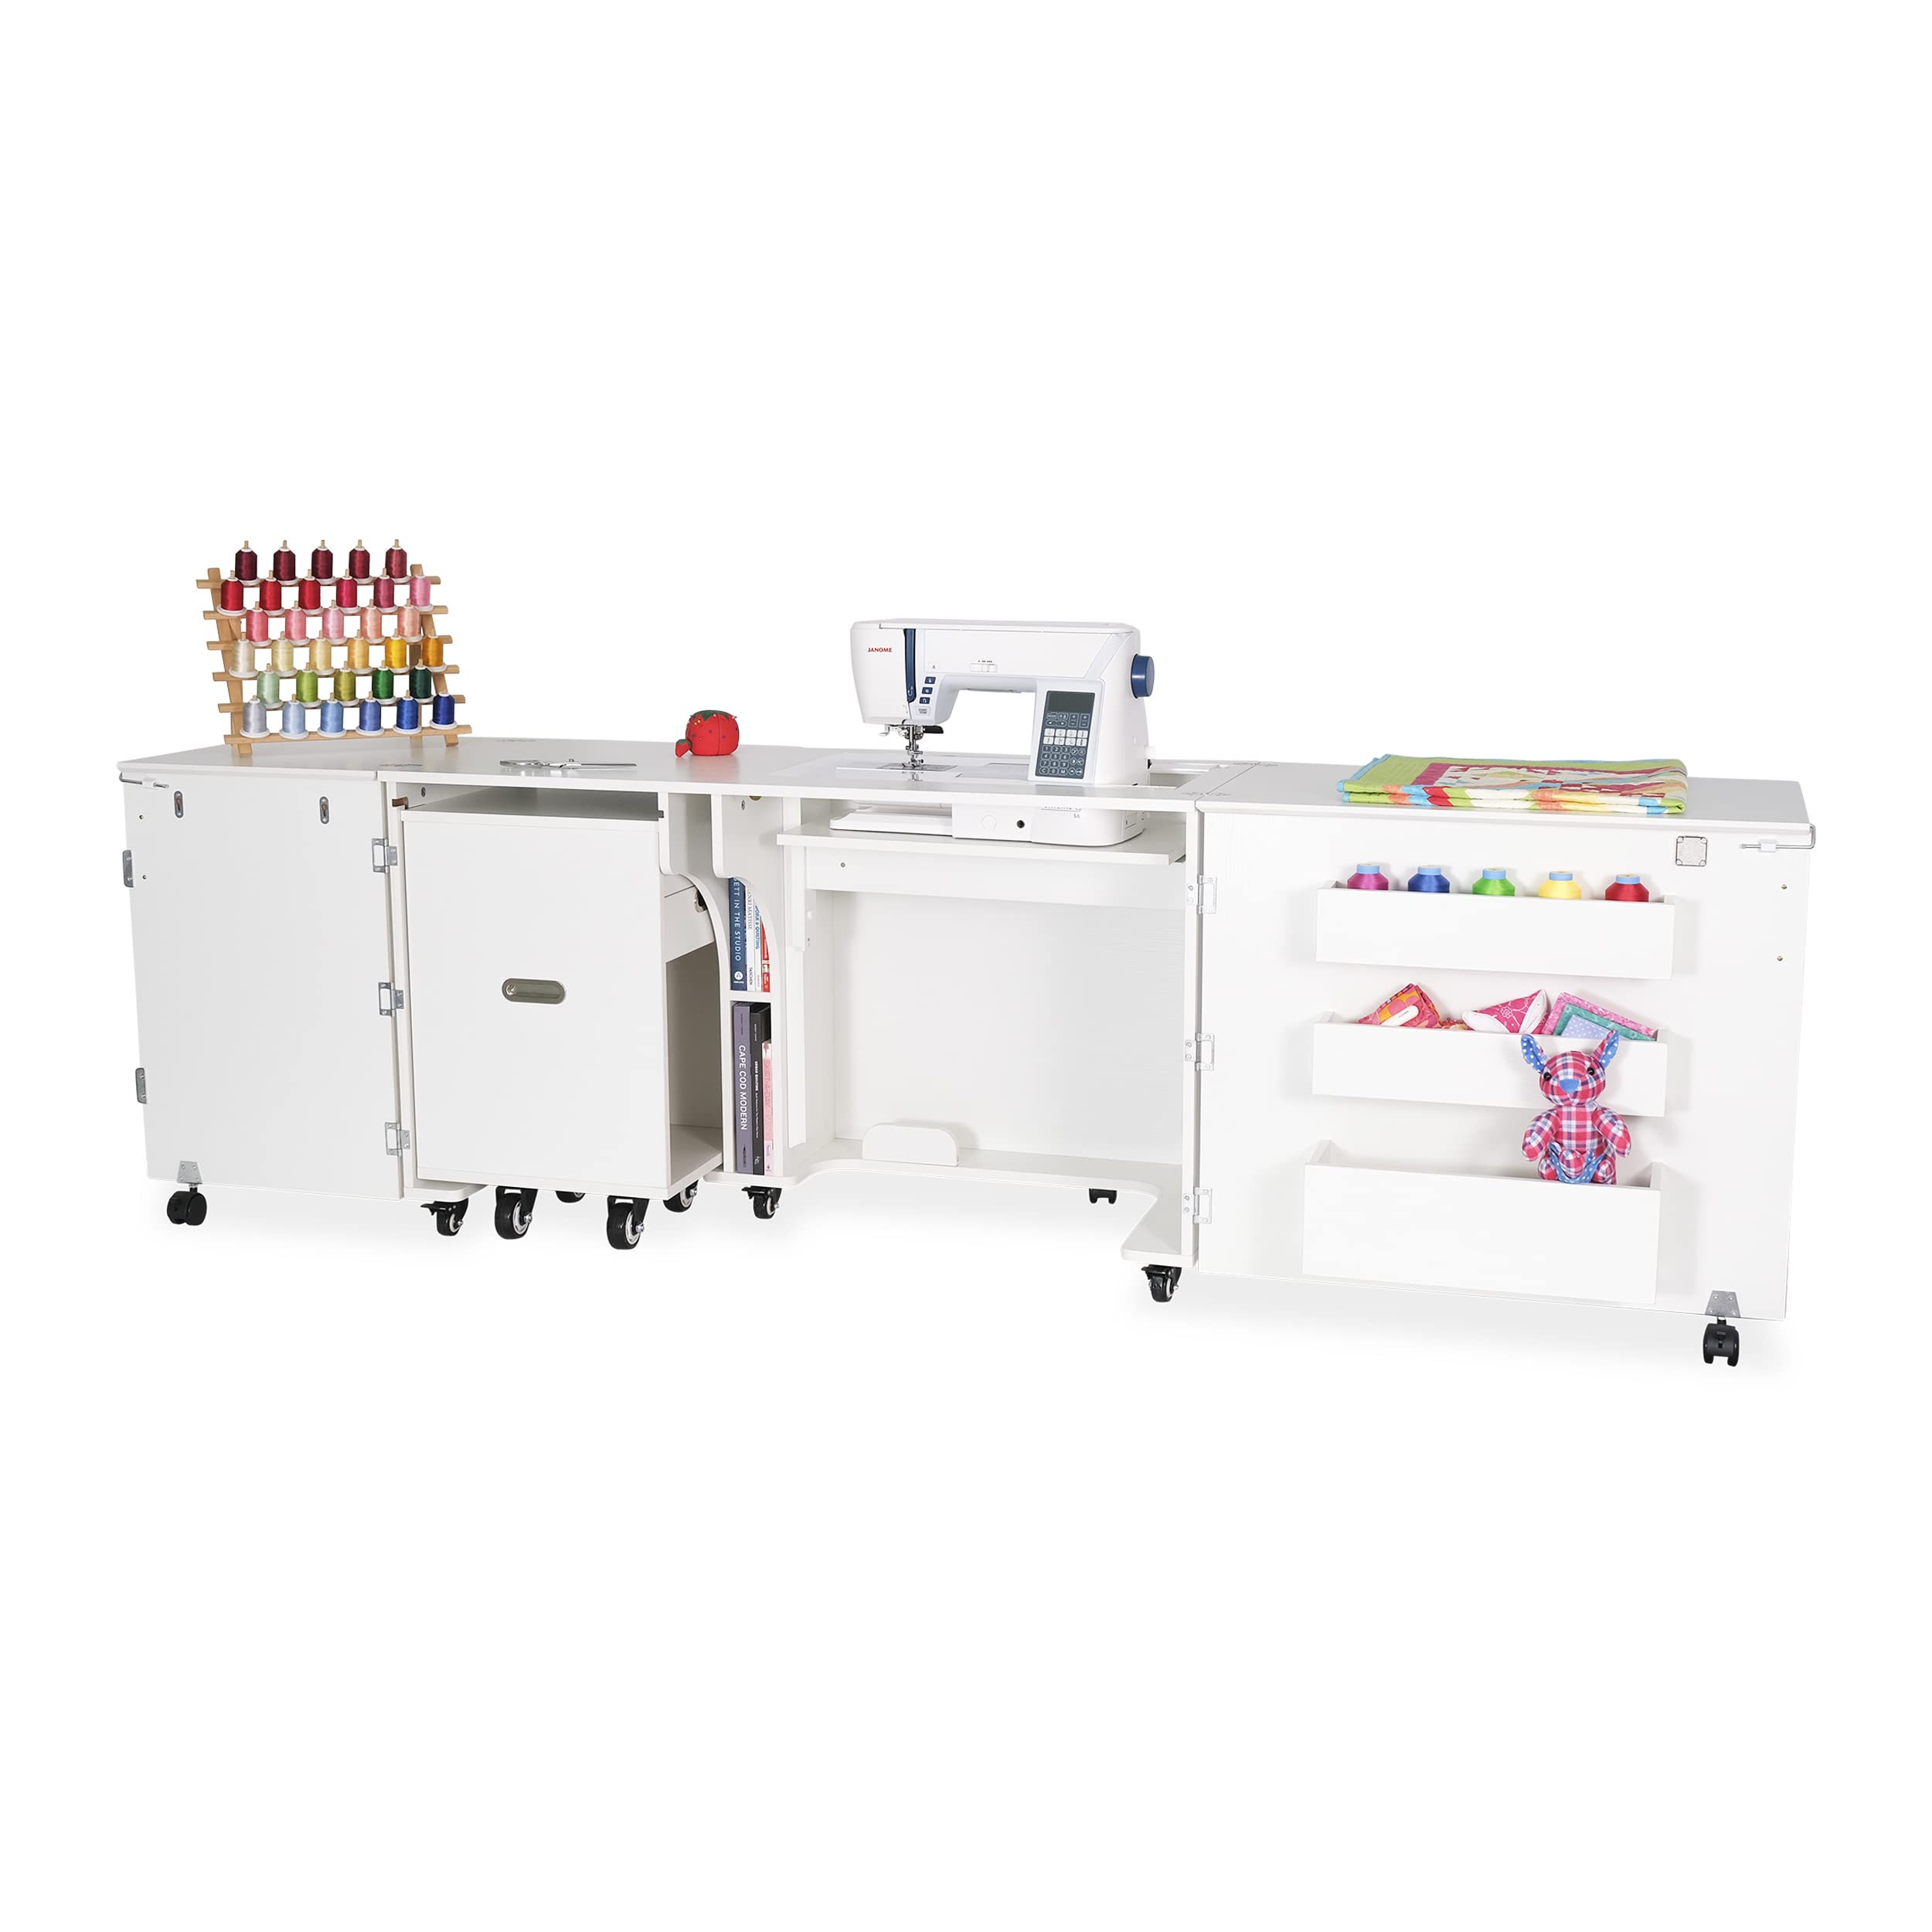
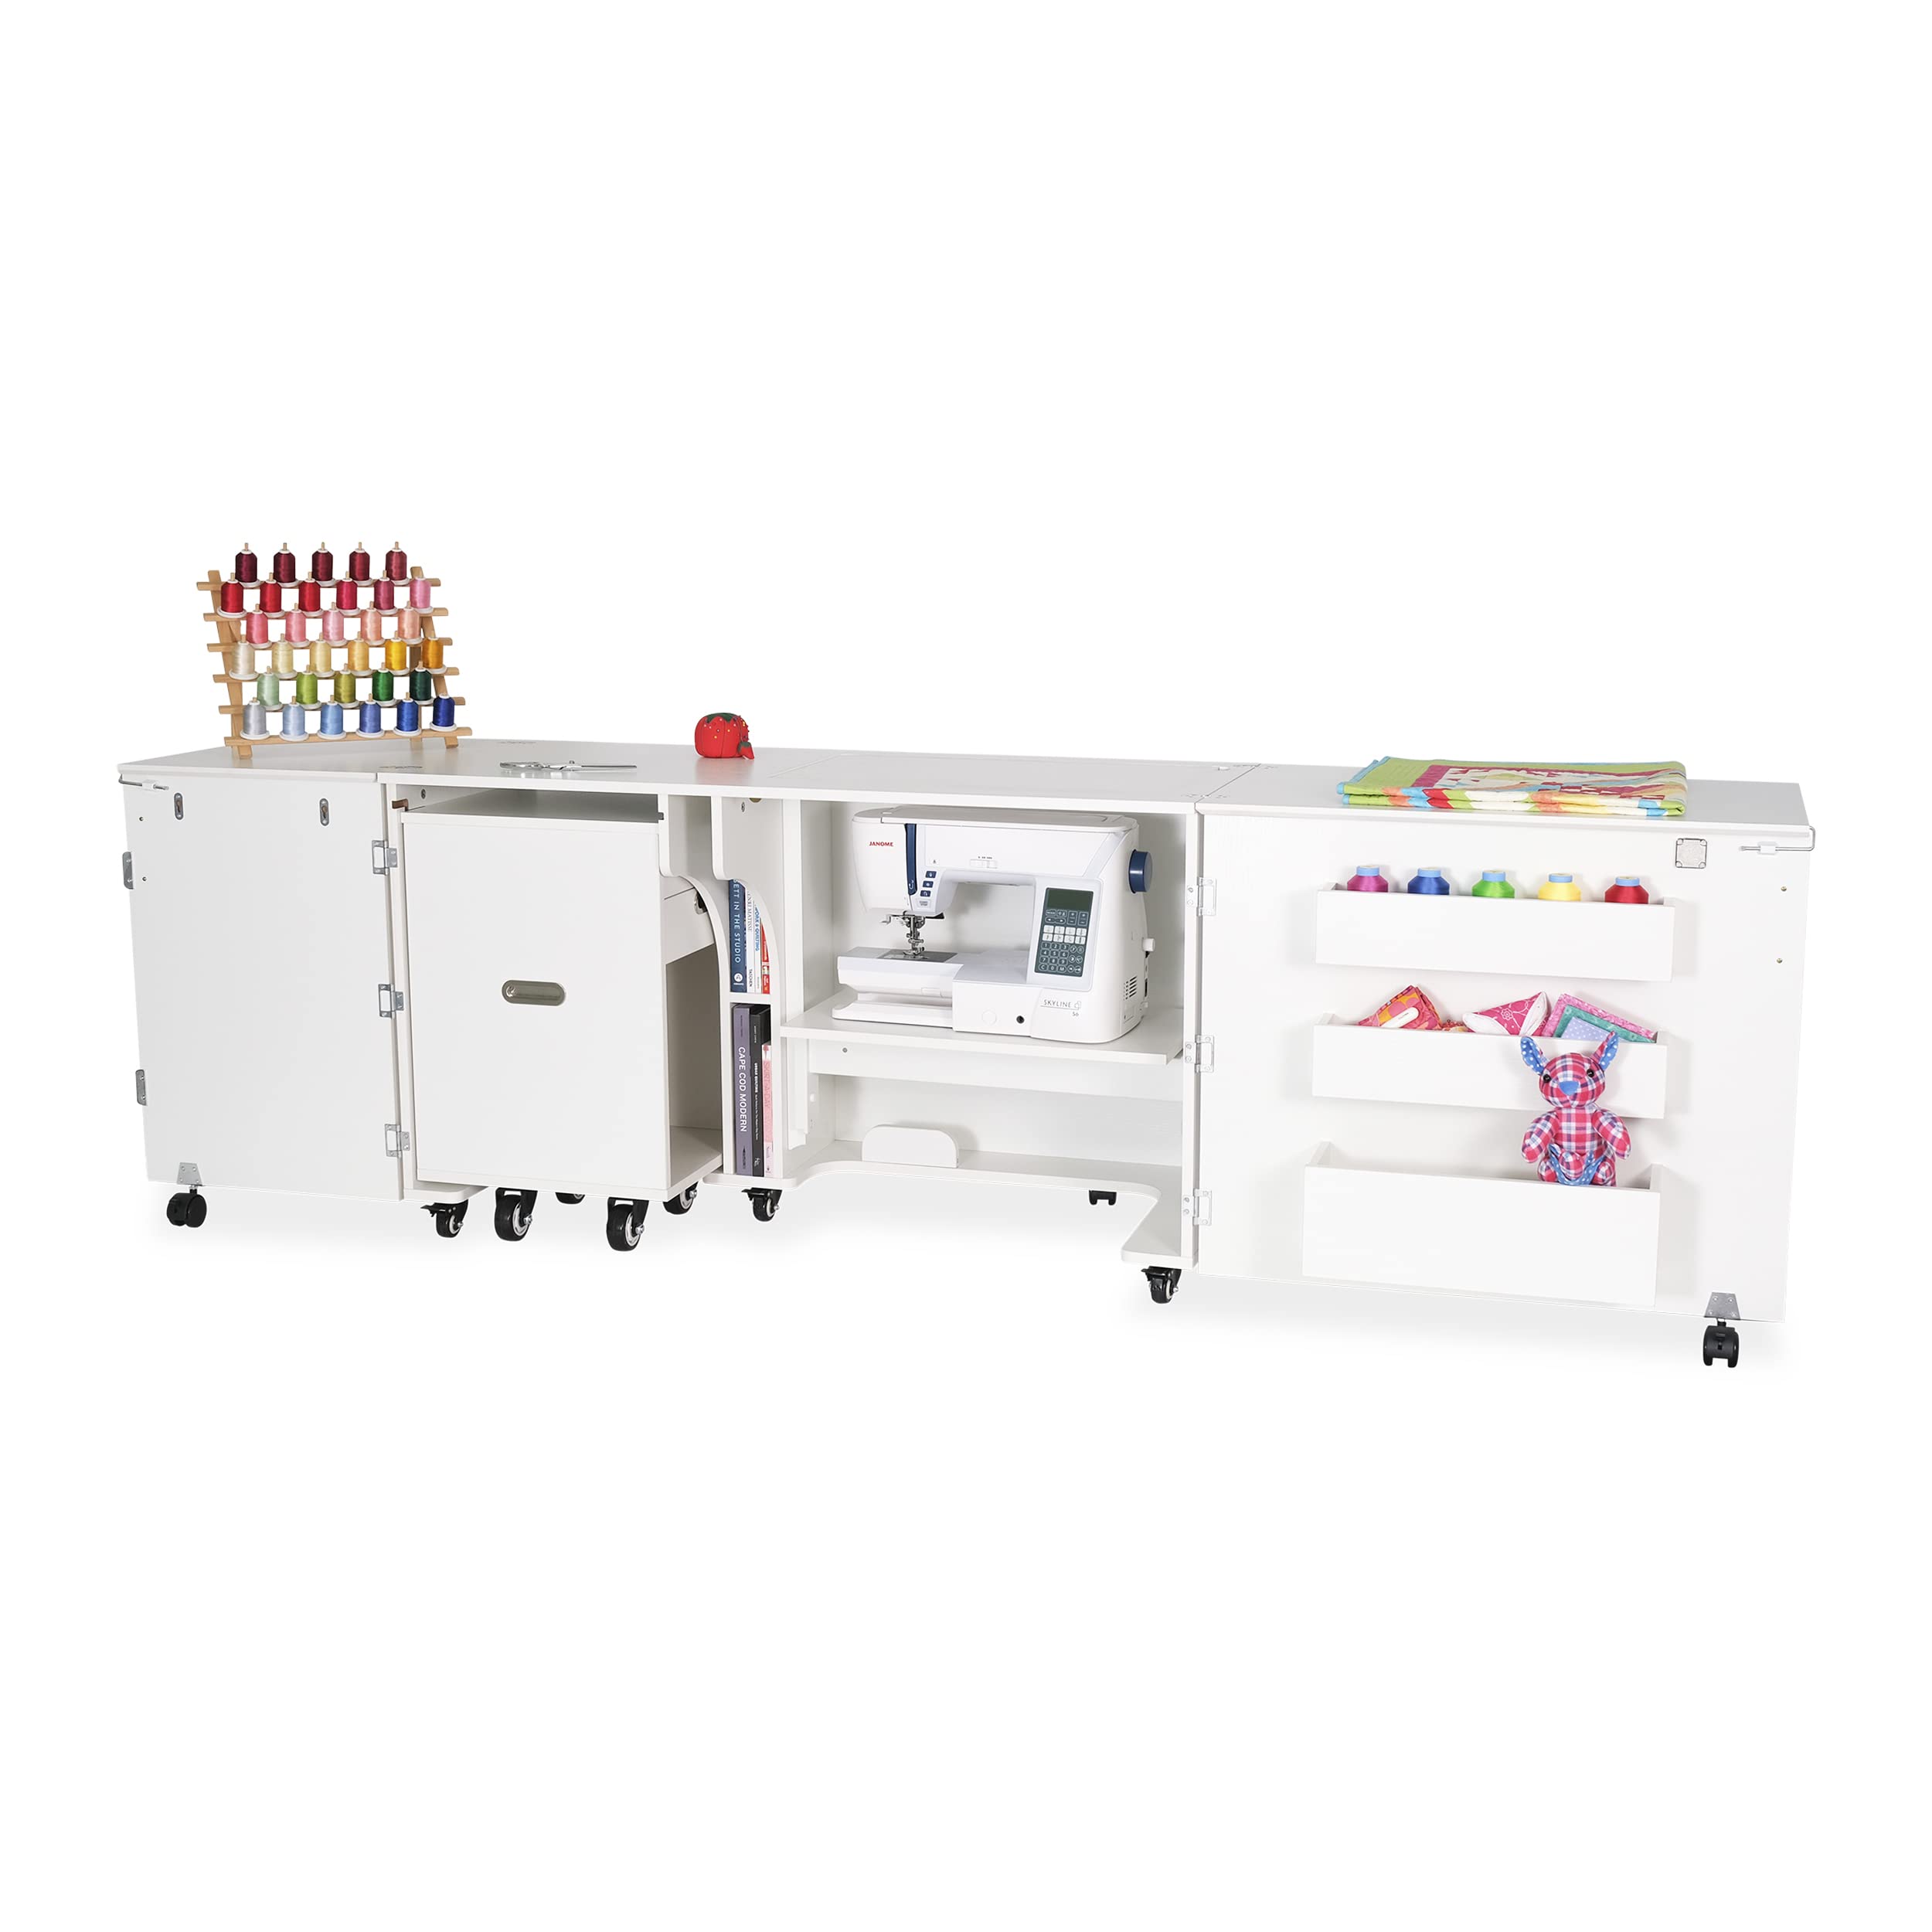
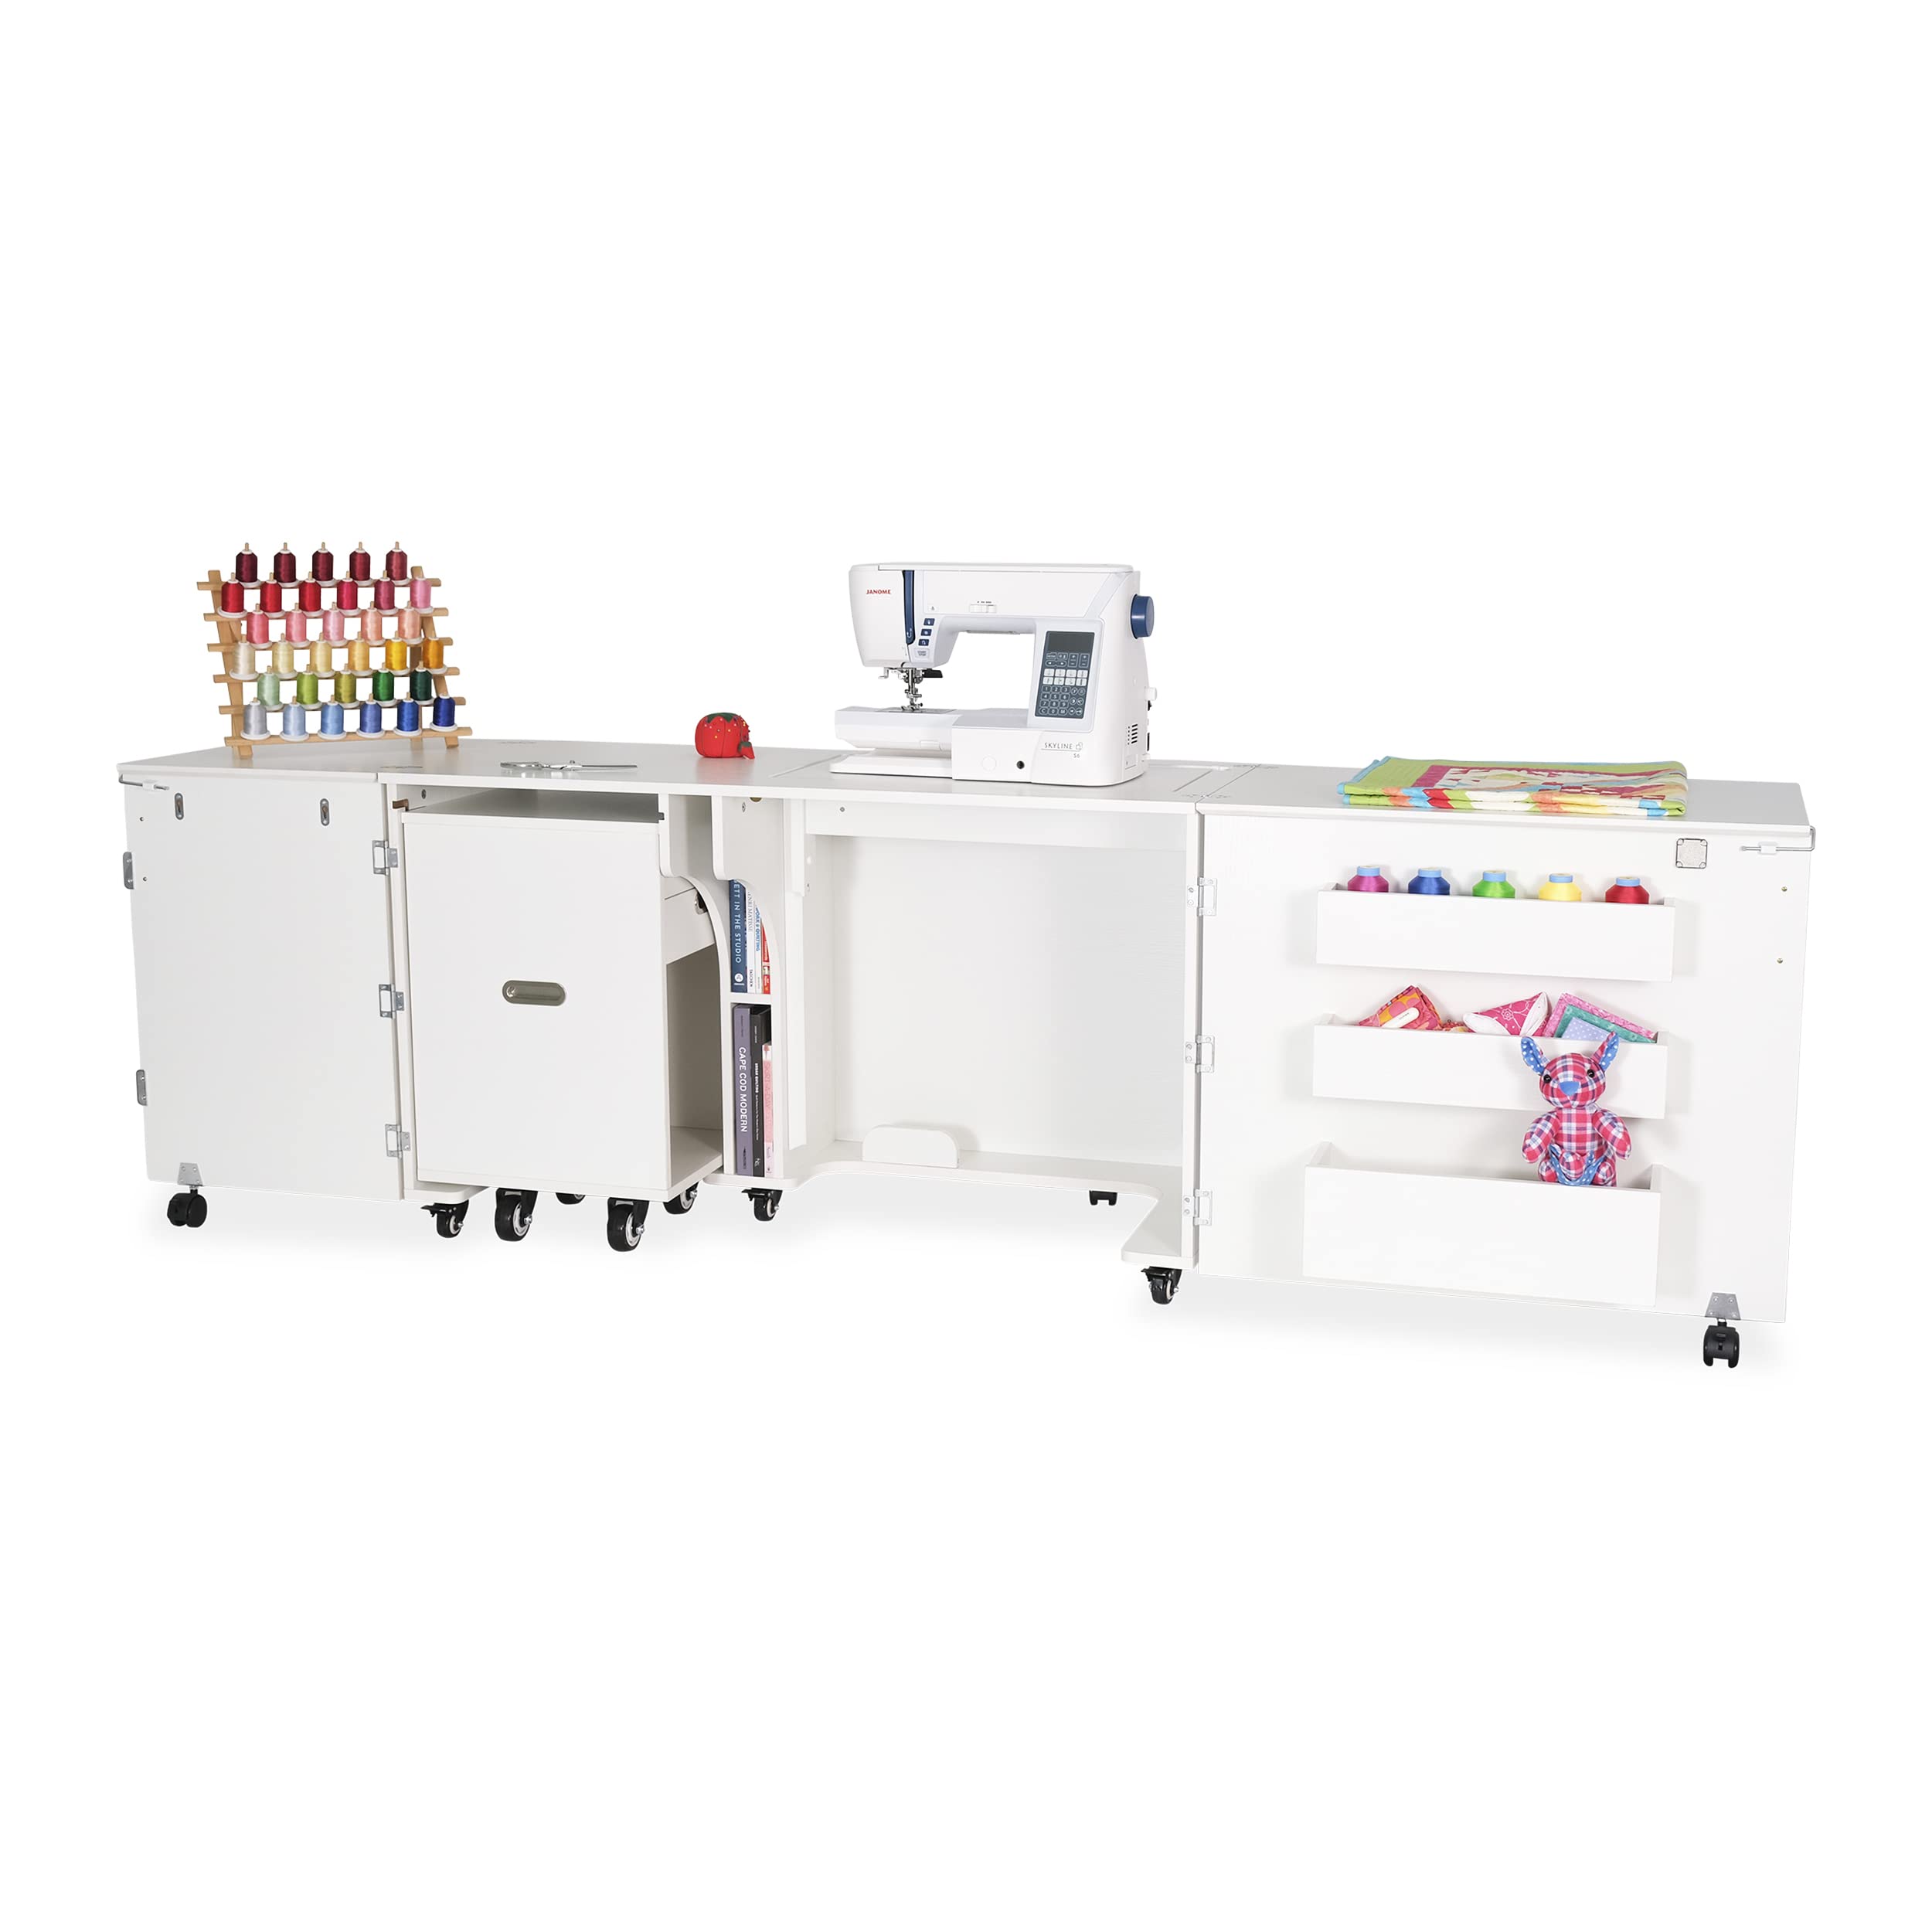
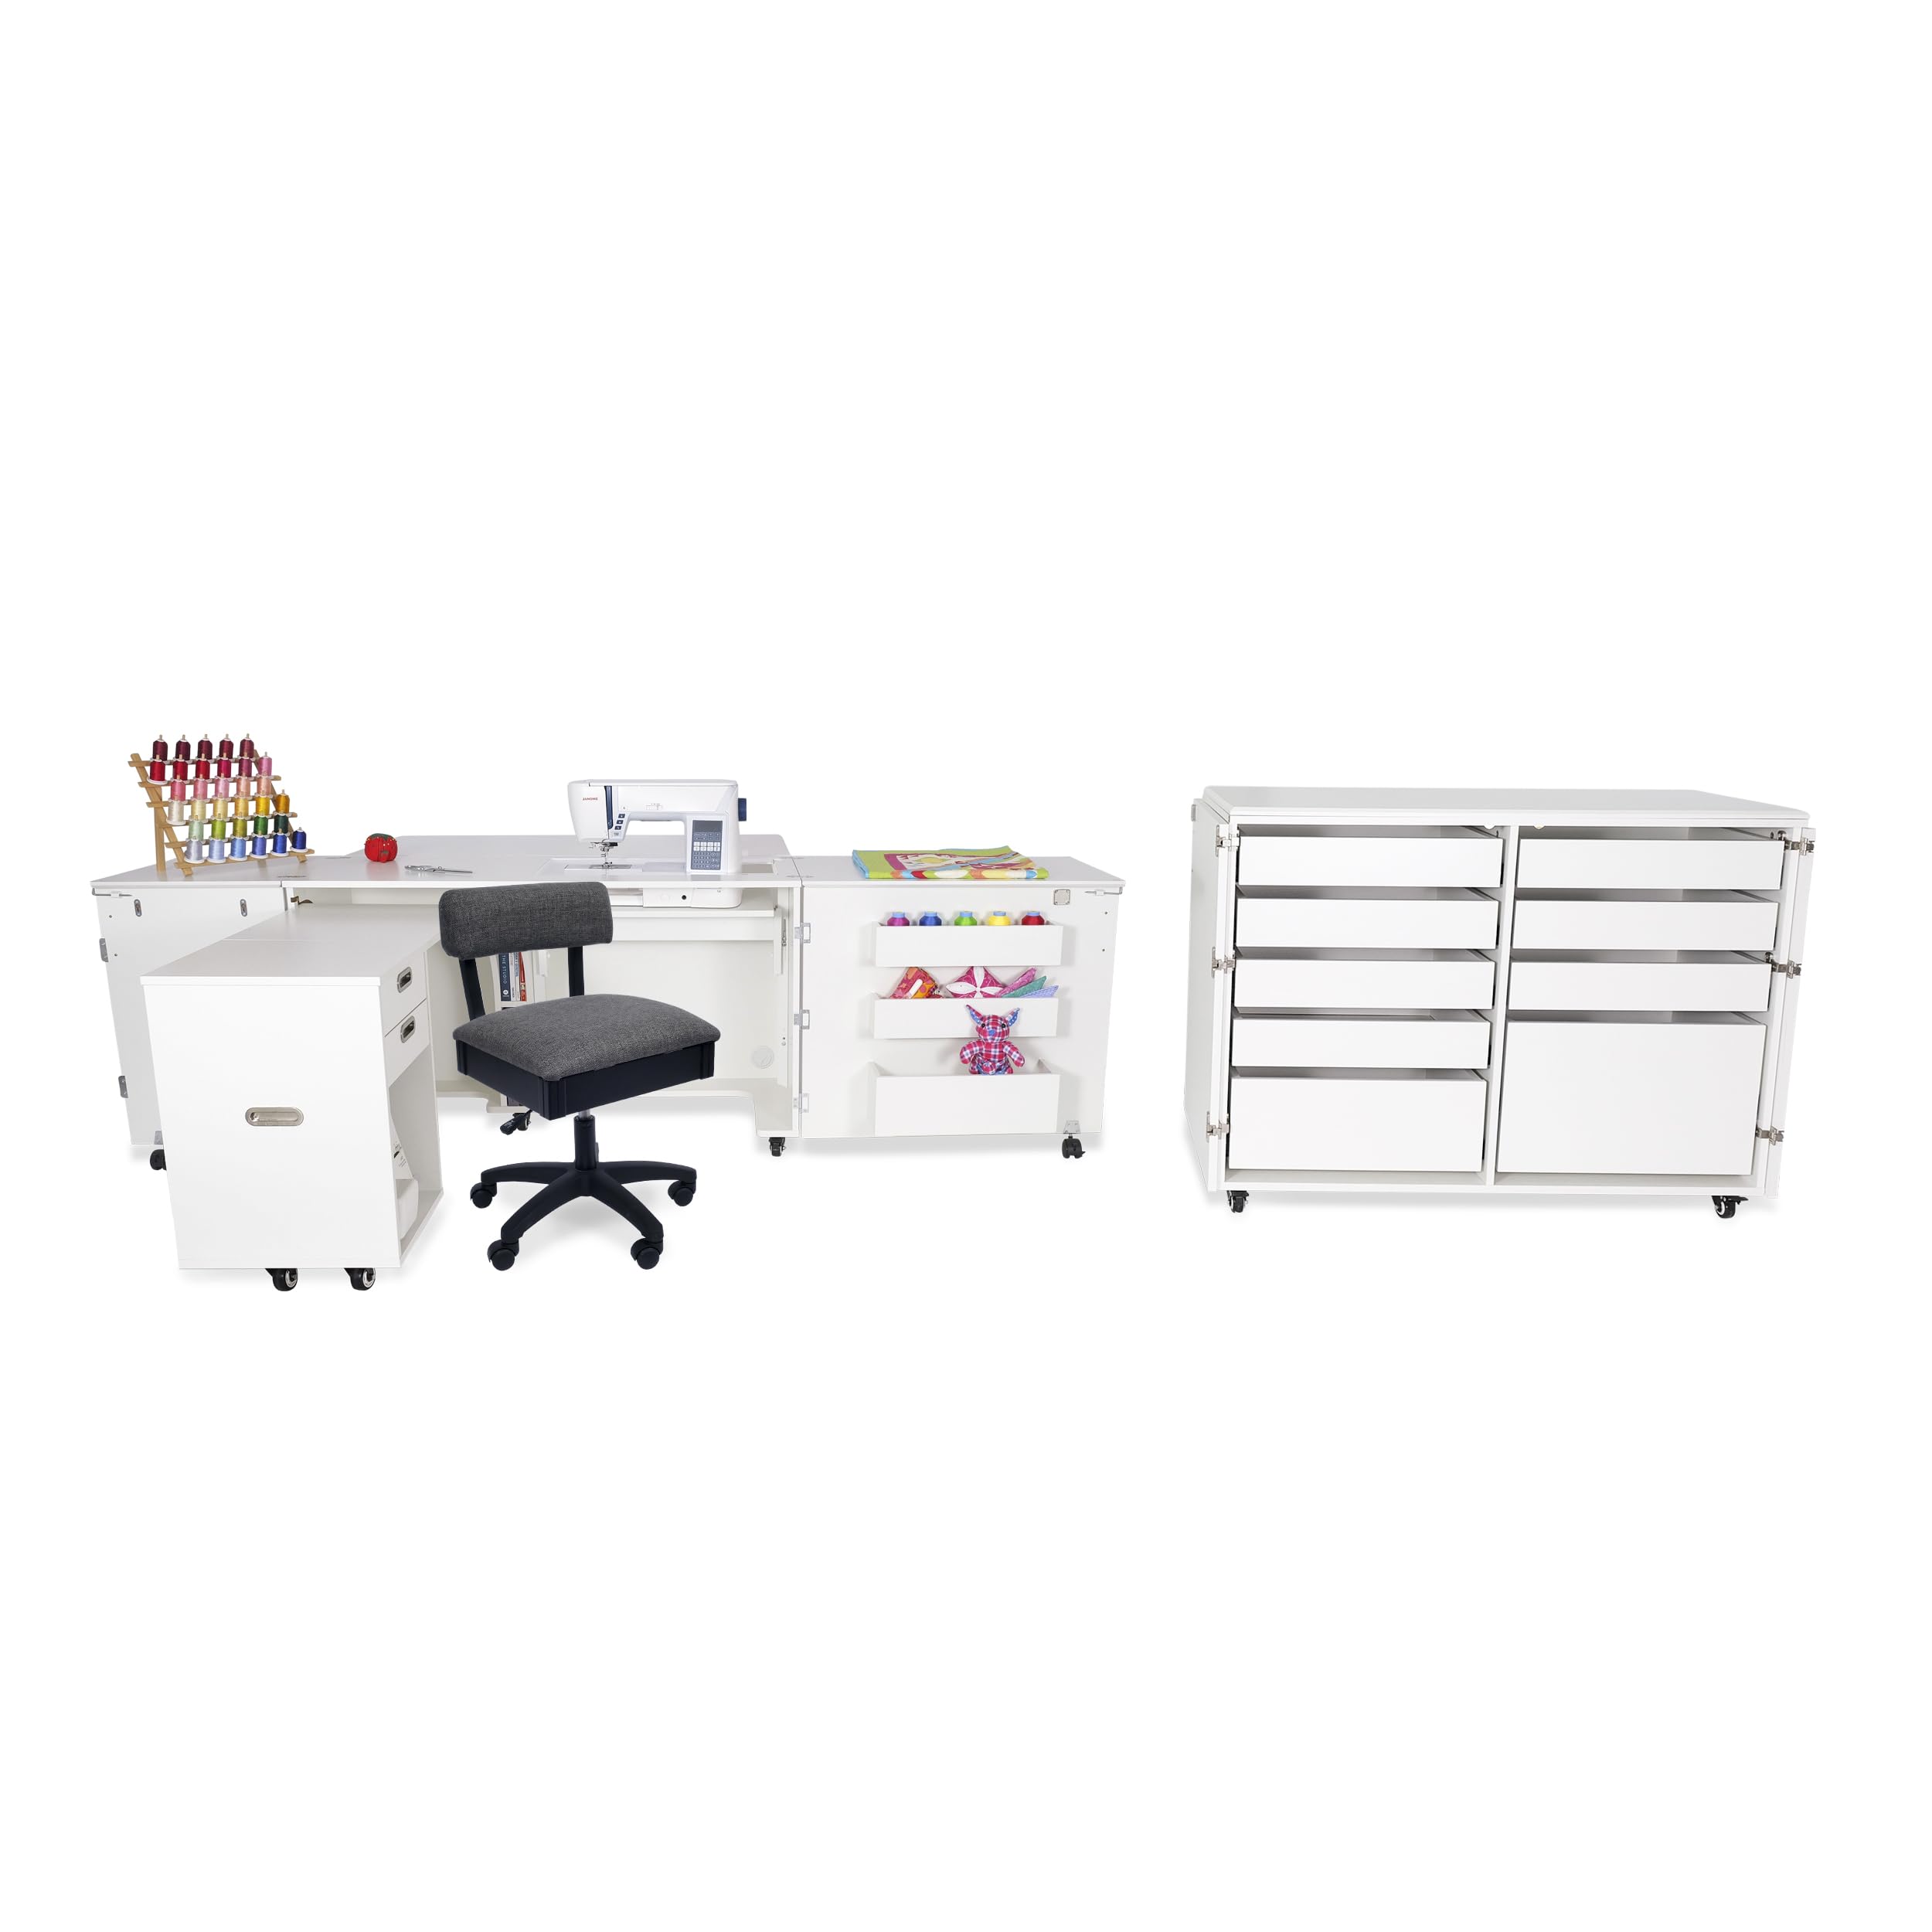
The Arrow K8611 Aussie Kangaroo Sewing Cabinet combines a 3-position hydraulic lift, large machine capacity (up to 55lb), and an expandable rear quilt leaf to deliver a versatile, professional-grade workspace. Its portable design with wheels and a pull-out caddy ensures seamless organization and mobility for serious sewing, quilting, and crafting enthusiasts.
B**N
Great Kabinet!
This was a Christmas gift for my wife. She absolutely loves it. :) For assembly I spread things out in a clear room and she read instructions for me. Even so it took me over half a day to assemble it; but it was fairly straightforward although instructions were a little confusing at a couple of spots. Keep small items in plastic bags as received as you start to assemble as the instructions reference the bag numbers. During assembly I glued it everywhere recommended and in addition placed glue in all screw holes to help prevent any loosening. Sturdy when finished. Nice and tidy when closed up and when opened up it is BIG and provides more than enough room to spread her work out (great for quilting). The built in storage takes care of just about all her stuff ('notions'...) and there is some room for material storage, etc. in the folded out extension section. The machine lift tray takes some concerted effort to push it down all the way but she manages it fine and she's not a big girl. All in all a good piece and something I believe will last for many years to come.
A**I
Great finished product, but...
This cabinet is great and versatile and my wife loves it. It is made of laminated pressboard, but it is still good quality especially if you assemble it right without overtightening things. I have given this product 5 stars based on the finished product. However if it were based on the assembly instruction it would get 1 star if that. As my profession I assembled furniture for store displays and in home assembly for 12 years and would consider myself an expert, as I have done thousands. Out of the box this looked like what I’m used to and all the parts and pieces. However it has the worst instructions ever! First of all there are no instructions in the box, but they have video instructions on their website. This would have been fine if the video was up to date, but many of the part numbers did not match what I was sent so it was useless. You could then download a printed copy. This worked except several thing were again out of date and didn’t match what I had. In all honesty a 10 year old could have come up with better instructions. I got this together in three hours with lots of pre fitting and thinking from years of doing assembly. But for someone who is not familiar with doing this they will have a frustrating time.
K**T
Assembly not for the faint of heart. Modifications required.
My wife, Kat, loves it. It's well thought out, roomy, solidly made. It loses one star overall because the sewing machine platform is sprung so stiffly that she cannot raise or lower the machine. I must do it for her. If there is a tension adjustment, I can't find it.Assembly is not for the faint of heart. Admittedly, I did it from the written instructions and did not watch the video. Many reviewers have mentioned the video, so that may have been a contributing factor. It took me 13 hours, and most of that is on your knees. I wore knee pads and took frequent back-stretch breaks. There is one step that will require two people.The boxes are heavy, and their large flat nature makes them hard to grasp and lift. You'll be happier if you have a second person. If you're going to unpack all the boxes at once (like I did to check parts before commencing) start with box 5. I started with box 1 and throughout the entire assembly process the pieces I wanted were on the bottom of the pile.The written instructions are not terrible, but there are times where they are flat wrong. There are also times where they are ambiguous, and you’ll have a 50/50 chance of doing it right. I had to dissemble and reassemble at least once.There are 70 cam bolts that screw into pre-drilled holes. You’d think they would want to self-center and be easy to install straight and true. I did not find that to be the case. They seemed very willing to go in at an angle and you must be diligent to prevent that outcome.There are 48 small wood screws that are used to attach various parts. The panels come with circles cut in the outer laminate but there are no pilot holes in the particle board. Being that the particle board is produced with resin, the screws are not sharp enough to bite into the flat surface. You must create a starter hole for every screw. You could do that with a drill. I used a scratch awl and a hammer. It doesn’t have to be much of a hole. Making it too big will weaken the attachment.All of that is not too bad for do-it-yourself furniture, however there were two flaws that made completion impossible without modification. That is outside the range of what you would expect, and outside the capabilities of some to overcome. For that reason, I would have given the assembly rating a 1. I raised it to a 2 because I didn’t watch the video, so they get a little benefit of the doubt.The first problem was with the five plate casters on which the main cabinet rests. The mounting holes in the plates did not align with the threaded sockets pre-installed on the underside of the base. That required a trip to the hardware store to buy a round file, and manually enlarge two holes on each of the five plates so that the mounting bolts could be threaded into the sockets.The second problem was that the castors on the caddy were set wider than the available area under the main cabinet. That required that I drill new holes in the under side of the caddy and re-install two of the threaded inserts in a narrower position.
Trustpilot
5 days ago
2 days ago