🚙 Hitch up and roll out with confidence!
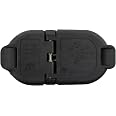
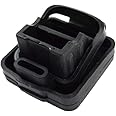
The ECOTRIC Trailer Hitch Receiver and Bezel is a high-performance towing solution designed for 2011-2022 Jeep Grand Cherokees. Made from durable alloy steel with a powder-coated finish, this Class IV hitch ensures maximum strength and weather resistance. It includes all necessary hardware for easy installation, making it the perfect addition for any Jeep owner looking to enhance their towing capabilities.
| Brand | ECOTRIC |
| Vehicle Service Type | Trailer |
| Material | Alloy Steel |
| Finish Type | Powder Coated |
| OEM Part Number | 82212180AC, 82212180AD |
| Manufacturer | ECOTRIC |
| Model | ET-117A+ET-117C |
| Exterior | Smooth |
| Manufacturer Part Number | ET-117A+ET-117C |
A**E
Fits like OEM.
Very easy to install
J**A
Wiring harness
The product was excellent and fit perfectly with my vehicle, however the proper wiring harness was not included or recommended. Still trying to find the proper wiring harness for this product.
A**Y
Great product
Fairly easy install, would recommend watching a couple youtube videos on the trim removal for the bumper as it's somewhat challenging to remove without breaking clips. The instructions were good. I did have some difficulty removing the bolt near the exhaust, you'll need a Universal socket joint or a wrench (13/16ths i think). Also, the light hole in the hitch is specifically made for the Mopar snap in connector. (It's listed in the "frequently bought together" section) but as for the hitch itself, it's very well made and everything slid in place like it should!
K**G
Good Receiver - install tip inside!
From It’s outward appearance, this receiver appears to be similar to an OEM with how it mounts where the rear impact beam would normally be.That being said I do suspect it is a bit different. I haven’t looked at the OWM’a assembly.I’d be wary of hauling HEAVY loads as the 3 bolts on either end holding the main beam to the brackets didn’t appear to be Grade 8 quality. That said, when mounting I recommend leaving those bolts a bit loose. This will help greatly with getting the larger bolts through the frame and into the mounting brackets. After they’re in THEN torque them to spec.Be cautious removing the bumper. The bracket at the top 10mm bolt behind the bumper protrudes into the bolt hole. If you don’t push the bumper forward to pop it over that hole you will likely break the bumper bracket as it is plastic. I did even though I knew to do that step and spaced it. Fortunately it was only $25 at my local dealer.When it comes to cutting the bumper out the marks to cut are on the backside molding into the bumper. I drilled 1/8” holes for the slots for the tabs on the trim piece (included with this hitch). Then for the main large piece of bumper to cut out I drilled holes along the line every couple inches. I then used a NEW razor blade to “score” the inside from hole to hole 3-4 times and it went through the plastic. The plastic is relatively soft, fortunately.Total install time minus my run to the parts house? About 2.5 hrs, but I was also taking phone calls for work, stopped for a bite for lunch and took plenty of time. Looking at the back of the Grand Cherokee you cannot tell a difference between it and an OEM setup.I’ll be downloading AlfaOBD and getting an OBD2 Bluetooth scanner to activate the wiring harness so trailer lights will work. My intention for now is to use the receiver to him a large cooler out back for my deer/elk hunting trip this year.
A**R
Looks OEM but has its problems.
Looks OEM but the trailer receiver is actually 2-1/8 instead of 2in, so it has a lot of play when pulling anything. You can't find anything except making some shims to fix it. Also, surface rust on the inside of the tube when I received it. It doesn't look like it will last 5 years without it being replaced. Hard to trust this product and I recommend getting a curt or Mopar receiver.
N**Y
Comes through the bumper rather than under it and the trim piece makes it look original.
I watched several you tube videos on how to mount the hitch before I bought it and they were helpful with one exception. They show prying off the lower half of the bumper instead of taking off the whole thing. Before I did this on my 2019 Grand Cherokee I crawled under and looked at the clips. They were not the same type as shown in the videos and if I would have just tried prying them out I would have messed something up. Most of my clips were 2 pieces each with a piece that snapped through a loop on the other piece after it went through the bumper. I just reached up, removed the retainer clip then the other half slipped off. There were a couple small bolts at the wheel well then the lower half of the bumper slipped off easily. I installed this by myself and it was easy. I barely had to lift the upper part of the bumper to slide out the frame piece and then slide in the hitch. Definitely not worth taking the whole bumper off just check to see what type of clips you have first. I was worried about not having a template to cut out the shape for the bumper but when I wiped some of the dirt off the inside of the bumper, the dirt filled the outlines (already etched in on the factory bumper) that I needed to cut but couldn't see before. I just used a rotary tool like a pen and followed the lines to cut out the hole.
C**Y
Good value for hitch
As others stated the fit is not perfect. You have to loosely assemble the sides. Then jam it into the frame and use some persuasion and possibly a grinder to getall the bolts started before tightening them all up. I dont plan on towing anything too big.
M**E
Prefect fit/easy install.
Well made and tucks up nicely behind the bumper. Included everything you need, but the 7-Way Trailer Connector (56055632AC). Even came with new bolts.Install was easy. I DID NOT have to remove the entire bumper assembly as the instructions state. I merely removed the lower bumper cover. Once it was off, I cut the hitch cover mounting slots with a dremel tool and cleaned them up with a utility knife. I used a cut of wheel on a grinder to rough cut the large opening and cleaned it up with a flap disk. The install videos and instructions make it sound harder than it is. Installing the hitch itself is just a matter of unbolting the old crossmember and bolting in the hitch assembly. Start to finish it took me about two hours (with hand tools in a gravel driveway.)
Trustpilot
1 week ago
1 day ago