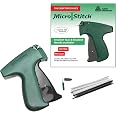
🪡 Stitch your way to perfection with ease!
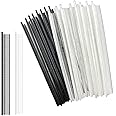
The Original MicroStitch® Micro-Fastener Kit is a comprehensive handheld stitching solution designed for quick clothing fixes, tagging, sewing, and quilting. It includes a lightweight tool, fine-point needles, and 1080 micro-fasteners (600 white and 480 black), eliminating the need for traditional pins or glue. With user-friendly instructions available via QR code, this kit is perfect for both novice and experienced crafters looking to streamline their projects.
| Container Type | Box |
| Unit Count | 1.0 Count |
| Material Fabric | ABS Plastic |
C**K
Life saver!!
I bought this product to use with a dress I had to wear. I used it to stitch it to my bra so the dress would not slip off my shoulders. It worked like a charm!
A**Y
Works well, but not on thick fabrics
I think this product is great! But I could not give it 5 stars because it doesn't work on thicker fabric. Specifically if you are missing a button and the seam at the edges of your fabric are doubled over it most likely will not be able to hold your garment together (or actually thread in place) as well as a safety pin would be able to.Works great at cuffing sleeves on thinner fabrics.
M**L
I ❤️ ❤️ ❤️ this micro stitch gun!
This is the 2nd micro stitch gun I've purchased - the first one was a piece of junk from a different company that I quickly returned. This one is fantastic and I'm definitely keeping it! The directions for set up and use are easy to follow and it helped me hem my jeans in a snap. This little tool is going to come in so handy!
T**S
Just ok
Waste alot of plastic ties trying to get just one to work. The mechanism that pushes the tie down the needle keeps coming out of place even though the needle is secure. And the feed for the ties doesn't work well at all. Wasted alot of ties trying to get just one to take. Also, the ties are to fragile for anything but thin material.
S**L
Better than others
This works way better than the “Stitchy” gun from another brand. The barbs are in fact smaller but also way stronger than the other brand. I don’t understand why the reviews are opposite but I wish I had bought this one initially (instead of wasting $$ on the purple one)
E**.
Love it. So glad I purchased!
Had to look up some YouTube videos to figure out how to get it started. An influencer influenced me to buy this and I now love it! Perfect for collars on shirts to give them a more open sexy vibe. Perfect for cuffs of pants. The plastic things are tiny and invisible. Comes with black ones also!!! I’m sure I’ll find new uses for it!
J**.
Didn't work out
I was hoping I could use this to put badges on my daughter's girl scout vest, but quickly realized this would not work well for that. It leaves a tiny space, which makes it a hair loose, and if she then caught it on anything at all, would rip right off. One came off within minutes of applying it. It may work well for other projects, but not for what I was buying it for sadly.
P**A
What exactly it is
It's not a nail gun, not a stapler gun, not even a tag gun. It's a rather delicate thing so if you use it as a 'gun' it will not last long. It's decently manufactured so if you treat it gently like sewing machines it will be fine.The tags are exactly like those used in attaching labels to clothes nowadays. But this is a short proper letter 'I' shaped plastic tag, with the top bar and bottom bar. The height of the character is 4mm as specified.The stitch is basically a hollow needle that go through the fabric. The top of the I is bent in the same direction of the I body so both of them slide through the hollow needle into the other the side of the fabric. When the trigger is released, the top of the T reverts to it's natural orientation. So the layers of fabric is sandwiched between the top and bottom of the I tag.Being hollow, sharp and thin, the needle is rather delicate. Indeed I bent the tip a bit when I tried to stitch into my leather crouch with something harder inside. But it still works. It's not a power tool. You have to push the needle through and through into the fabric yourself. There's no point to shoot the tag through. You can actually squeeze the trigger slowly and gently, and the tag will slide through.What it is good for? Ideally the total thickness of the fabric or thing to be stitched is 4mm. In this case the material have to be able to compress a little to let the top of I to return to it's orientation. (You don't need to aware of how the stitcher does this.) If you stitch thin materials, a reviewer said that you have the option of pushing the needle through the fabric and then back up, like using a sewing needle. This single stitch can be about 4mm long.The tag isn't stronger than sewing. It's different. For sewing the force is distributed along the stitches. A single tag alone doesn't survive tearing apart the fabric by hand. The strength depends on how many tags you apply and the strength and density of the fabric itself.If you are stitching thick materials, they cannot be too dense. The needle have to be able to go through it. The needle is a bit thick compared to simple sewing needles, so it is harder to go through thick materials.The cushion cover and armrest of my leather crouch have long degenerated. Otherwise it's a perfect piece to sit on, and now becoming an semi-antique due to old age. The cushion is square and over 8" deep. By square I mean every face is rectangular. The problem is that it does not have 6 faces, but more like half of a T viewed from the top. The leather is hard to match, real or fake. Even if matching is not required (by wife), I don't see how I can find a custom made cushion cover or the whole cushion. I have been considering the options over the years, including buying a sewing machine and made a cover ourselves. But so many things can go wrong and it probably won't turn up nicely, at least for the 1st trials.When my wife was browsing online for crouches over $1,000, I know it's time for action. First, I got the idea from the web of using a wooden board at the under side of the cushion, and use a stapler gun to mount leather onto it, with the cushion in between. Then I think this one might work by stitching leather to leather and get rid of the board. I was thinking of making a temporary cushion cover but without sewing and measuring.When this guy arrived, I went to the nearest fabric store to get myself some faux leather fabric. It's more common than you think. I went to the store where you can get milk and motor oil at the same checkout! I would have ordered from Amazon but I'm not sure how the color will turn out. Matching is out of the question. So I designed a two tone leather crouch, one tone fake, and one tone real.When I got everything together, I knew what to do. I gifted wrap the cushion with the faux leather and used the micro stitch to hold it together. I discovered that a tight wrap doesn't work. That will be easier with staple gun and wood board. A loose wrap turns out nicely. Most of the cushion is a rectangular block so it's easy. The stitches are mostly at the hidden areas. When its difficult to hide the stitches, I leave fold lines at the visible area and bring the stitches under the cushion. The little bit sticking out of the rectangular block is a nightmare. Otherwise I would have finished in 5 minutes. Somehow I ended up with diagonal fold lines around that little bit.It was a proof of concept model and it turned out to be working so far. It looked OK, as compared to severely weathered leather and exposed naked cushion. I applied few stitches but the whole thing survived several days of sitting on, both adults and kids. Although it's loose fit with some fold lines at the side, it looked like soft leather at a few feet away. The two tone isn't too bad. But if I can find better matching, I will replace it at $7 a yard and 5 minutes of work. The problem is when you drop yourself on the cushion at some height, the cushion cover will turn into a balloon and blow air into the weakest link, or tags. So far I'm sure some tags are dislodged, but I have yet to repair my creation.
Trustpilot
2 weeks ago
1 month ago